We use cookies to improve the services we offer you. By continuing to browse this site, you consent to keep them in accordance with our Privacy Policy.
×We use cookies to improve the services we offer you. By continuing to browse this site, you consent to keep them in accordance with our Privacy Policy.
×
 5
5
 10 min
VLC Video Player can crop video in ways most users never discover. The built-in tool removes unwanted edges from the frame by specifying pixel values, and with the right save workflow you can make that crop permanent on Windows, Mac, and Linux.
The catch: VLC’s crop video workflow is split across three separate menus, and skipping any single step means the crop previews without saving. This guide covers the complete five-step process, explains the two critical steps most guides miss – Croppadd in Preferences and the Video Cropping Filter in Convert/Save.
VLC has two crop modes: a real-time preview-only crop via Tools → Effects and Filters – this changes what you see but does not save the file; and a permanent crop saved through Preferences → Croppadd + Convert/Save with the Video Cropping Filter. The workflow below covers both parts in the correct order.
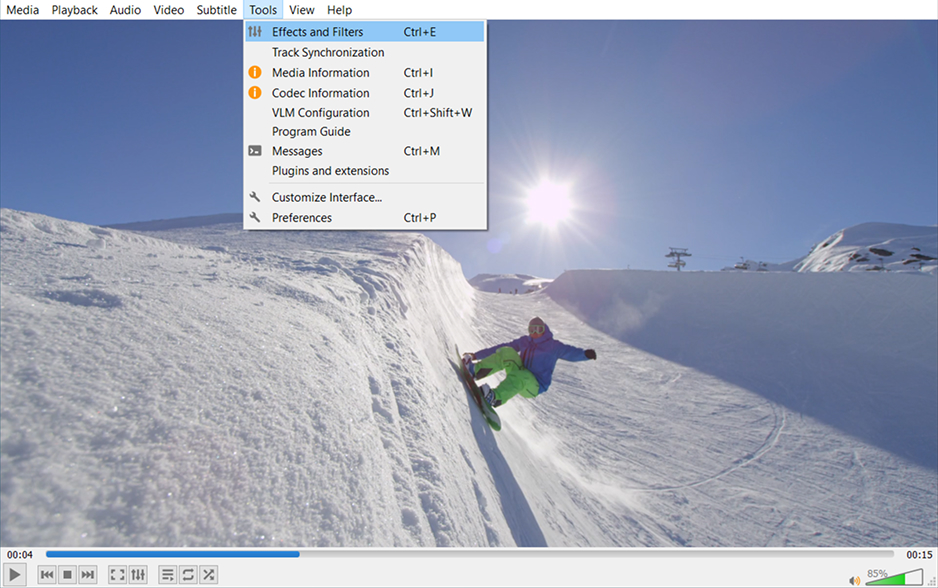
Launch VLC Media Player on your PC or Mac. Click Media → Open File and select the video file you want to crop. The video starts playing. Now go to Tools → Effects and Filters (shortcut: Ctrl + E on Windows / Cmd + E on Mac). This opens the Adjustments and Effects dialog.
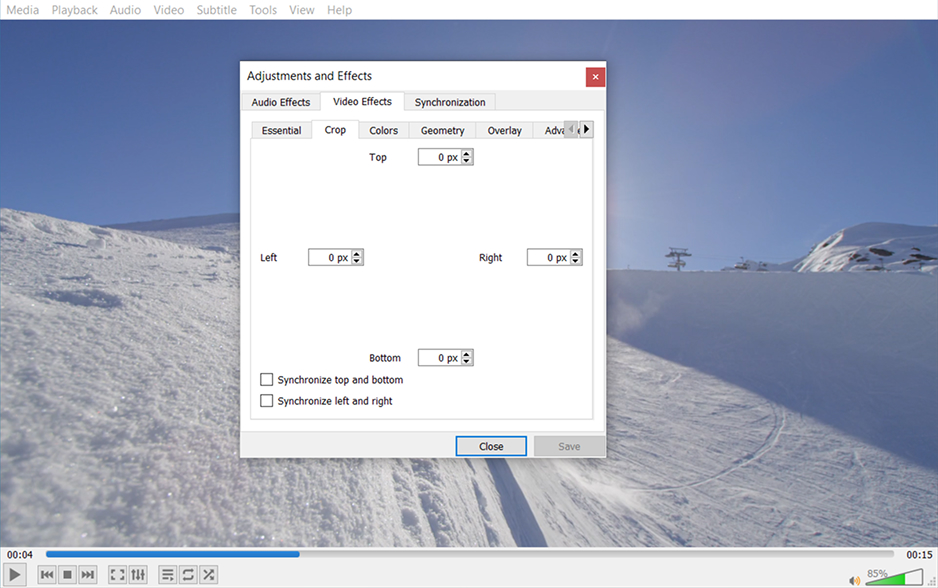
In the Adjustments and Effects window, click the Video Effects tab, then click the Crop sub-tab. You’ll see four pixel fields: Top, Bottom, Left, Right. Type a pixel value into each field that corresponds to how many pixels you want to remove from each edge. For example, entering 100 in Top removes 100 pixels from the top of the frame. The video in the background updates in real time as you type. Write down these four values – you’ll need them in the next step. Close the window when satisfied.
VLC accepts a wide range of source video files for cropping. Any format VLC can play can be passed through the crop workflow:
| Input formats – VLC Media Player |
| MP4 / M4V (MPEG-4) |
| MKV (Matroska Video) |
| AVI (Audio Video Interleave) |
| MOV (Apple QuickTime) |
| WMV / WMA (Windows Media) |
| FLV / F4V (Flash Video) |
| MPEG-1, MPEG-2, MPEG-TS |
| 3GP / 3G2 (Mobile video) |
| WebM / VP8 / VP9 |
| OGG / OGV |
| VOB (DVD Video) |
| HEVC / H.265 (partial) |
| MP3, AAC, FLAC, WAV (audio passthrough) |
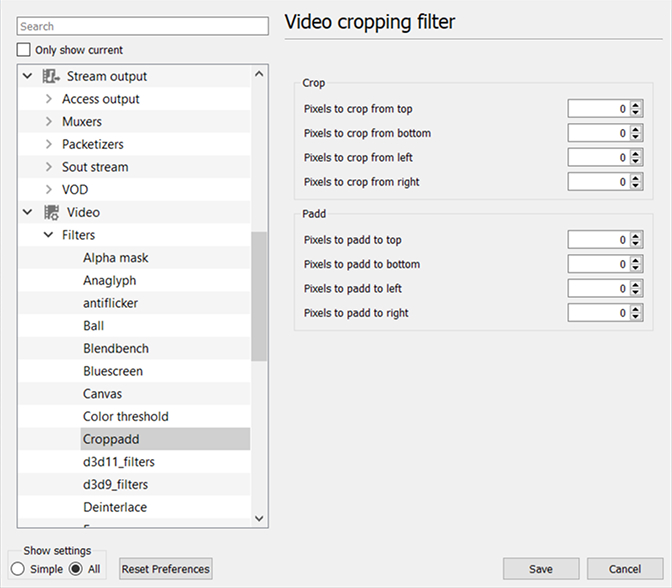
This is the step most guides skip – and why most VLC crop attempts don’t save. Go to Tools → Preferences. In the bottom-left corner, under Show Settings, click All to reveal the full preferences tree. In the left panel, expand Video → Filters and click Croppadd. In the right panel, enter the same pixel values you noted in Step 2 into the Top crop, Bottom crop, Left crop, and Right crop fields. Click Save.
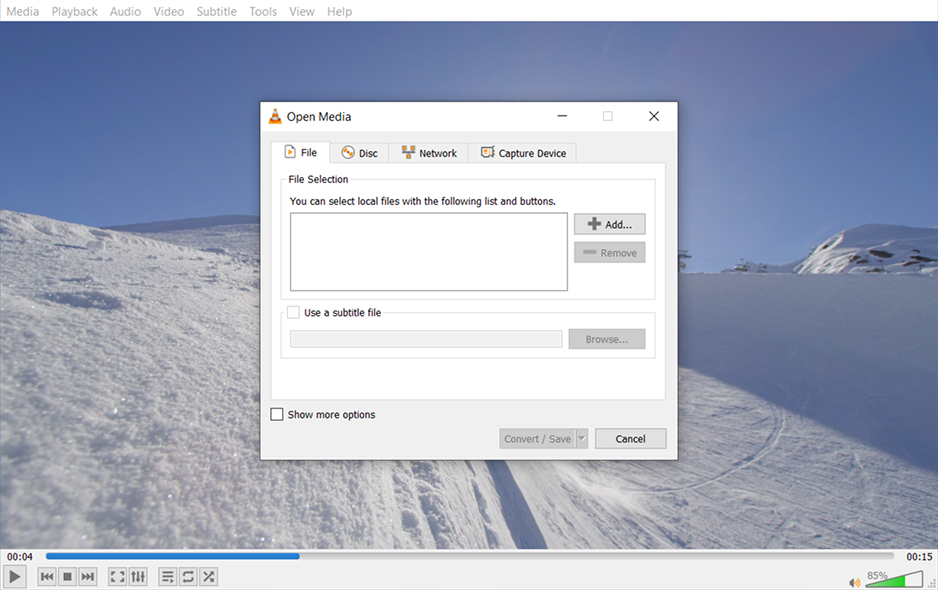
Now go to Media → Convert/Save (Ctrl + R). In the Open Media window, click +Add and re-add your original video file. Click Convert/Save at the bottom, then select Convert from the dropdown. In the Convert window, click the wrench icon next to your selected Profile to edit it. Go to the Video Codec tab, then click the Filters sub-tab. Check the box for Video Cropping Filter and click Save.
When saving the cropped video via Media → Convert/Save, you can choose from the following output formats:
| Output formats – VLC Media Player |
| MP4 / M4V (H.264 + MP3 or AAC) – recommended |
| MPEG-TS (MPEG Transport Stream) |
| OGG / OGV (Theora + Vorbis) |
| WebM (VP80 + Vorbis) |
| ASF / WMV (Windows Media) |
| MP3 (audio only) |
| FLAC (lossless audio) |
| WAV (PCM audio) |
Important: After finishing your cropped export, go to Tools → Preferences → Reset Preferences to clear the Croppadd values – otherwise VLC will apply the same crop to every video you play until you reset them.
Back in the Convert window, click Browse under Destination and choose the folder where you want to save the cropped file. Give the output file a clear name so you don’t confuse it with the original. Click Start. VLC processes the video with the Croppadd filter applied, rendering a new file with the crop permanently baked in. When the progress bar in VLC’s main window completes, your cropped video file is ready.
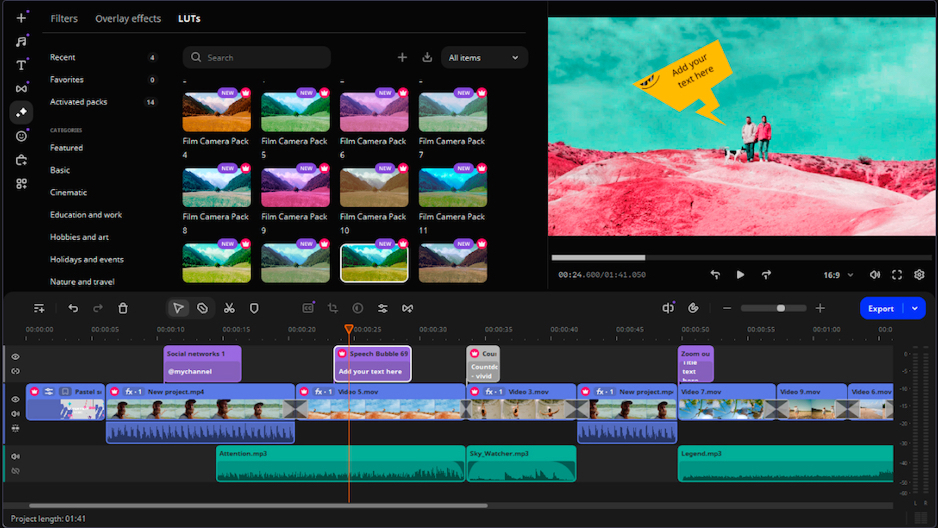
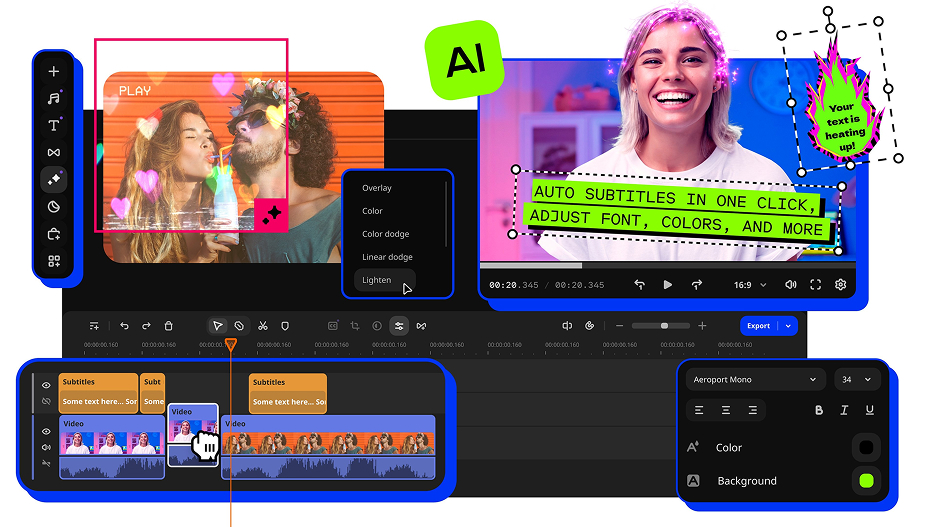
Movavi Video Editor is a visual cropping tool for Windows and Mac that replaces VLC’s five-step pixel-entry workflow with a drag-and-drop crop frame. You drag the handles in the preview window to select the area you want to keep, pick a preset aspect ratio (16:9, 9:16, 4:3, 1:1), and export – no pixel arithmetic, no Croppadd, no filter checkboxes.
Beyond cropping, Movavi is a complete video editing software: trim, merge, add titles and transitions, color-correct, denoise audio, and export in 60+ formats – all in one app. The free 7-day trial gives full access to every feature before any payment, and the paid version removes the trial watermark entirely.
Exclusive discount on Movavi Video Editor
Crop, trim, and edit videos with Movavi – and save on your license. Check current promo codes →
⬇ Download for Windows | ⬇ Download for Mac
The Movavi crop workflow is visual and takes three steps — no pixel values to calculate, no hidden preference menus.
Download Movavi Video Editor for Windows or Mac from movavi.com/videoeditor. Install and open the app. Click Add Files to import the video file you want to crop, or drag it into the program window. Drag the clip from the Project Files panel onto the Timeline at the bottom of the screen.
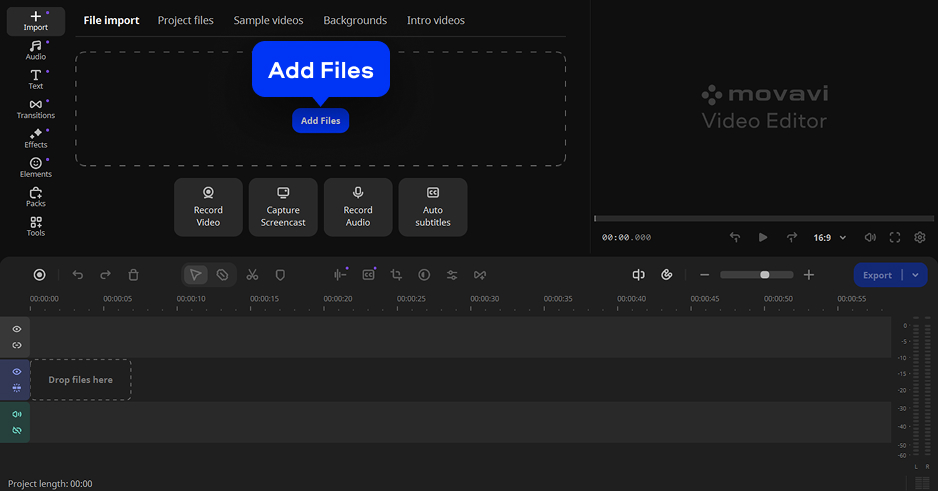
Select the clip on the Timeline and click the Crop icon in the Tools panel above the preview (it looks like overlapping rectangles). The crop frame appears over the video in the preview window. Drag any of the eight handles – corners and edges – to resize the crop area. Drag the frame itself to reposition it. To lock to a standard aspect ratio, open the Aspect Ratio dropdown and choose 16:9, 4:3, 1:1, 9:16, or any custom value. The preview updates live as you adjust.
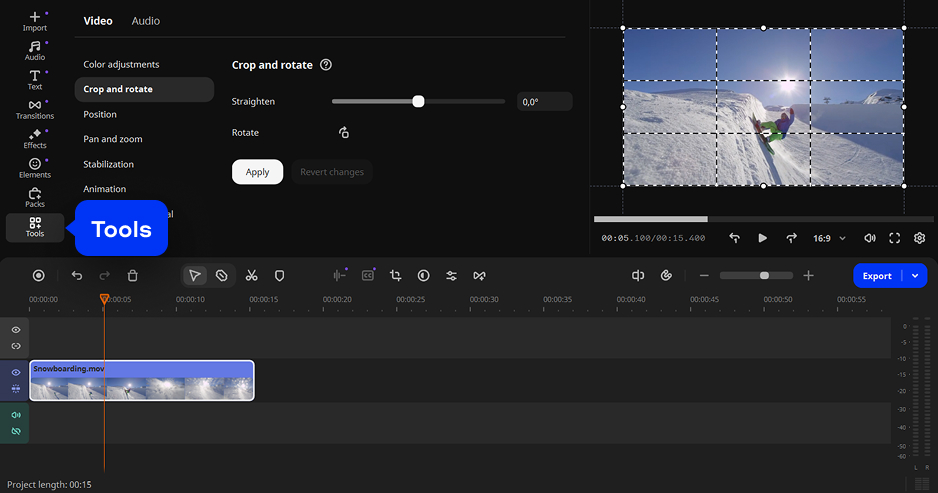
When the crop frame looks right, click Apply to lock the crop to the clip. Preview the full video in the Timeline. When satisfied, click Export in the top-right corner. Choose your output format – MP4 H.264 is recommended for the widest device compatibility – set a save location, and click Start. Movavi renders the cropped video and saves the file to your chosen folder. Total time from import to export: typically under two minutes for a standard clip.
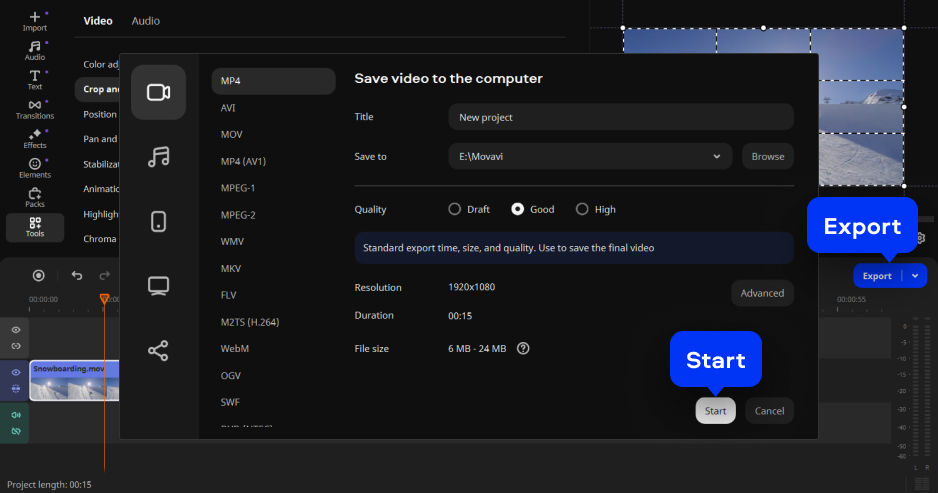
How to crop a video in Movavi Video Editor
Cropping video in VLC is possible, but it takes five steps across three different menus – and forgetting any one of them means the crop won’t save. The process works and it’s completely free, but it’s not designed for regular use as a crop tool.
For anyone who needs to crop video more than occasionally, Movavi Video Editor’s visual crop frame is a significantly faster and more reliable software — on both Windows and Mac. Download the free trial, crop your file, and compare the results.
Cutting out a section (trimming by time) in VLC is different from spatial cropping (removing frame edges). To cut out a portion by time: enable View → Advanced Controls, play the video to the start of the segment you want to keep, click the Record button, let the video play to the end of that segment, then click Record again to stop. VLC saves the captured clip automatically to your Videos folder as a new file. This is VLC’s only built-in method for time-based cutting; for frame-based spatial cropping, see the five-step workflow above.
To crop a portion of a video in VLC (remove edges from the frame permanently):
VLC has two meanings of “crop”:
By default, VLC applies no crop – the full video frame is displayed as-is. However, if you’ve previously followed the Croppadd workflow and forgot to reset preferences, VLC will apply those saved pixel values to every video you play until you clear them. To check and reset: go to Tools → Preferences, click Reset Preferences at the bottom left, and confirm. Additionally, the Video → Crop menu in VLC’s top menu bar offers quick aspect-ratio crop presets (16:9, 4:3, 1:1, etc.) – these are view-only and reset each time you close the file. They do not affect the saved file.