
We use cookies to improve the services we offer you. By continuing to browse this site, you consent to keep them in accordance with our Privacy Policy.
×We use cookies to improve the services we offer you. By continuing to browse this site, you consent to keep them in accordance with our Privacy Policy.
×
 30,127
 6 min
6 min
Already mastered basic video editing and ready to take the next step? Advanced features of movie-creating programs will help you make your videos more interesting, engaging, and epic. Motion tracking tools, for example, are designed to enable you to “stick” images and effects to moving objects.
Intrigued? Read on to learn more about motion tracking and discover different ways to integrate it into your videos.
In the world of video editing, the motion tracking tool is used to track the movements of any object in a clip and pin to it any other object, such as stickers and pictures.
Every time you see someone with a blurred face or an arrow that follows an object during a scene of a video, you can be sure that creators used a motion tracking feature.
Motion tracking is one of the more advanced video editing tools and is not available in every video creating program. Luckily, there are applications that allow even beginners to easily apply this effect and achieve amazing results. For example, in Movavi Video Editor Plus, it takes just a couple of simple steps to track an object and “stick” something to it.
Here are some ways to use the motion tracking feature in Movavi Video Editor:
If you want to have a text that follows a character or an object in a video, you can track it and pin a title to it. Like this:
Want to try it yourself? Here’s what you do after adding your clip to the video track:
1. Go to the Titles tab and choose a caption style to your liking. Drag it to the track.
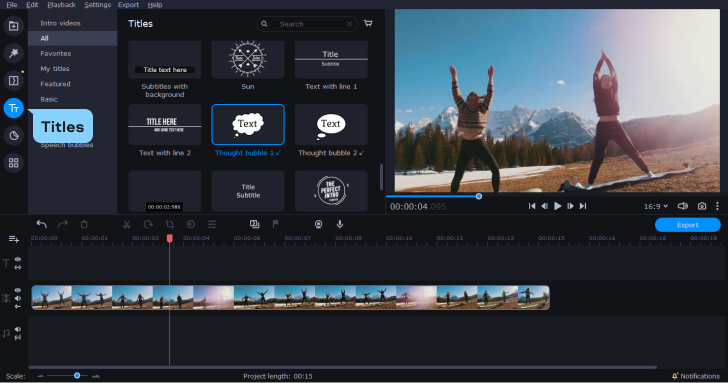
2. Go to the Text section, type in the text, and format it. Adjust the size of the title and move it to the desired spot. On the track, extend the title clip to your preference.
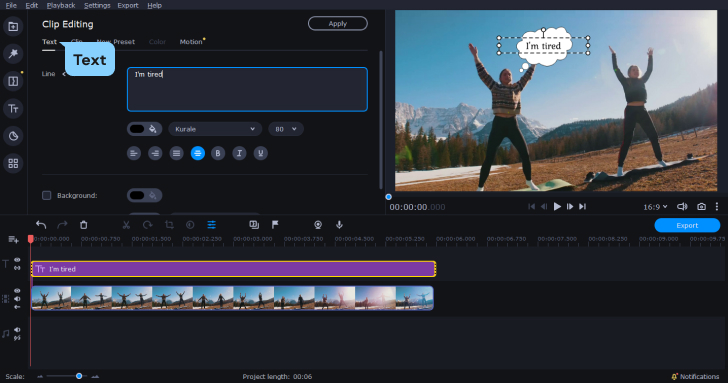
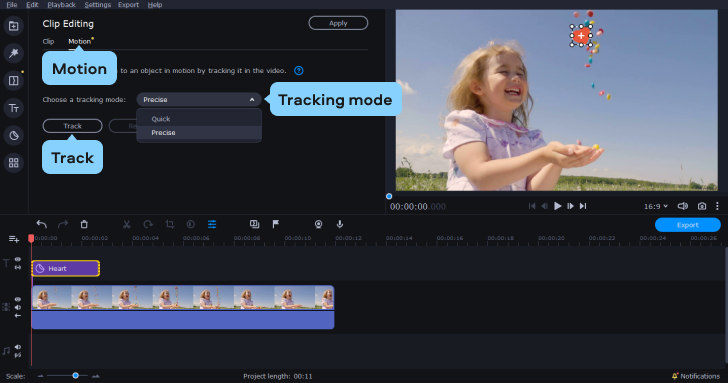
3. Go to the Motion section. In the preview window, place the + sign on the object you want to track. Adjust the dotted box to the size of the object. Choose the tracking mode. Precise will take longer but will work better on difficult movements. Quick will be faster, but the final result may have minor mistakes if the object’s movement is too intricate. Hit Track.
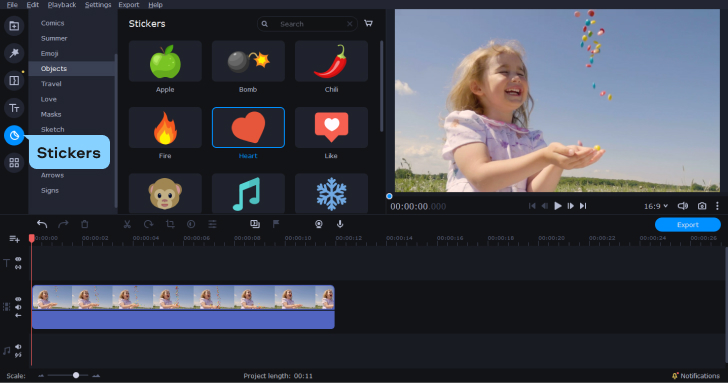
Another way to use the motion tracking feature is by adding movable stickers to your video. You can add an arrow sticker to highlight something or someone in the clip, hide an object with an emoji, or simply add a new character to your movie. Look at this, for example:
If you want to add a motion-tracked sticker to your video, follow these steps:
1. After adding your video clips to the track, go to the Stickers tab, find a sticker you want to use, and drag it to the track.
2. On the track, extend the sticker clip to the preferred duration.
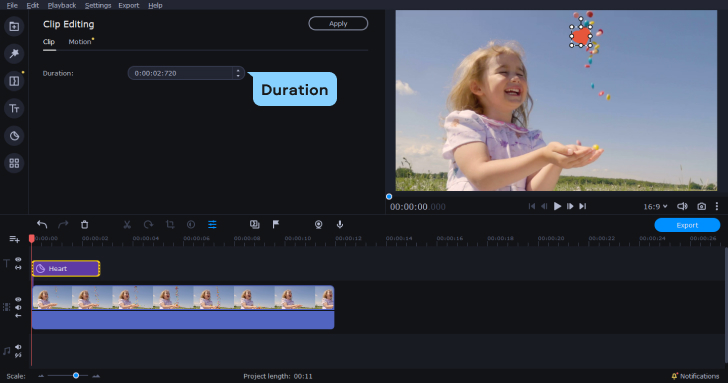
3. Double click on the sticker clip to go to open its settings. Edit the sticker to your liking: set the animation speed and choose a color for your sticker. Go to the Motion section and choose the tracking mode. Precise will take longer but will work better on difficult movements. Quick will be faster, but the final result may have minor mistakes if the object’s movement is too intricate. Hit Track and then check the results.
Motion tracking can be also used to blur or highlight someone’s face on a video. Like in this GIF:
Here’s how you achieve this effect in Movavi Video Editor Plus:
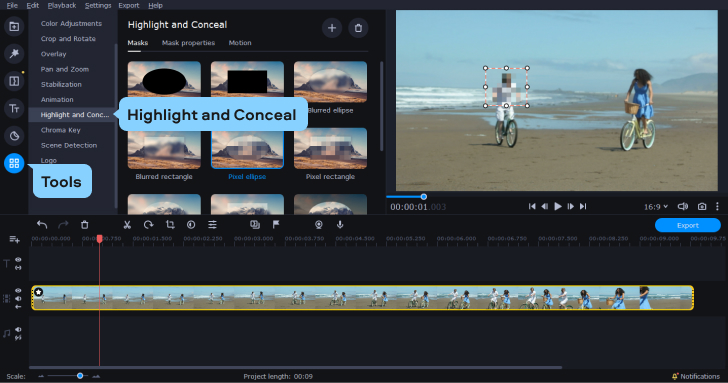
1. After you’ve added your clip to the video track, go to the Tools tab and choose Highlight and conceal. Choose the effect you want, adjust its size, and position it on the preview window.
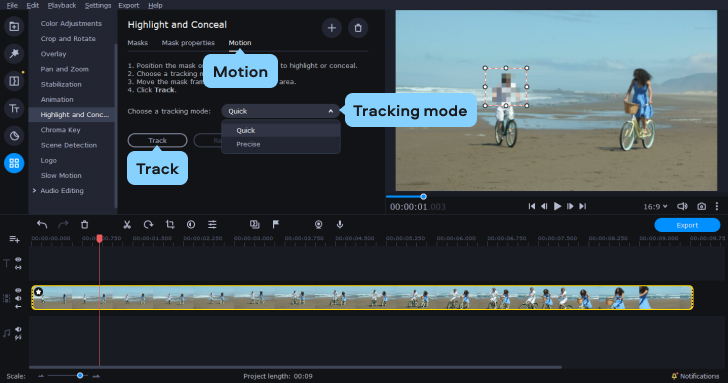
2. Go to the Motion section and choose the tracking mode. Precise will take longer but will work better on difficult movements. Quick will be faster, but the final result may have minor mistakes if the object’s movement is too intricate. Hit Track and then check the results.
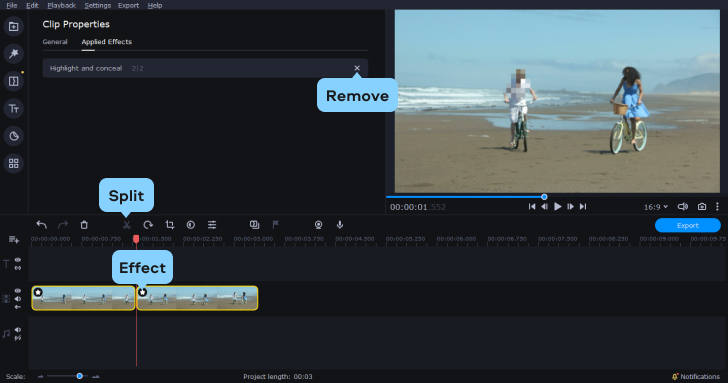
3. If you only want to add this effect until a certain point in your video, split your clip at that moment. Then remove the effect from the second part of the video: hit the star sign in the upper-left corner of the clip to open the list of applied effects, find Highlight and conceal and press the cross sign.
That’s it! As you see, motion tracking can majorly enhance your videos. And it’s not difficult to use at all – especially in Movavi Video Editor Plus! Using the available tools, you can complete simple tasks, like blurring certain faces on videos, or you can go truly creative and add amazing effects to your movies. The only limit is your imagination 😉