We use cookies to improve the services we offer you. By continuing to browse this site, you consent to keep them in accordance with our Privacy Policy.
×We use cookies to improve the services we offer you. By continuing to browse this site, you consent to keep them in accordance with our Privacy Policy.
×
 95
95
 9 min
9 min
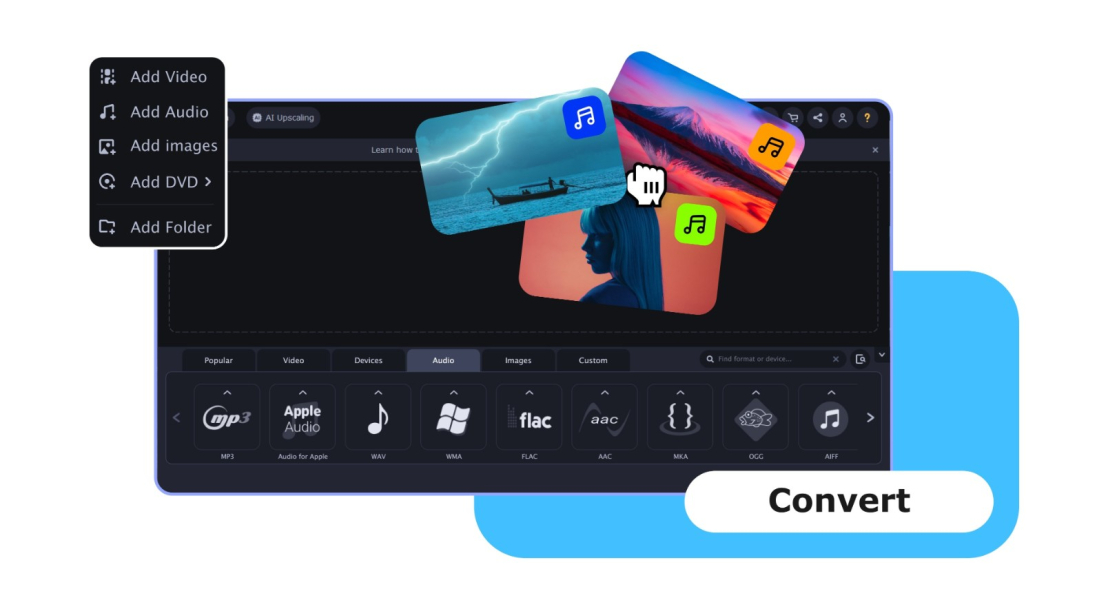
In this guide, we’ll show you exactly how to rip a DVD with VLC step by step, from inserting the disc to saving the final file. We’ll also cover an easier alternative using dedicated DVD ripper software for anyone who wants a faster, more reliable result.
Insert the DVD into your computer’s disc drive. If a default media player launches automatically, close it. Open VLC Media Player instead, then click Media in the top menu bar and select Open Disc from the dropdown.
Under Disc Selection, make sure DVD is selected. Confirm that the correct drive appears in the Disc device dropdown – if it’s empty, click Browse… to locate it. If you only want to rip one part of the DVD, set the specific Title and Chapter numbers under Starting Position; leave them at 0 to rip the whole disc. You can also tick No disc menus if you want to skip the DVD’s menu.
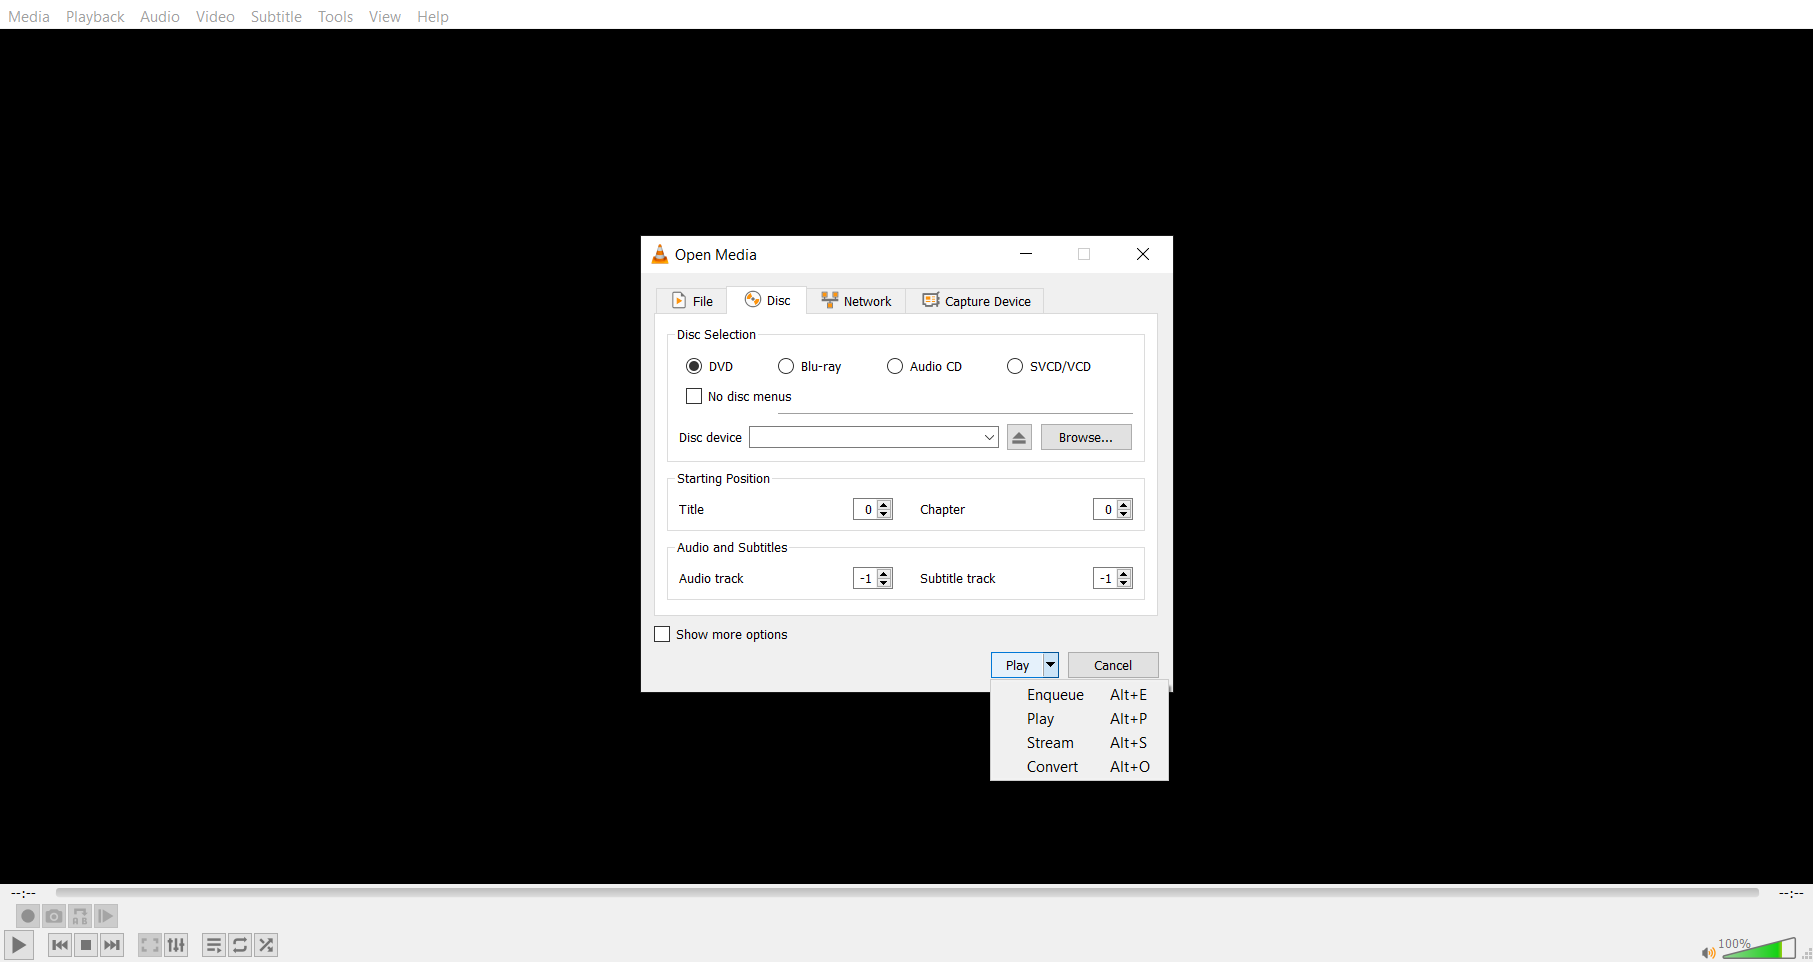
Step 2. Open the Convert/Save dialog and select a profile
When you’re ready, don’t click Play directly – instead click the small dropdown arrow next to the Play button and choose Convert. This opens the Convert dialog, where you’ll choose what format to rip the DVD into.
In the Profile dropdown, select a video profile such as Video – H.264 + MP3 (MP4), which works well for most computers and devices. If you need a different format, click the wrench icon next to the dropdown to edit a custom profile, where you can adjust the video codec, audio codec, and container format to your liking.
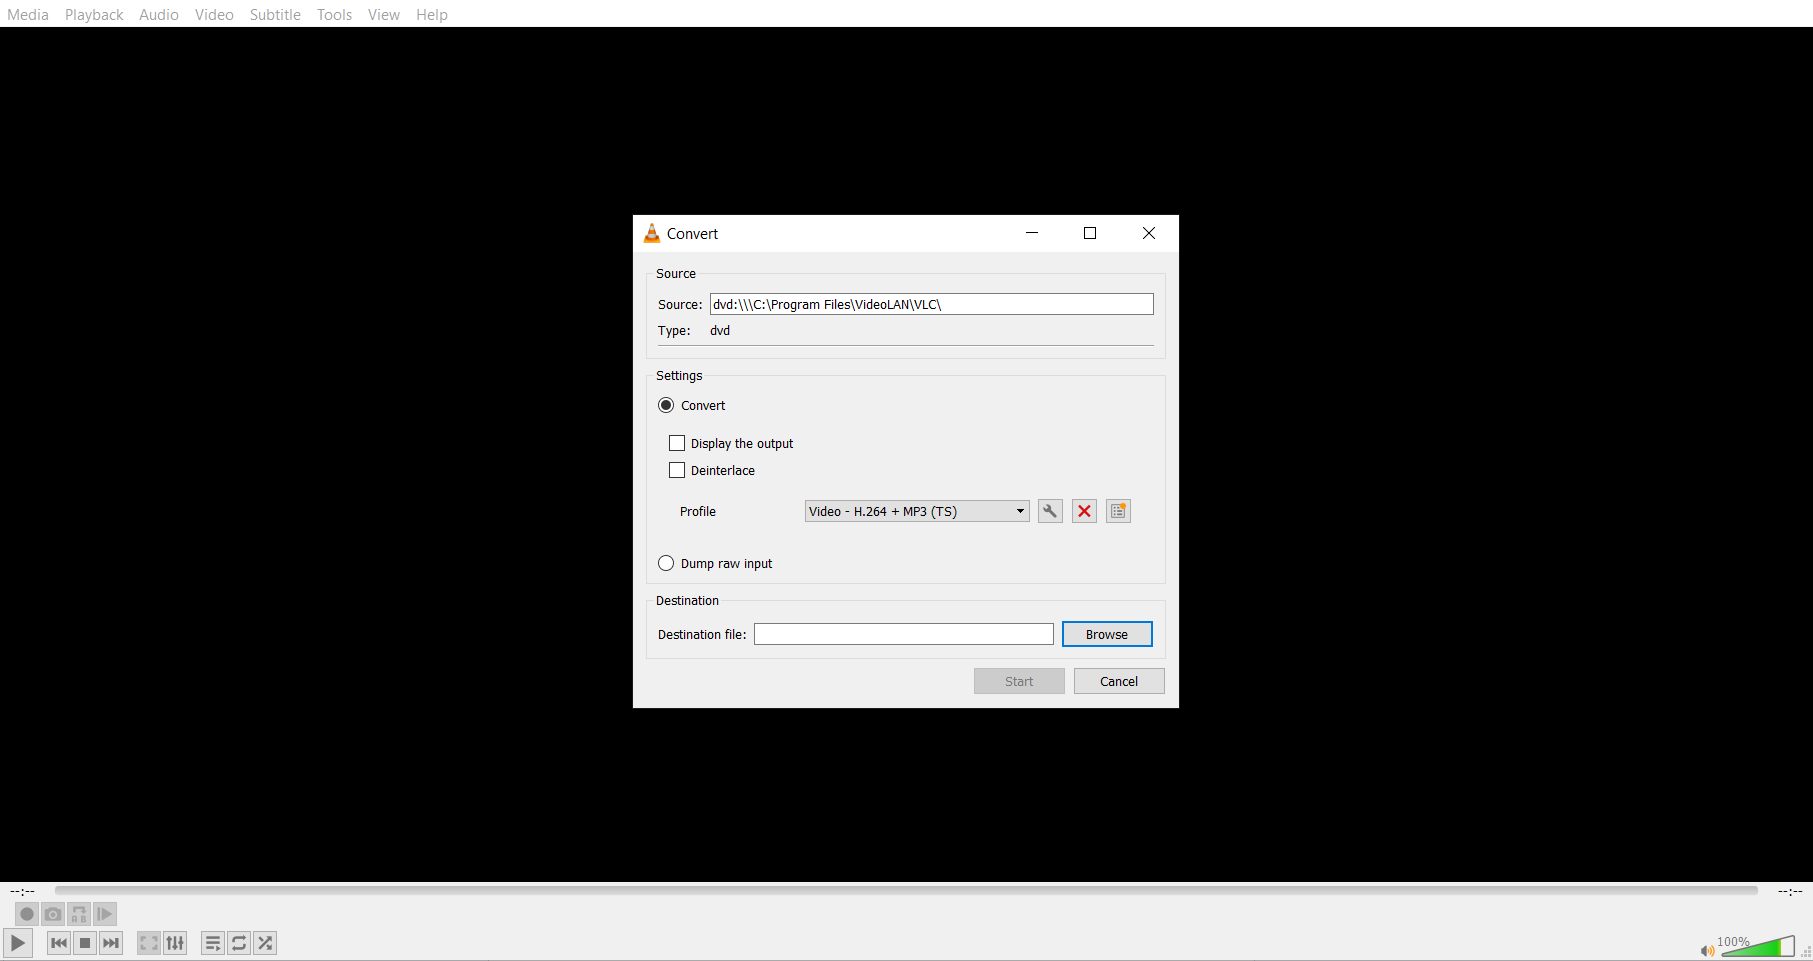
VLC can read most standard DVD formats, which makes it a versatile free DVD ripper for a wide range of discs:
Keep in mind that VLC’s native DVD support does not include built-in decryption for commercially encrypted (copy-protected) discs without additional libraries – more on that in the FAQ section below.
Back in the Convert dialog, click Browse next to the Destination file field. Choose a folder on your computer and type a filename with the appropriate extension, such as mymovie.mp4. Make sure you have enough free disk space, since DVD rips can range from 1 GB to over 7 GB depending on the disc.
Click Start to begin ripping. VLC will process the DVD and permanently save the file to your chosen destination on your PC or Mac. Ripping time varies depending on the length of the DVD and your computer’s speed – see the FAQ section for more detail on how long this typically takes.
Once you rip a DVD with VLC, you can save the result in several common output formats, depending on the profile you select:
For most users, ripping to MP4 is the best choice, since it balances file size and quality while remaining compatible with virtually every device.
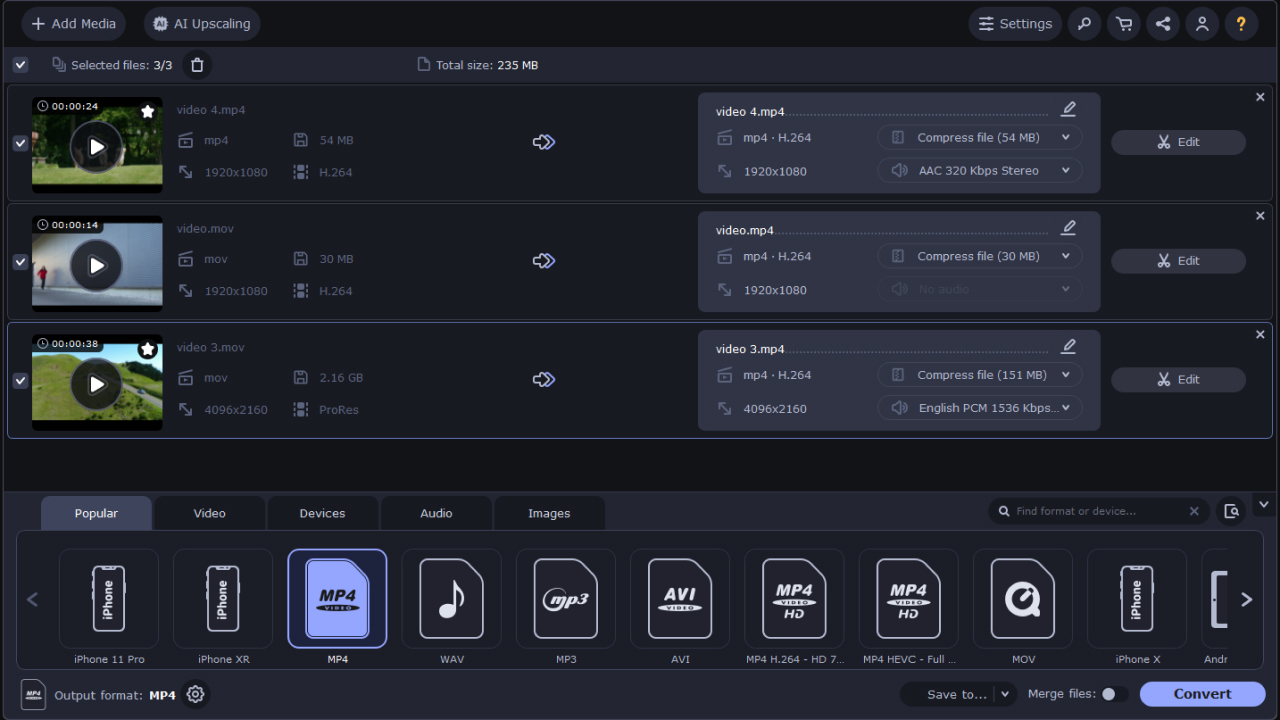
VLC is a free tool, but it wasn’t built specifically as a DVD ripper, so the process can feel clunky – especially with copy-protected discs, which VLC often cannot handle out of the box. Movavi Video Converter is dedicated DVD ripping software designed to read both standard and many protected DVDs reliably on Windows and Mac.
Movavi offers a free trial so you can test the ripping process before buying. It automatically detects DVD structure, lets you select specific chapters or the entire disc, and exports directly to MP4, AVI, MOV, or other popular formats. It’s a great alternative tool for anyone who wants a faster, more dependable free DVD ripper experience.
🎉 Special offer: Use promo code SUP0W1HGQDIS20 for 20% off Movavi Video Converter! Check current promo codes →
⬇ Download for Windows | ⬇ Download for Mac
Step 1. Download and Install Movavi Video Converter
Download Movavi Video Converter for Windows or Mac. Once the download finishes, run the setup file and follow the on-screen instructions to install the program.
Step 2. Open the Program and Add the DVD
Insert the DVD into your computer’s disc drive and launch Movavi Video Converter. Click the Add Media button on the main screen, then select Add DVD > Open DVD, and locate the VIDEO_TS folder on your disc. Movavi will load the DVD contents so you can select what to rip.
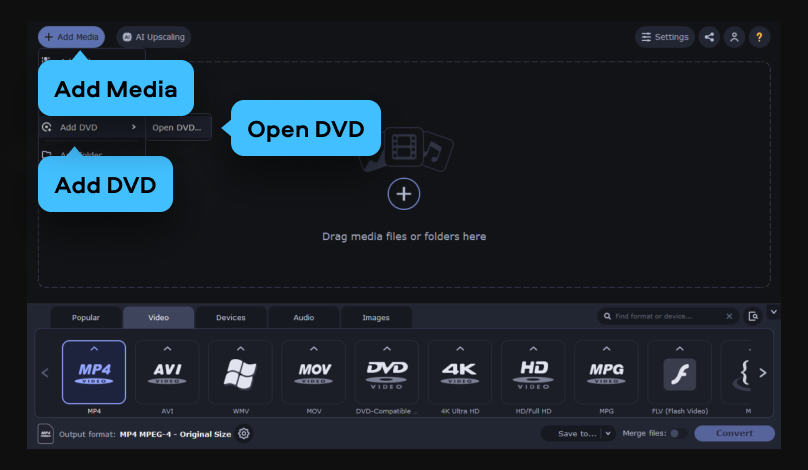
Step 3. Choose the output format and settings
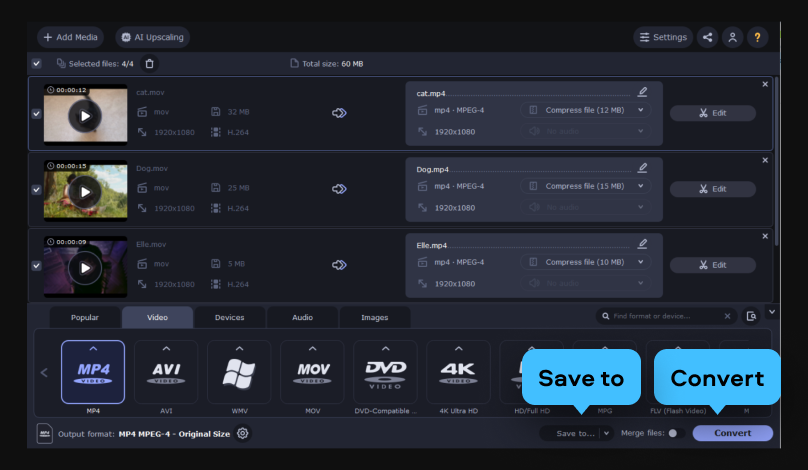
At the bottom of the Movavi window, open the Video or Devices tab and pick your target format or device. Movavi offers more than 180 media formats and over 200 device presets, so you can choose MP4 (H.264) for most computers, or a specific preset if you plan to watch the DVD on a phone, tablet, or smart TV.
Adjust the resolution and quality settings if needed. Higher quality settings produce larger files but preserve more detail from the original DVD. For most home movies and TV shows, the default settings work well.
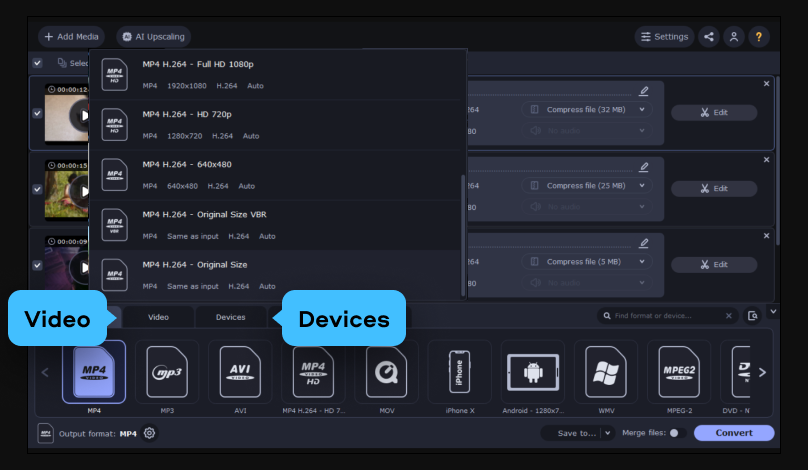
Step 4. Start ripping and save the DVD to your computer
Set your destination folder in the Save to field at the bottom of the screen, then click the orange Convert button. Movavi will start processing your media files. Once ripping is complete, your DVD is saved as a digital file on your PC or Mac, ready to watch or transfer.
Disclaimer: Please be aware that Movavi Video Converter does not allow you to convert copy-protected media files and DVDs.
Ripping a DVD doesn’t have to be complicated. VLC is a solid free tool for ripping unprotected discs to your computer, and it works on both Windows and Mac without any extra cost. Just keep in mind that it has limited support for copy-protected DVDs and that ripping times can vary depending on your hardware.
If you frequently rip DVDs or need to handle protected discs, dedicated DVD ripping software like Movavi Video Converter offers a faster and more reliable experience. Both options let you permanently save your DVD collection as digital files, so you can finally retire that stack of discs.
VLC doesn’t have a ripper labeled as such, but its Convert/Save feature can function as one. By opening a DVD disc and using the Convert option instead of Play, you can save the disc’s content as a video file on your computer. It’s a built-in capability rather than a dedicated ripping tool, which is why the process involves a few more manual steps than software designed specifically for ripping DVDs.
VLC and HandBrake serve different primary purposes – VLC is a media player with ripping as a secondary feature, while HandBrake is dedicated video conversion and ripping software. HandBrake generally offers more control over compression settings and tends to produce smaller files at similar quality, while VLC is simpler for quick, one-off rips. Neither tool reliably handles modern copy-protected DVDs without additional libraries, so for protected discs, dedicated DVD ripping software like Movavi Video Converter is often the more practical choice.
By default, VLC cannot rip most commercially copy-protected DVDs, since it lacks built-in decryption for content scrambling systems used on store-bought discs. Some users add third-party decryption libraries to extend VLC’s capabilities, but this exists in a legal gray area depending on your country’s copyright laws. For protected discs, dedicated DVD ripper software designed to handle protection – such as Movavi Video Converter – is generally a more reliable and straightforward option.
Ripping time with VLC depends on the length of the DVD, your computer’s processing power, and the output settings you choose. As a rough estimate, a standard 90-minute movie typically takes between 20 and 60 minutes to rip on an average PC or Mac. Older or slower computers, as well as higher-quality output settings, can extend this time significantly, while modern hardware with multi-core processors will rip faster.