We use cookies to improve the services we offer you. By continuing to browse this site, you consent to keep them in accordance with our Privacy Policy.
×We use cookies to improve the services we offer you. By continuing to browse this site, you consent to keep them in accordance with our Privacy Policy.
×
 97
97
 10 min

Knowing how to cut a clip in iMovie unlocks the most fundamental skill in video editing – removing dead time, trimming shaky starts, splitting a long clip to delete a middle section, and building a tight sequence on the timeline. iMovie handles all of this with several overlapping methods, each suited to a different level of precision.
This guide covers the three main ways to cut videos in iMovie – edge-drag trimming, R-key range selection, and Command + B split-and-delete feature.
iMovie offers three ways to cut a clip. Use Method 1 for quick start/end trims, Method 2 for precise range selection, and Method 3 to split and delete a middle section. Read on to learn all the details on how to cut on iMovie.
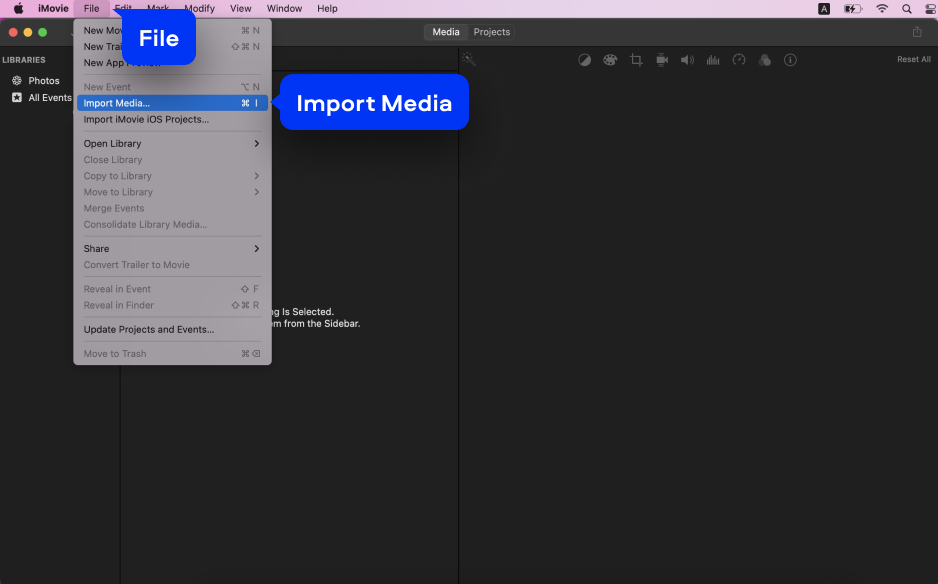
Open iMovie and create a new project or open an existing one. Click File > Import Media and select the video file you want to edit. Drag the clip from the Project Media browser onto the timeline at the bottom of the window. Use Command + Plus (+) or View > Zoom In to zoom into the timeline for more precise control.
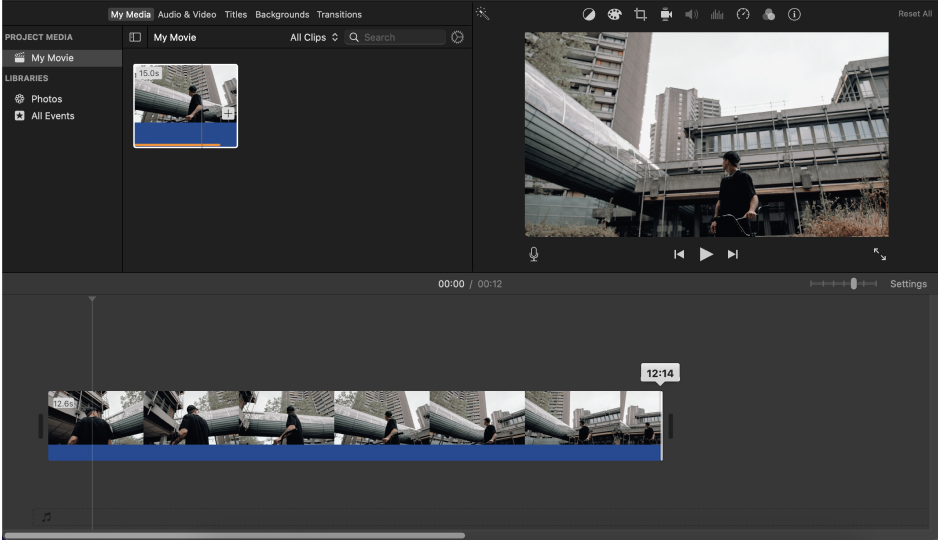
Move your pointer slowly to the very beginning or end of the clip on the timeline. When the pointer changes to a clip trimmer cursor (a vertical bar with left and right arrows), click and drag:
The minimum clip length iMovie allows is 0.3 seconds. If you can’t drag any further inward, the clip is at its shortest.
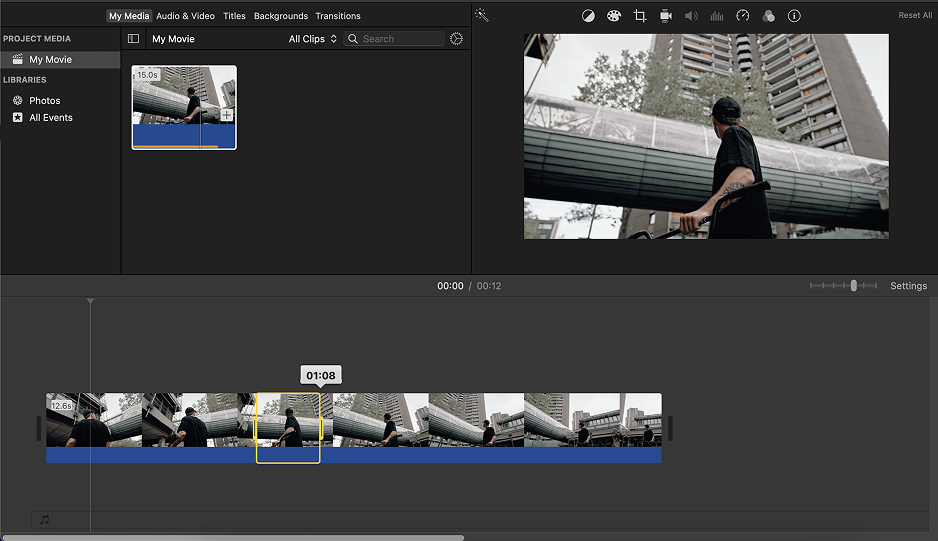
This method lets you cut a clip to a precise selection without touching the edges. Press and hold the R key on your keyboard, then click and drag across the clip in the timeline to highlight the section you want to save. A yellow selection box appears over the chosen range. The area outside the yellow box will be removed.
| R + drag | Select a range to keep – hold R, click and drag across the clip to highlight the portion to preserve |
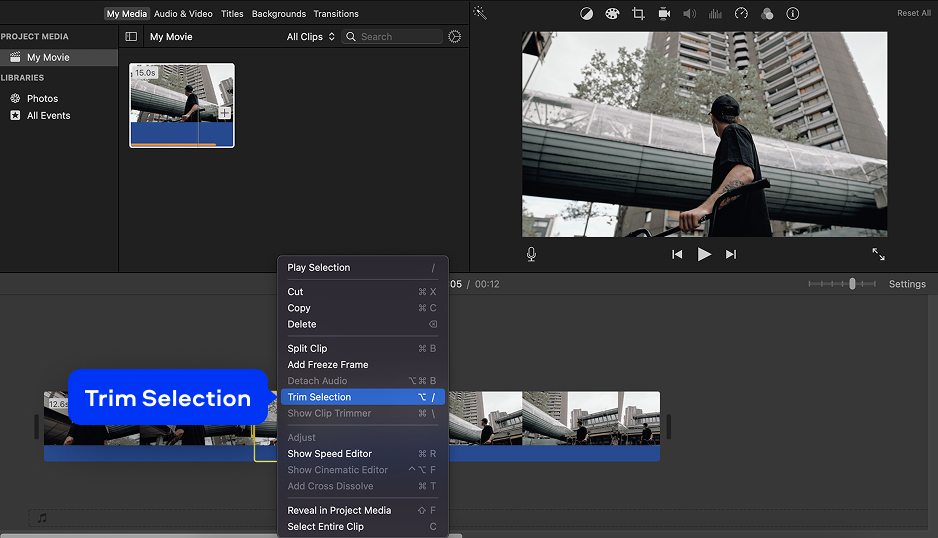
With the yellow range selected, right-click on the clip and choose Trim Selection from the context menu. iMovie trims the clip to match your selected range exactly – everything outside the selection is removed. Alternatively, use the keyboard shortcut Option + / to trim to the selection without touching the mouse.
| Option + / | Trim to selection – trims the clip to the yellow R-key range in one keystroke |
iMovie accepts the following video and audio formats. All of these can be imported and trimmed in the timeline.
| MP4 (H.264 and H.265/HEVC) – most common, fully supported |
| MOV (QuickTime) – Apple native, all codecs |
| M4V (iTunes video) |
| MKV – H.264 content usually works |
| AVI – limited support |
| AVCHD / MTS / M2TS (camcorder footage) |
| 3GP / 3GPP (mobile video) |
| DV (Digital Video tape) |
| 4K / ProRes (from Apple devices and cameras) |
| Audio: MP3, M4A, AAC, WAV, AIFF (for standalone audio clips) |
To remove a section from the middle of a clip, you need to split it twice: once at the start of the bad section, once at the end. Click on the timeline to position the playhead (the white vertical line) at the exact frame where you want the first cut. Use Command + Plus to zoom in for frame-level accuracy. Then press Command + B to split the clip at the playhead.
| Command + B | Splitting divides the clip at the current playhead position into two independent clips |
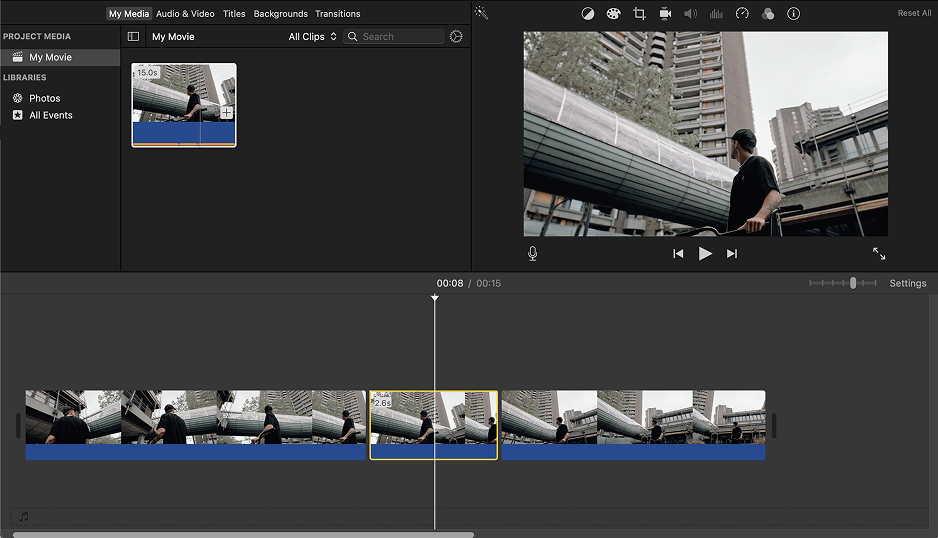
Move the playhead to the end of the section you want to remove and press Command + B again. You now have three clips: the good part before, the section to remove, and the good part after. Click on the middle clip to select it. Press the Delete key to remove it from the timeline. The surrounding clips close the gap. iMovie may add a gap clip if the deleted section leaves an empty space – right-click the gap and choose Delete Gap if needed. Now you know how to cut in iMovie using the splitting option.
| 📌 Undo tip: if you delete the wrong clip, press Command + Z immediately to undo. iMovie maintains a full undo history for the current session. |
After cutting your clips, iMovie exports to these formats via File > Share.
| MP4 (H.264 or H.265) – default export, widest compatibility |
| MOV (ProRes) – via Export File > Quality: ProRes |
| 4K (3840 × 2160), 1080p, 720p, 480p – resolution presets |
| Direct upload to YouTube, Vimeo, Facebook (via Share menu) |
| Email (compressed version for smaller file size) |
| Note: iMovie does not export standalone audio files – use GarageBand or QuickTime |
| Command + B – Split clip at playhead |
| Option + / – Trim to R-key selection |
| Command + Z – Undo last action |
| Command + Plus (+) – Zoom in on timeline |
| Command + Minus (–) – Zoom out on timeline |
| R + drag – Select a range on a clip |
| Delete – Remove selected clip from timeline |
| Command + X – Cut selected clip (moves to clipboard) |
Movavi Video Editor is the cross-platform alternative to cutting clips that works on both Mac and Windows PC. The Split tool places a cut at the playhead in one click with frame-level precision; the timeline handles dragging, deleting, and rearranging clips visually without hidden menus or keyboard-only workflows.
The 7-day free trial gives full access to the cut, trim, and split tools, plus the full editing suite – color correction, transitions, audio tools, titles, and popular export formats.
| 🏷️ Save on Movavi Video Editor
Use a promo code for a discount on your Movavi license. Check current promo code → |
Three steps from raw footage to a clean, trimmed clip on your Mac or PC.
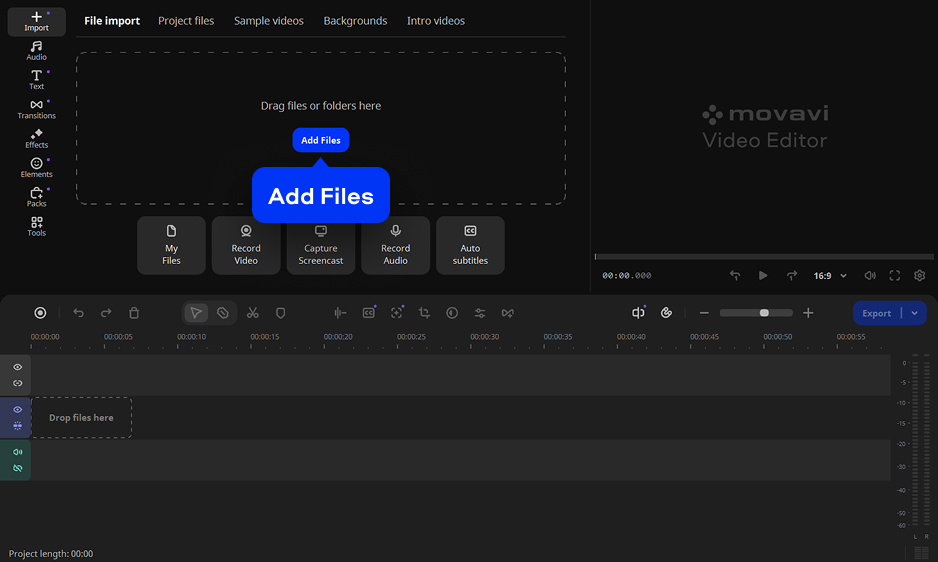
Download Movavi Video Editor and install the software. Click Add Files and select your video file. Drag the clip from the Project files panel onto the Timeline. Use Ctrl + Plus / Cmd + Plus to zoom in on the timeline for precise frame-level work.
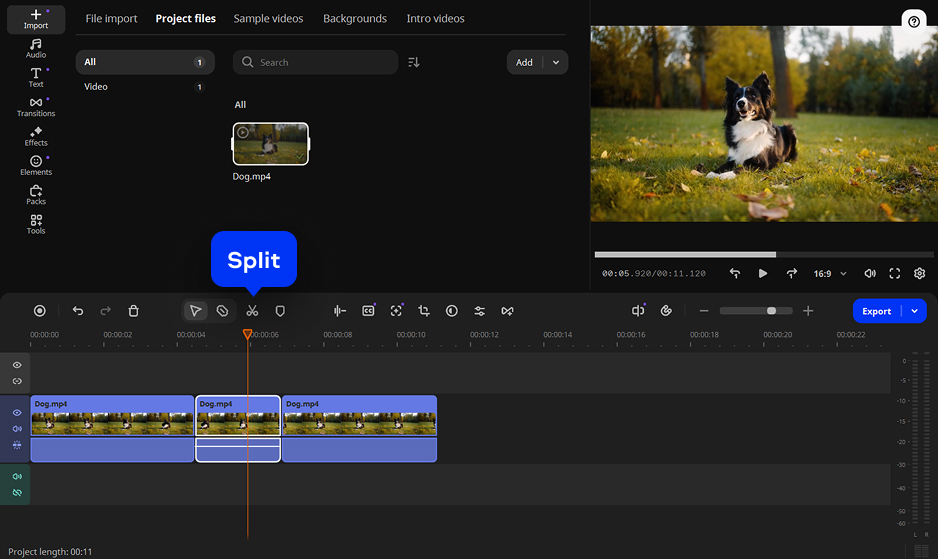
To trim your video, drag the left or right edge of the clip inward on the Timeline to shorten it. To split, position the playhead at the cut point and press Ctrl + B / Cmd + B or click the Split icon in the toolbar. To delete a middle section, split at the start of the section, split at the end, click the segment to select it, and press Delete. The adjacent clips snap together automatically.
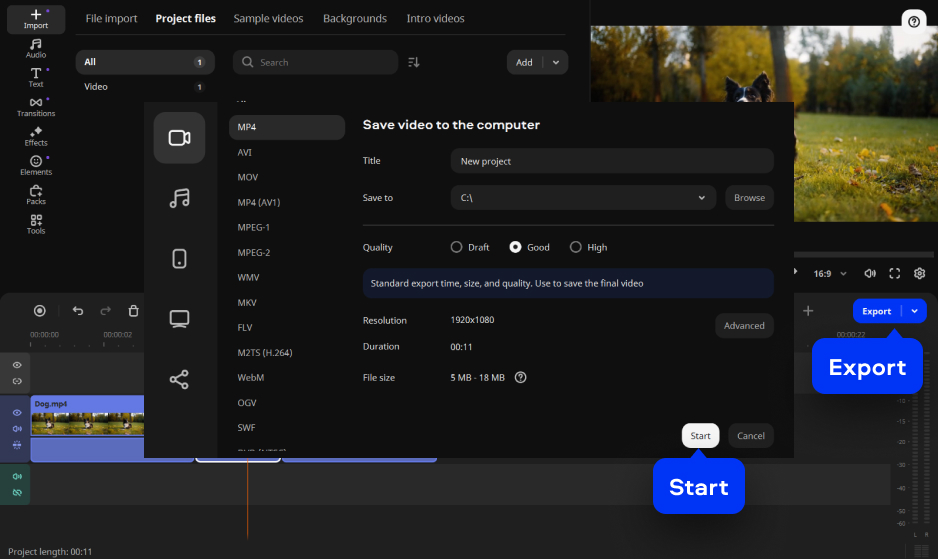
When the clip looks right in the preview, click Export. Choose your output format – MP4 is recommended for the widest compatibility. Set resolution and quality, pick a save location, and click Start.
| ▶️ Video tutorial – Movavi channel
How to cut and trim videos in Movavi Video Editor |
Cutting a clip in iMovie has three reliable methods: drag the edges for a quick trim, use R-key range selection with Option + / for precision, or use Command + B to split and delete a middle section.
For a cross-platform tool that works on both Mac and Windows PC with the same clean workflow, Movavi Video Editor covers every cut, split, and trim scenario in a visual timeline – free to try for 7 days. Download the program and edit your first clip today.
To split a clip in iMovie on a Mac:
Alternatively, right-click the clip at the playhead position and choose Split Clip from the context menu.
If Command + B isn’t splitting a clip in iMovie, check these causes:
Cutting between clips in iMovie means controlling where one clip ends and the next begins in the timeline.
The standard approach is:
For fine-tuning the exact frame where the cut happens, double-click the edge between clips to open the Precision Editor (Window > Show Precision Editor). The Precision Editor shows an expanded view of both the outgoing and incoming clips so you can adjust the cut point to the exact frame. This is the most accurate tool in iMovie for controlling the transition between two clips.
Yes – but iMovie’s crop is a spatial crop (removing pixel edges from the frame), not the same as cutting (removing frames from the timeline by duration). To crop spatially, select the clip in the timeline, click the Crop icon in the preview toolbar (overlapping rectangles), choose Crop to Fill, drag the yellow rectangle to the area you want to keep, and click the blue Apply checkmark. This removes the edges of the video frame but keeps the full duration.
To cut duration – removing frames from the start, end, or middle of a clip – use the trim, R-key, or split-and-delete methods covered above. The two are different tools in iMovie’s workflow. Movavi Video Editor handles both spatial crop and timeline cut in the same panel, which makes the distinction clearer for new editors.