


We use cookies to improve the services we offer you. By continuing to browse this site, you consent to keep them in accordance with our Privacy Policy.
×We use cookies to improve the services we offer you. By continuing to browse this site, you consent to keep them in accordance with our Privacy Policy.
×
 9,096
9,096
 7 min
7 min
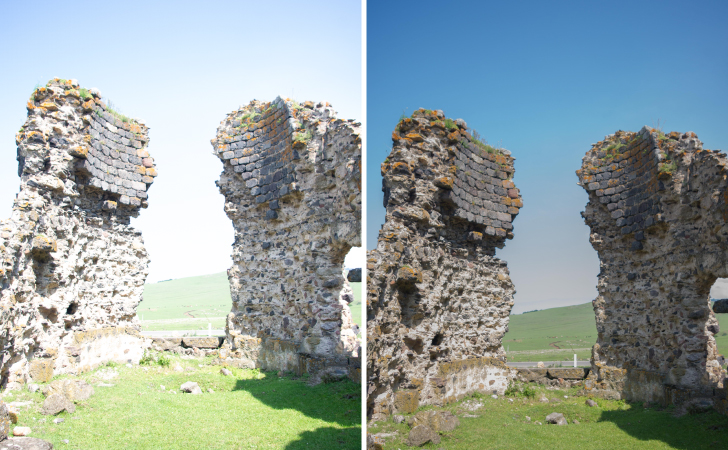
How often you come home after a great photoshoot on a sunny day and found that half your photos turned out overexposed? It happens to the best of us!
Don’t rush to throw them all in the trash – there’s still a good chance you can save your overexposed photos and still be able to use them. All it takes is some decent software and a little patience.
*In this article, we’re going to talk about pictures that are partly overexposed. For example, where the sky or some other area is too bright. If your photo is completely overexposed, unfortunately, this solution won’t fix it.
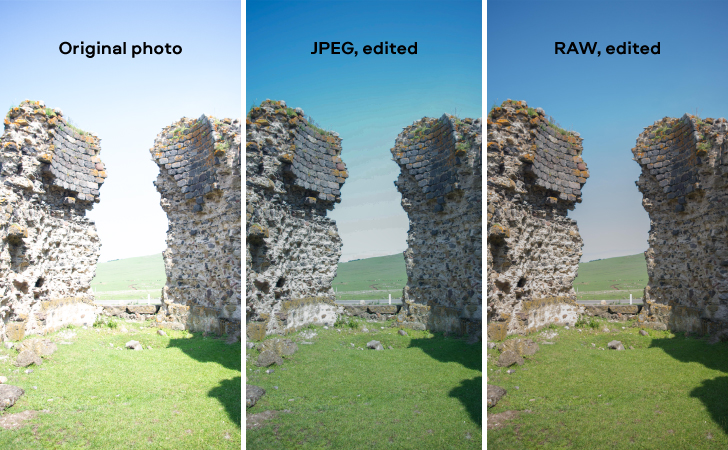
If you’re shooting in RAW format, then you have a pretty good chance to fix your photos. So let’s talk a bit about this format.
*But if you have a JPEG file that needs to be fixed, stay with us. All the tools we describe in this article will work for that format too. Not as well as with a RAW file, but good enough.
Beginning photographers often skip the option to shoot in RAW format – and for good reason. JPEG files take up a lot less space, they look better in preview, and any program or device can open them.
RAW files, on the other hand, look worse at first glance. But in reality, they save much more information about the shot. In simple terms, RAW saves all the signals from the camera sensor. Think of it as of film that has yet to be developed – you still need to set the exposure, brightness, contrast, and other parameters. On the other hand, a JPEG file has already been processed by your camera. Your camera pre-edits the shot and deletes all the extra information from the file.
No matter what software you’re using, to fix overexposed photos, you’re going to use the same editing techniques. The difference is that programs for beginners will provide you with a clear intuitive interface and simple tools so you can easily complete your task. Professional photo editors, on the other hand, will give you more control over the image, but will take time and patience to learn how to use the tools.
So, whatever tools you have, you’re going to do these two things to the overexposed areas of your photo:
Sounds easy, doesn’t it? Let’s see, how you can do this with two different programs – one for beginners, the other for more advanced users.
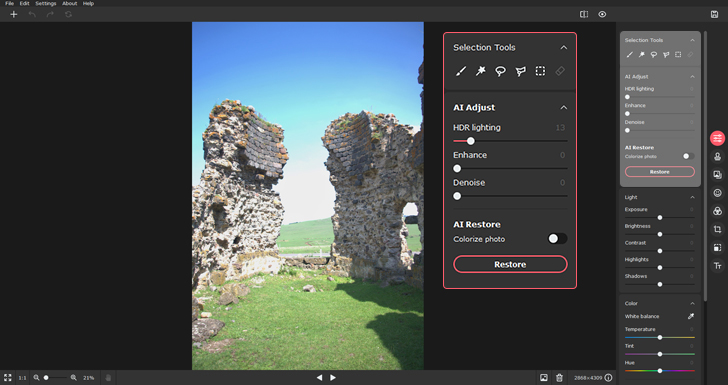
Movavi Picverse is a simple yet powerful photo editor for beginners and amateur photographers. It has a straightforward and intuitive interface. One of Picverse’s advantages is that it includes multiple AI-based tools, which enable users who don’t have advanced editing skills to enhance their photos in no time.
When you upload a RAW file to Movavi Picverse, it automatically edits it even before you touch any tools. This makes it easier for you to work.
To fix an overexposed photo, first of all, try using the tools in the AI Adjust section. The Enhance and HDR lighting sliders work on the image, correcting all the colors and making them more vivid and saturated. Drag the sliders until you like how the picture looks.
If you want to correct the overexposed areas of the shot manually, go to the Light section on the same tab.
The Exposure slider will affect all the colors in your image and make them all lighter or darker. If your photo is heavily overexposed, drag this slider to the left.
Use the Highlights tool to work only with the most overexposed areas of your shot. Drag the slider to the left as well. The Shadows slider, on the other hand, will affect only the dark areas. Drag it to the left just a little bit to make those parts clearer.
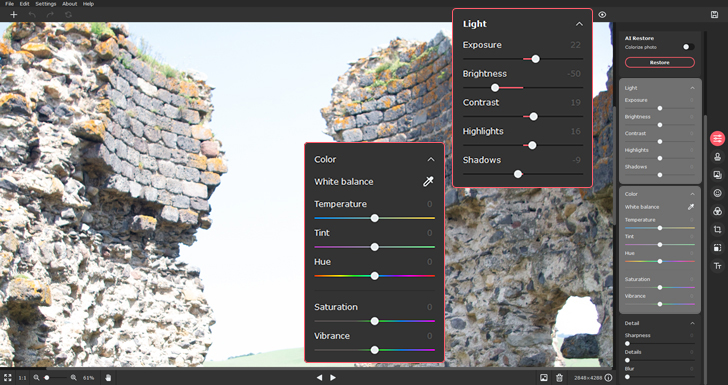
In addition to the abovementioned tools, you can also try using the White balance and Contrast tools.
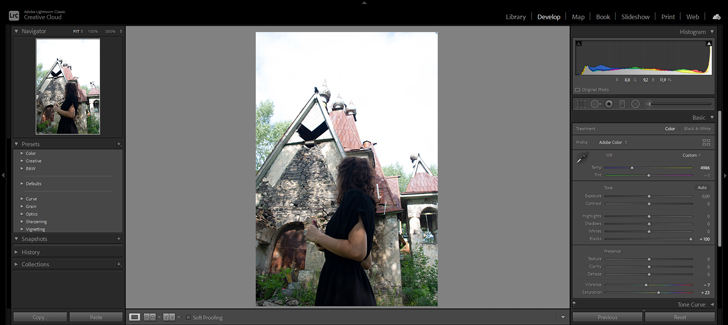
Lightroom is professional-grade photo editing software from Adobe. The interface more complex to navigate, and it doesn’t have many automatic adjustment features. Lightroom is valuable for different reasons: it gives users full control over their pictures and provides a really comprehensive set of tools.
Lightroom’s Histogram will help a lot when you’re working on over (or under-) exposed pictures. It’s basically a graph that represents the distribution of tones in your image. Simply put, it shows you how many light, dark, and mid-tones your photo contains. The horizontal axis represents the entire tonal spectrum from dark to bright. The vertical axis represents the number of pixels in the image for each tonal value.

To identify all the overexposed parts of your shot, click on the triangle icon in the upper-right corner of the histogram. The program will highlight all areas of the photo that are too bright.
The histogram also helps you to select the tools that will affect each tonal range. Hover your mouse over the histogram, and the program will highlight the tool that affects that spesific range.
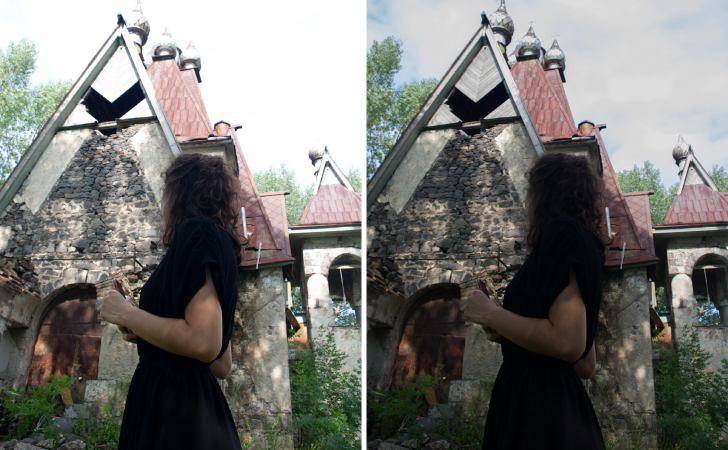
To fix the overexposed parts of the image, use the Highlights slider. This tool affects only the areas that are too bright and doesn’t impact shadows, midtones, or whites. Slide it to the left.
The Whites slider works with the brighter parts of the image, but it also affects white areas. The more you move it to the left, the darker they become.
If you feel that the picture is still not perfect, try experimenting with the Exposure and Contrast tools.
As we mentioned earlier, you can use all the same tools on JPEGs that you would use on RAW files. The difference is that you won’t be able to rescue any completely white areas of the picture (those that would be at the right-hand end of the histogram). Other than that, you have as much chance of salvaging a JPEG image as a RAW.
If it doesn’t work, don’t get upset. Just set your camera to save pictures in RAW and keep experimenting!
Good luck 😉

