


We use cookies to improve the services we offer you. By continuing to browse this site, you consent to keep them in accordance with our Privacy Policy.
×We use cookies to improve the services we offer you. By continuing to browse this site, you consent to keep them in accordance with our Privacy Policy.
×
 7,842
7,842
 7 min
7 min

Need to add subs to your video? Don’t worry, it’s a piece of cake! Let us show how you can do it in less than 10 minutes.
Most likely, yes. Subtitles make viewers’ experience better. If you’re uploading a video to YouTube, subs will make it available to non-English speaking people, and so will help you to broaden your audience.
If you’re watching a foreign movie, it’s always better to watch it undubbed and with subtitles. This way, you’ll have a more pure experience and a deeper understanding of the culture the film represents.
When it comes to family videos, subs can be useful here, too. Those cute films are usually produced without any professional audio equipment. And the in-built camera mic doesn’t always work well. Sometimes it captures too much background noise or doesn’t record the speaker’s voice clearly. In these cases, subs will just help everyone understand what’s going on in the video.
Common Subtitle File Formats
There are many different types of text files that can be used as a subtitle file. Here are the most common ones:
SRT – the most common type of file and the easiest to use. Almost all movie players or video editors support this format. It also can be used in YouTube and Facebook videos.
SSA – this format provides more advanced features than SRT. It enables you to add display effects like positioning, karaoke, and style management.
ASS – an advanced version of SSA. This format allows you to format and style subs in many different ways.
To add subtitles to a video, you can use any video editing software, online tools, or even some conversion apps. For example, you can use Movavi Video Converter if you need to put together an existing SRT file and a video. It’s a simple program that will help you get things done quickly and easily. Recently, we’ve updated the software and added some new features to it.
By the way, we have a little surprise for our blog readers! Until 23 of November, you can get the new version at a 10% discount! Just use promo code Converter21Blog when purchasing the software for Mac or Windows.
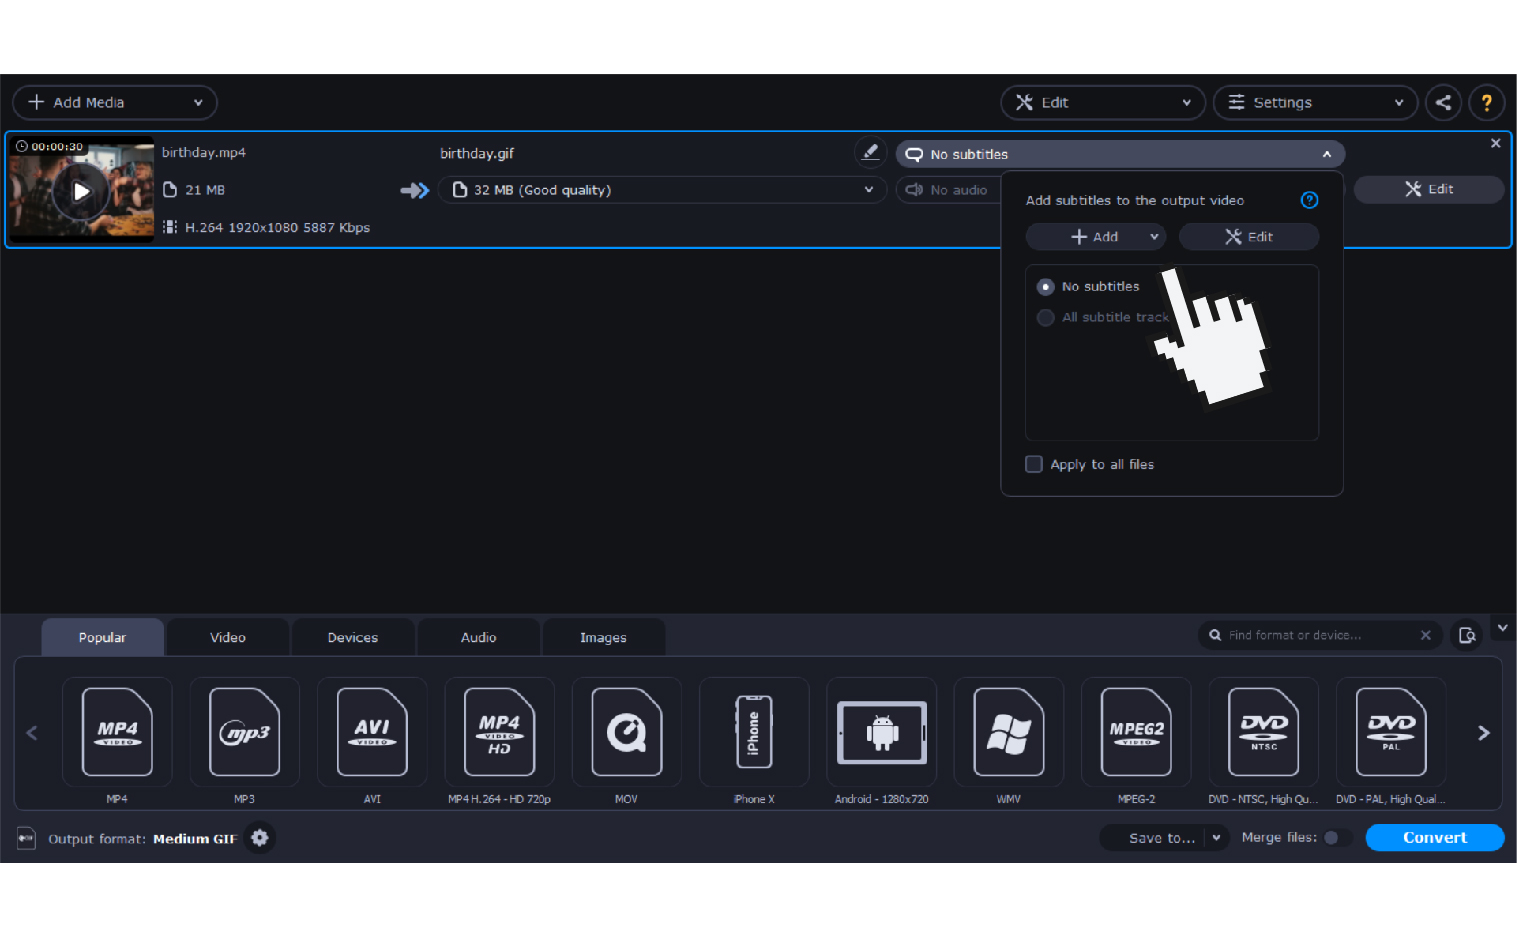
To add your video to the program, use the Add Media button in the upper left corner of the screen or simply drag and drop your file. In the panel below choose the output format.
If you’re adding subtitles to a movie, convert it to MOV, AVI, MP4, or another popular format that your TV or laptop can read. If you want the format to stay the same, simply set it as the output format.

On the video tab, click No Subtitles to add the file to your clip. If you already have the subtitles downloaded to your computer, click Add and then Choose file. You can also search for subtitles online via the app. To do this, tap on Search online, and then type the name of the movie in the search bar. You’ll get connected to the opensubtitles.org where you can choose one of the files.
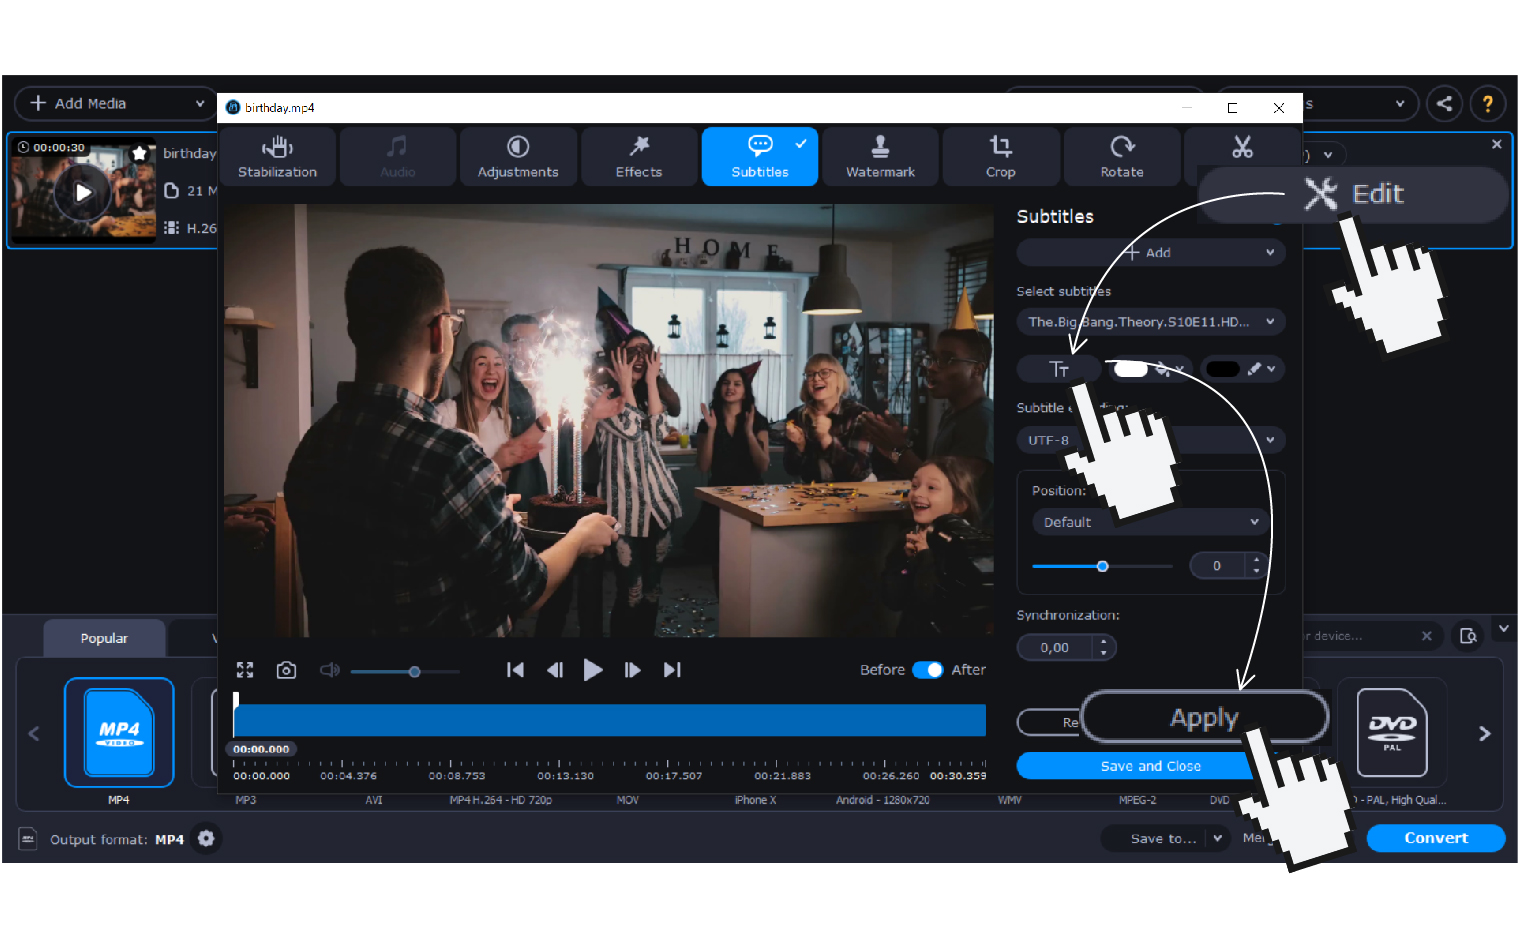
Press the Edit button to adjust the subtitles track. Your working panel will be on the right. Hit Tt to set the font, size, and style of the text. The buttons on the right will help you to choose an appropriate color for the subs.
Next, set the position for your subs and synchronize them with the video track. When everything is ready, click Apply to merge your subs with the video.
If you need to make other changes, use the tabs at the top of the screen. In this simple editor, you can crop, rotate and trim your movie, adjust the audio track, add color grading effects and a watermark, and stabilize the video.
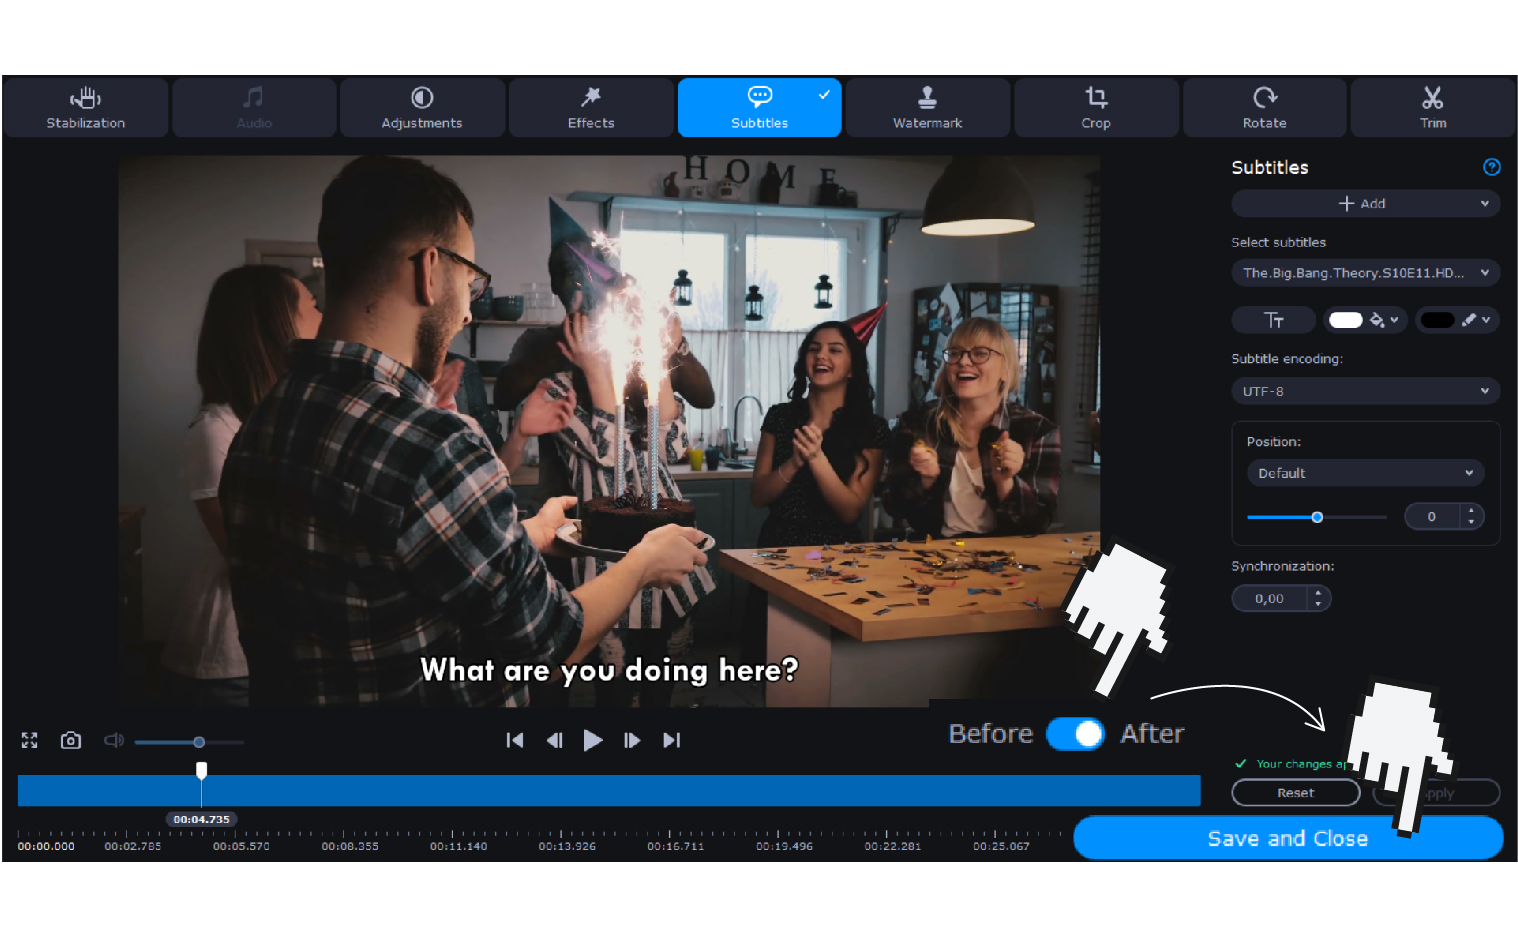
To review the results, check if the Before/After switch is set to After. In the latest version of Movavi Video Converter, we’ve added some new cool features to help ensure the final video comes together perfectly:
If you want to see how the video looks from beginning to end, hit Play and watch. If everything looks okay, press Save and Close.
Choose the destination folder for your movie. To do this, click Save to in the bottom right part of the screen. Then click Convert. Your video is now permanently merged with the subs – ready to watch!
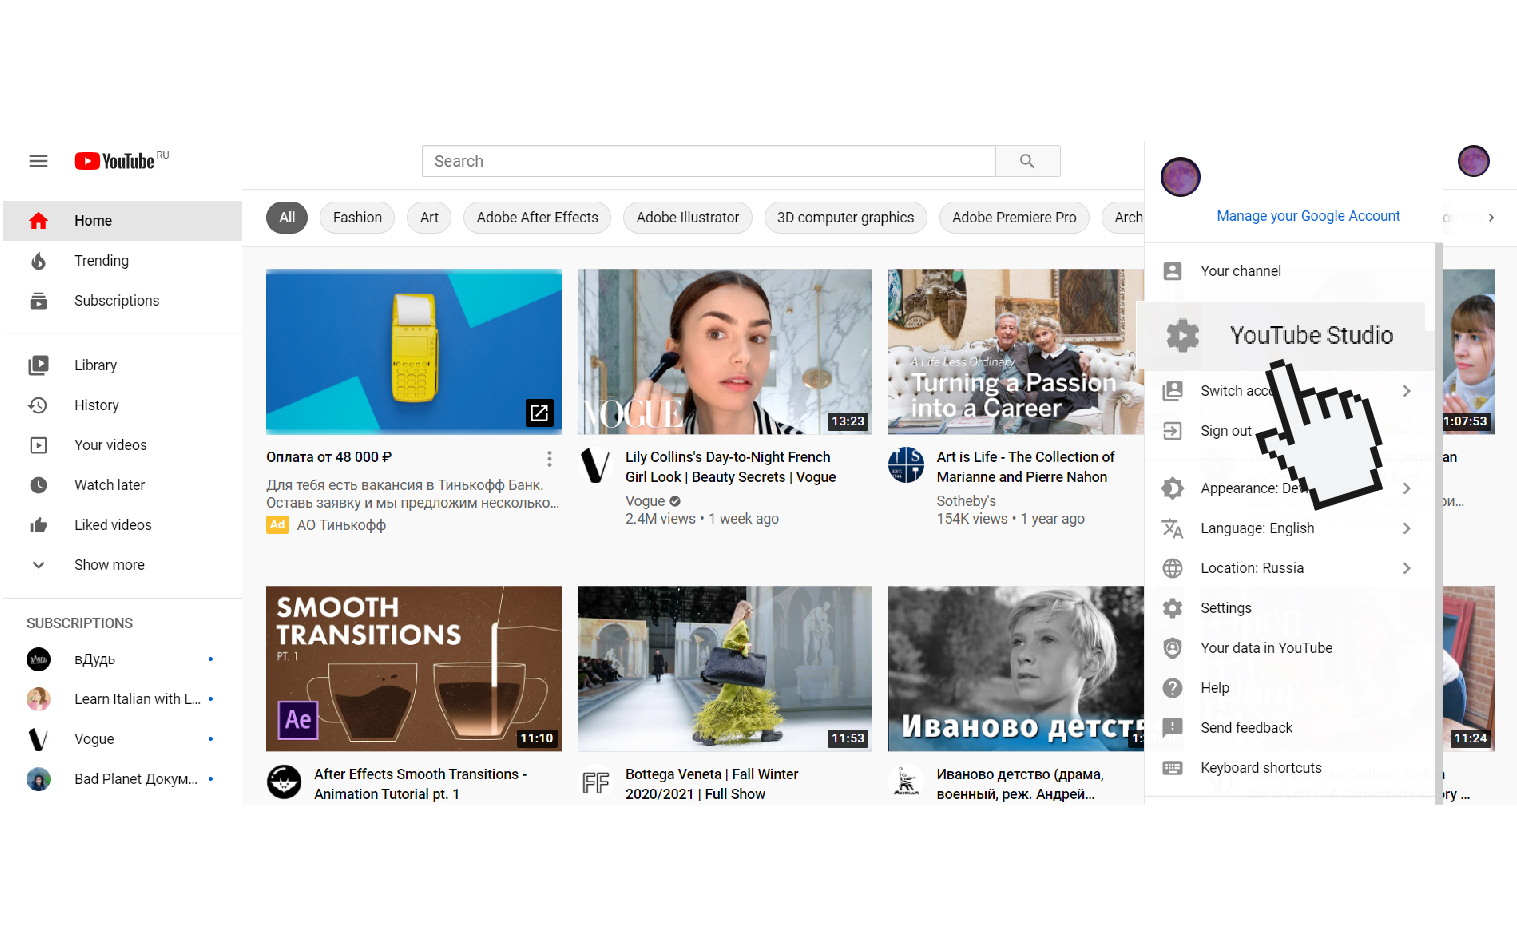
If your video is already uploaded to YouTube, it will be easier for you to add captions via YouTube Studio. Here’s how to do it:
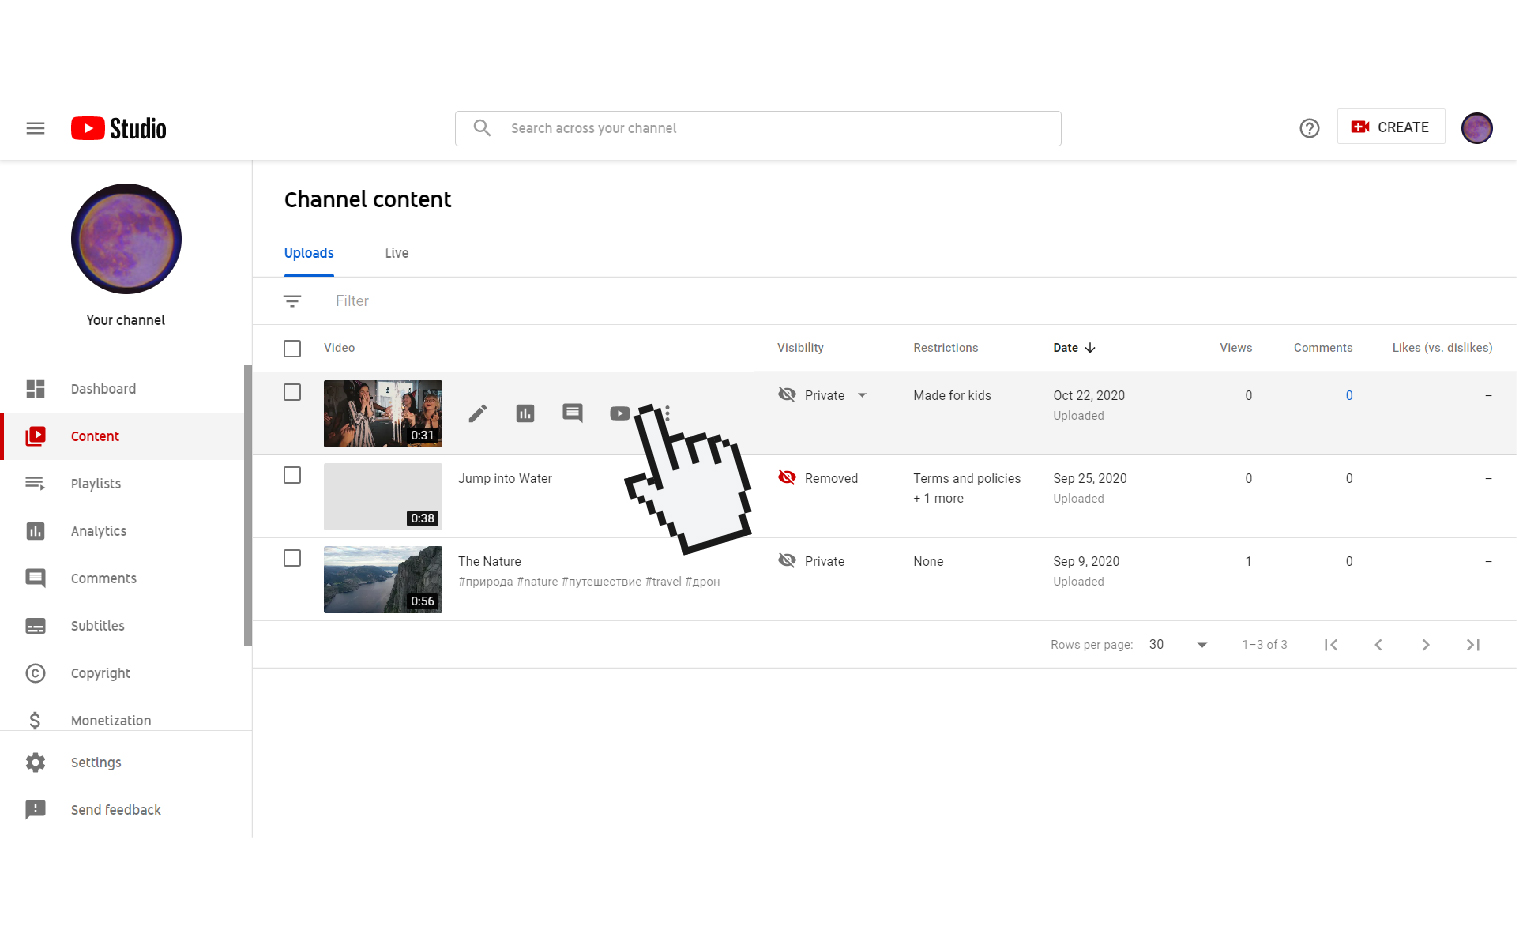
1. Sign in to YouTube Studio.
2. Choose the video you want to add subs to in the Content tab.
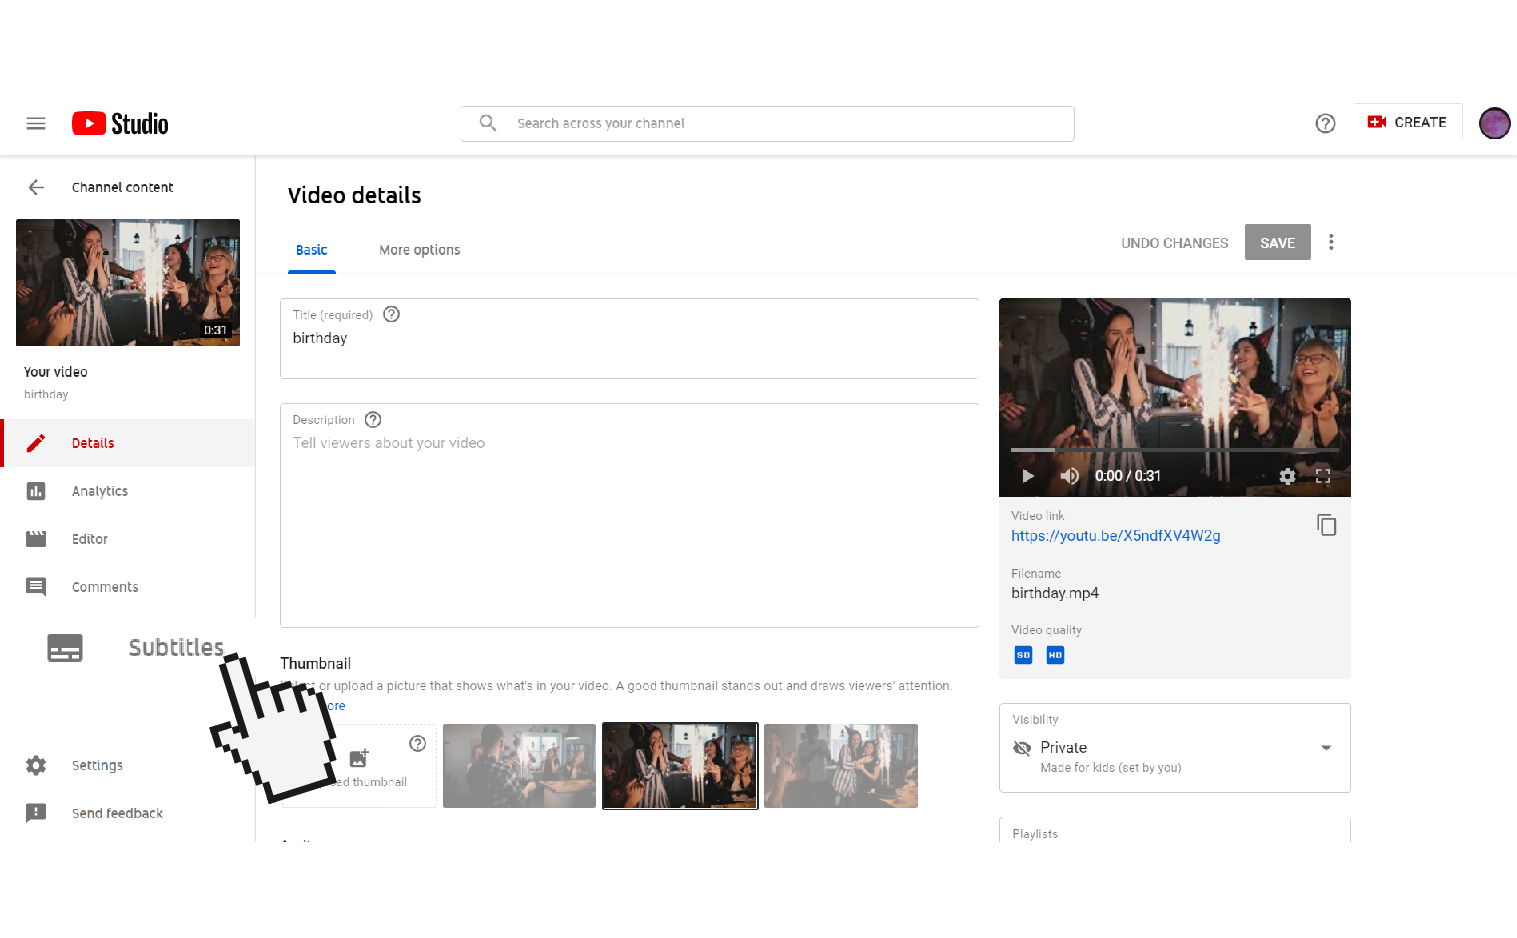
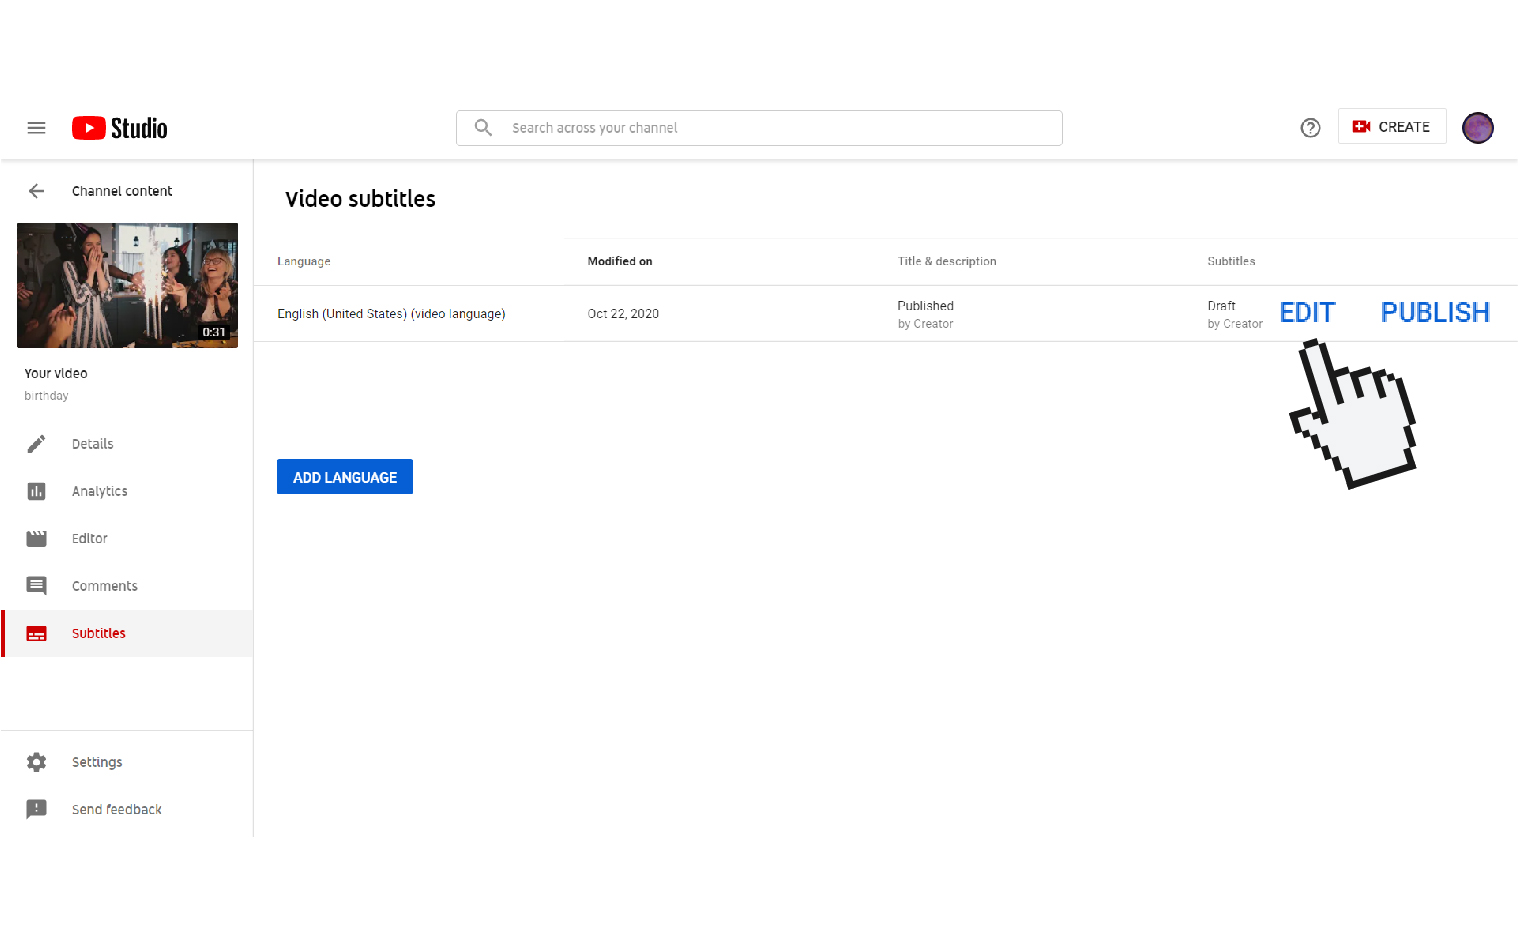
3. Go to the Subtitles section and click Edit.
4. Choose whether your file has timing or not, and then click Continue.
5. In the pop-up window, choose your subtitles file. See which file formats YouTube supports here. Or you can just manually type your subs for any chosen part of the video.
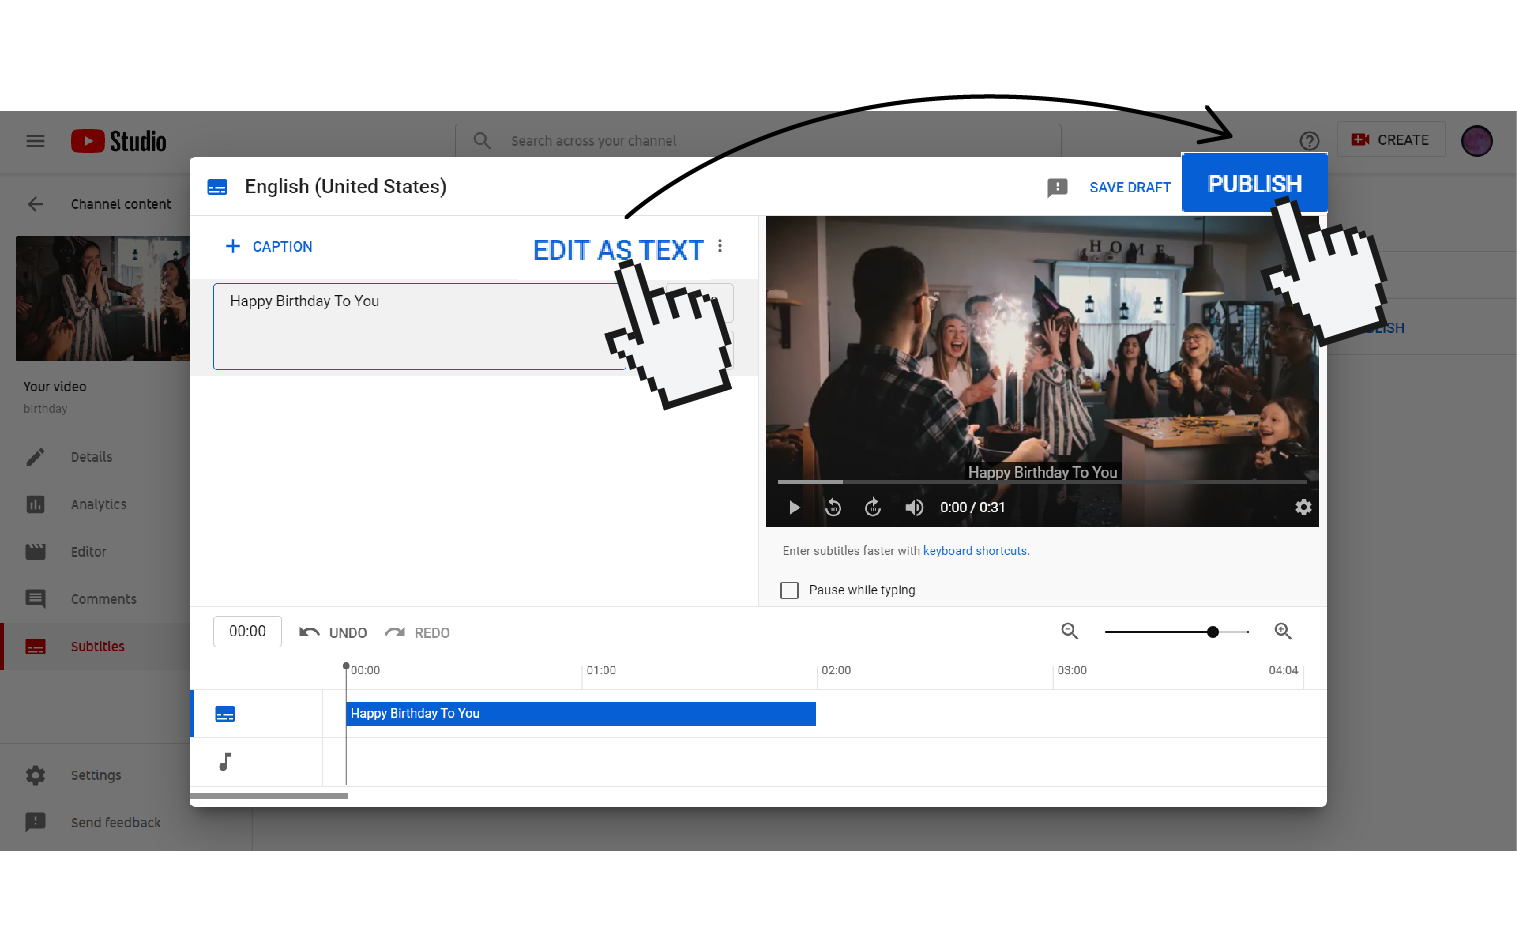
6. Once you’ve chosen your file, it will be automatically added to your video. Click Publish to apply the changes and make them visible to everyone.
You can create an SRT file with your own text using any text editor on your computer. All you need to do is write down the text you’ve marked with the time it should appear on the screen. Do this as shown here:
[Section of subtitles number]
[Time the subtitle should begin: [hours]: [minutes]: [seconds], [milliseconds]] –> [Time the subtitle should end]
[Subtitle]
It should look like this:

When everything is set, all you need to do is save your file in SRT format – just change “.txt” to “.srt” manually.
If you don’t want to spend hours counting seconds, here are some of the best subtitle editors to help you with this task:
Basically, all you need to do is play your video, insert your subs while you’re watching it, and customize them.
And that’s how easy it is. See? We told you adding subs to videos is a piece of cake 😉

