


Get Movavi Screen Recorder with a 30% discount!
We use cookies to improve the services we offer you. By continuing to browse this site, you consent to keep them in accordance with our Privacy Policy.
×
 7,167
7,167
 15 min

Everybody loves GIFs – no proof required. We’ve all either shared or received a funny gif from someone at least once in our lives.
These animated pictures are an integral part of social network and instant message conversations – not only because they’re funny, but also because they’re easy to share. GIFs are small files, so they can be used pretty much anywhere. Send them as non-verbal replies to messages, attach them to posts, use them as comments – you name it. In fact, in the past few years, GIFs have become a kind of a universal internet language for expressing reactions and emotions – easy to understand, no translation required.
Read on to find out what GIFs actually are, where it’s best to use them and, most importantly, how to make a GIF of your own.

GIF stands for Graphic Interchange Format, which is exactly what this type of content was originally designed for. It was invented back in 1987 at the dawn of the internet era, when it was one of the few formats that could be processed by most computing devices.
The secret of GIFs is that, as much as they look like short films, they don’t have anything to do with video. A GIF is a bitmap format for graphic images – or, to put it simply, they are animated images consisting of a sequence of frames. Long gone are the days of punch cards and floppy disks, but somehow GIFs managed to survive and triumphantly conquer the Internet – much to our delight.
GIF is now one of the most popular formats for memes, digital postcards and interface elements. It is widely used in content marketing, advertising and even in business presentations. Because they are so easy to share, GIFs have great viral potential – which makes them one of the cheapest yet most practical marketing tools.
Sometimes GIFs are used as independent content units. You often see them on social media and forums instead of YouTube videos, as they are much more convenient: no links to click, less time for loading, and you don’t even need to turn off the sound.
The role of GIFs in today’s communications is familiar to most people. If you haven’t amassed your own collection of GIFs for every occasion, it’s high time you started – and we’re here to help you.
Making a GIF from videos or photos is a piece of cake: there are free online services, handy desktop programs, and mobile apps to choose from. The process of creation usually takes just a few minutes – particularly if the original files don’t require any editing.
Remember, however, that GIFs don’t include sound. If the characters in your original video say something important, you’ll have to replicate that audio content in subtitles. Similarly, any instructions and explanations need to be replicated in text, especially if it’s not obvious what’s happening on the screen.
When it comes to YouTube videos, the easiest way to convert them is to make a GIF online. You don’t even need to access other websites to make it happen.
Open the video you want to extract from and just type “gif” in the browser address field, as you can see in the screenshot.
Press Enter. You will be automatically transferred to the YouTube to GIF service.
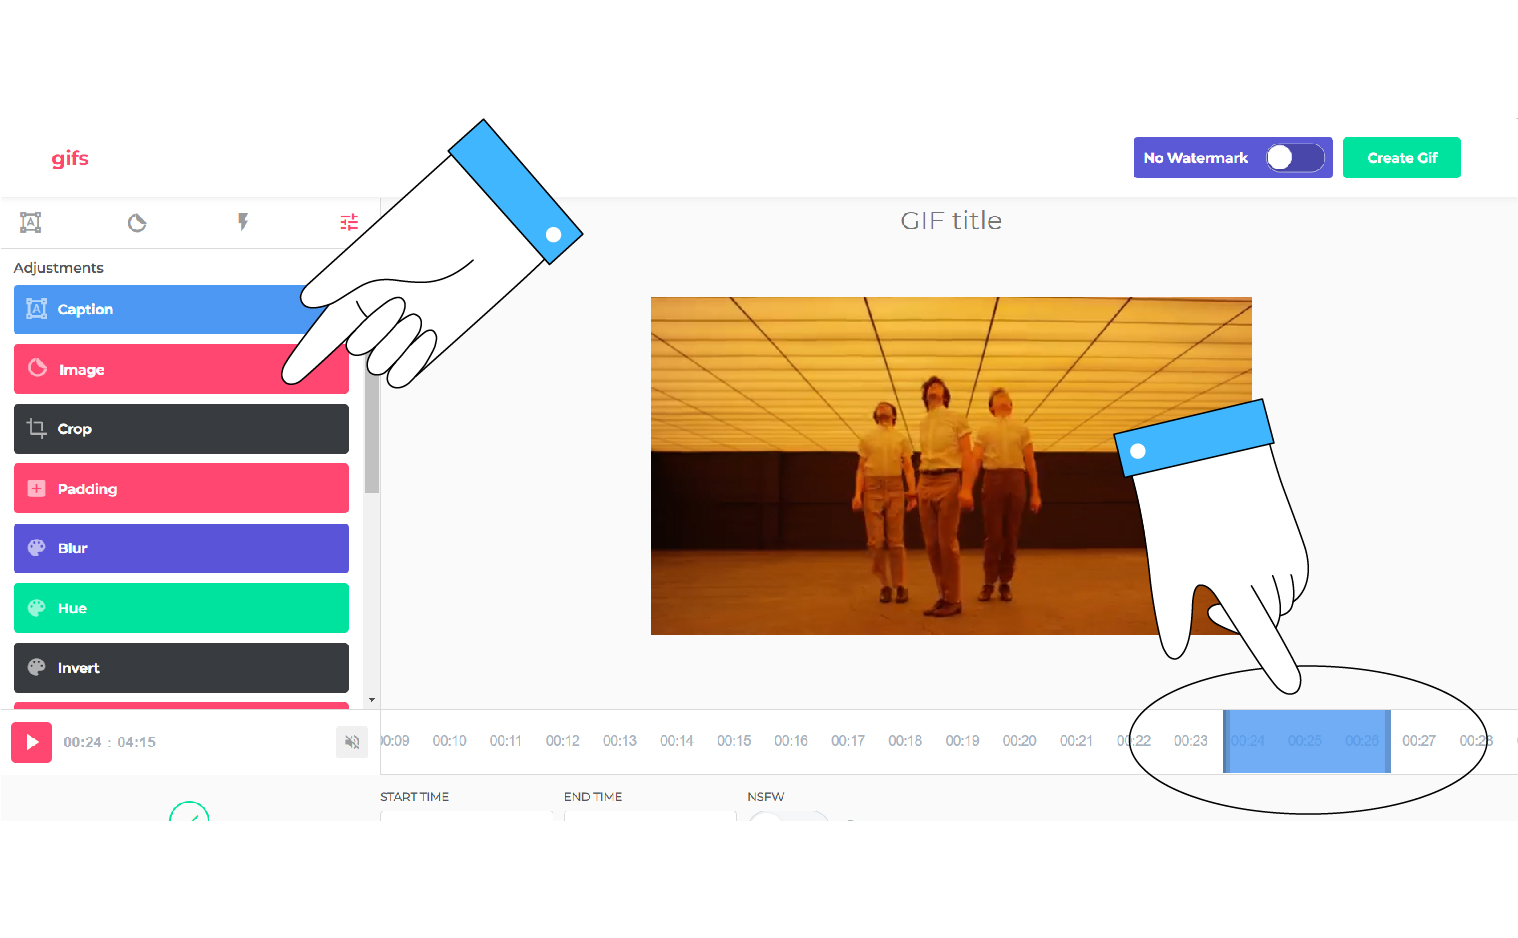
When the options window pops up, select the desired segment of the clip and click Create Gif. Set the title, tags and privacy settings. The watermark can be removed if you opt for premium access to the service, which costs $10. If you don’t mind the small logo in the corner of the gif, you can skip this step.
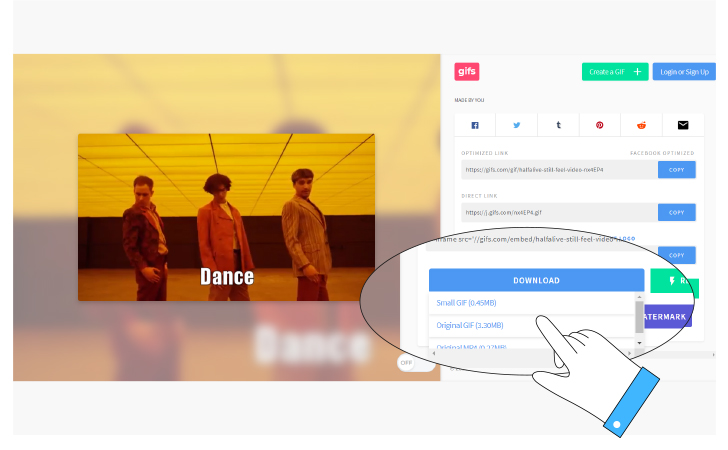
Click “Download” to download the result. The service requests registration for this option, but you can avoid this by doing it in a slightly different way. Paste the link from the Direct Link field into a new window and download the GIF directly from the browser.
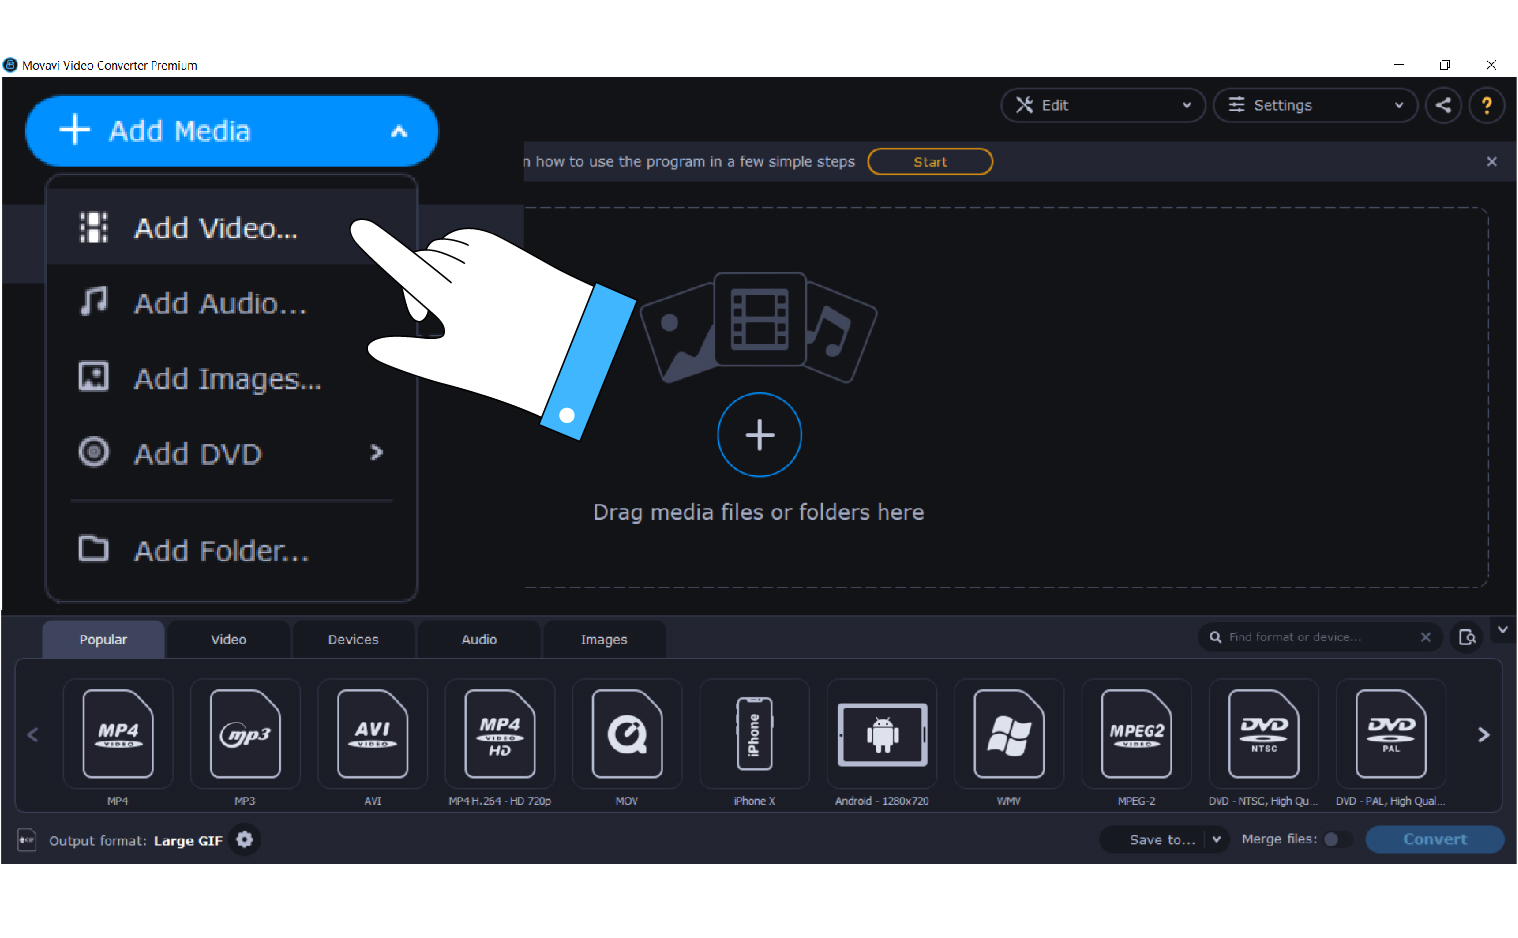
Although Movavi Video Converter is primarily designed for converting videos to various formats, it can be used for making GIFs, too!
Open the program and upload the source material by clicking on the Add files button in the upper left corner.
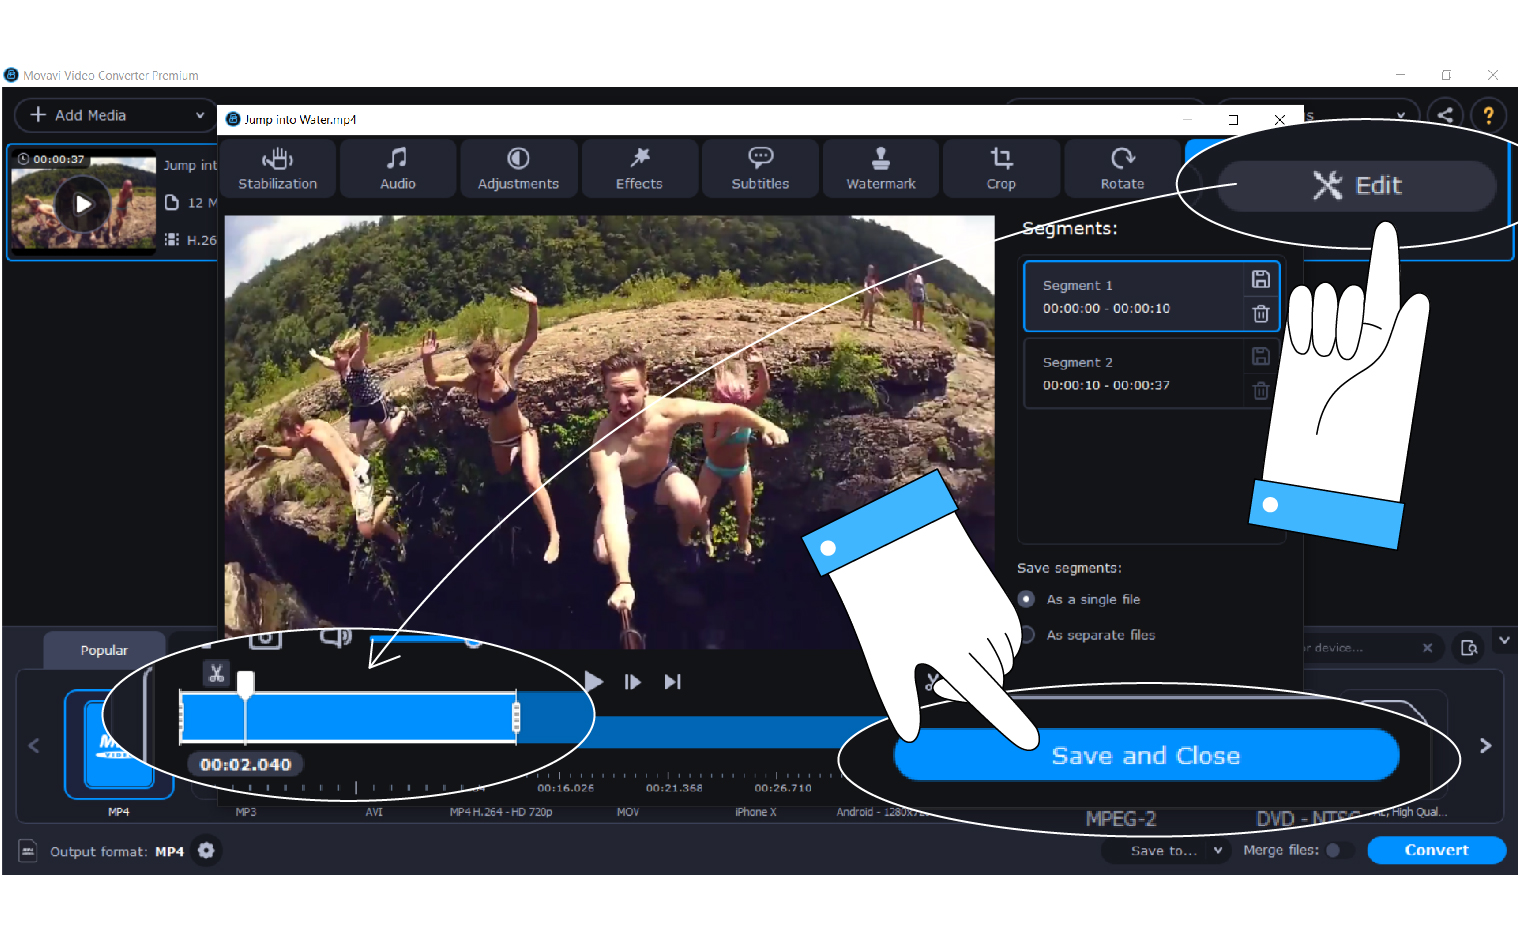
Click the Edit button on the right. Select the segment you want to turn into a GIF.
Select the format for export at the bottom of the window. Open the Pictures tab, select GIF and set the desired size.
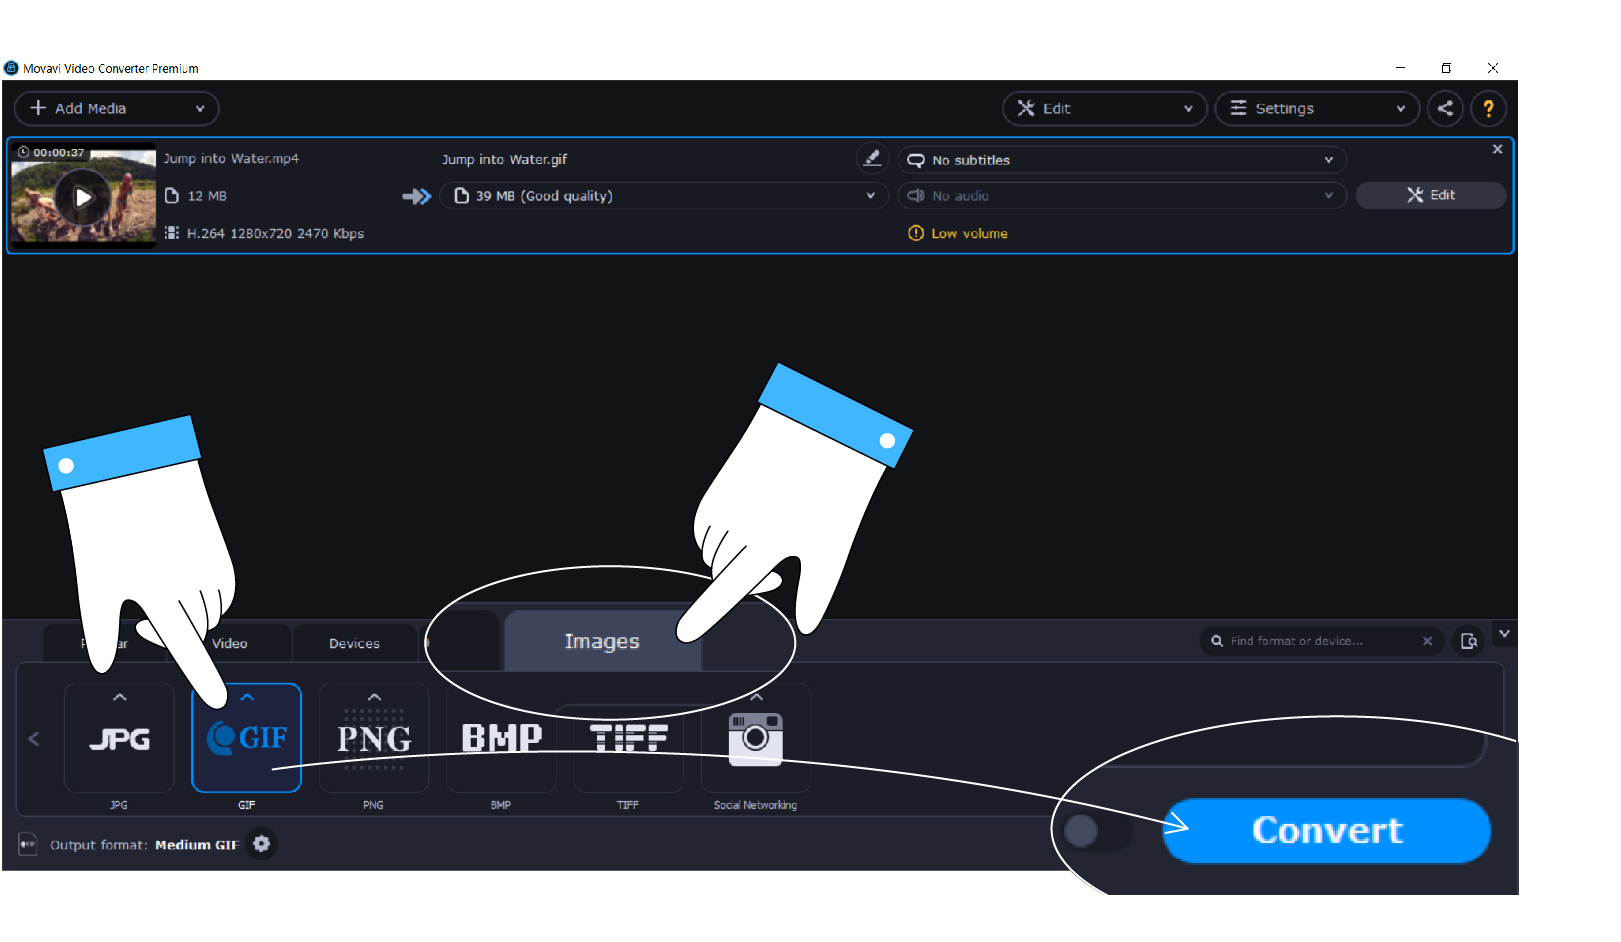
Select the location to save the file to and start exporting. The folder with the file will open automatically once the processing is finished.
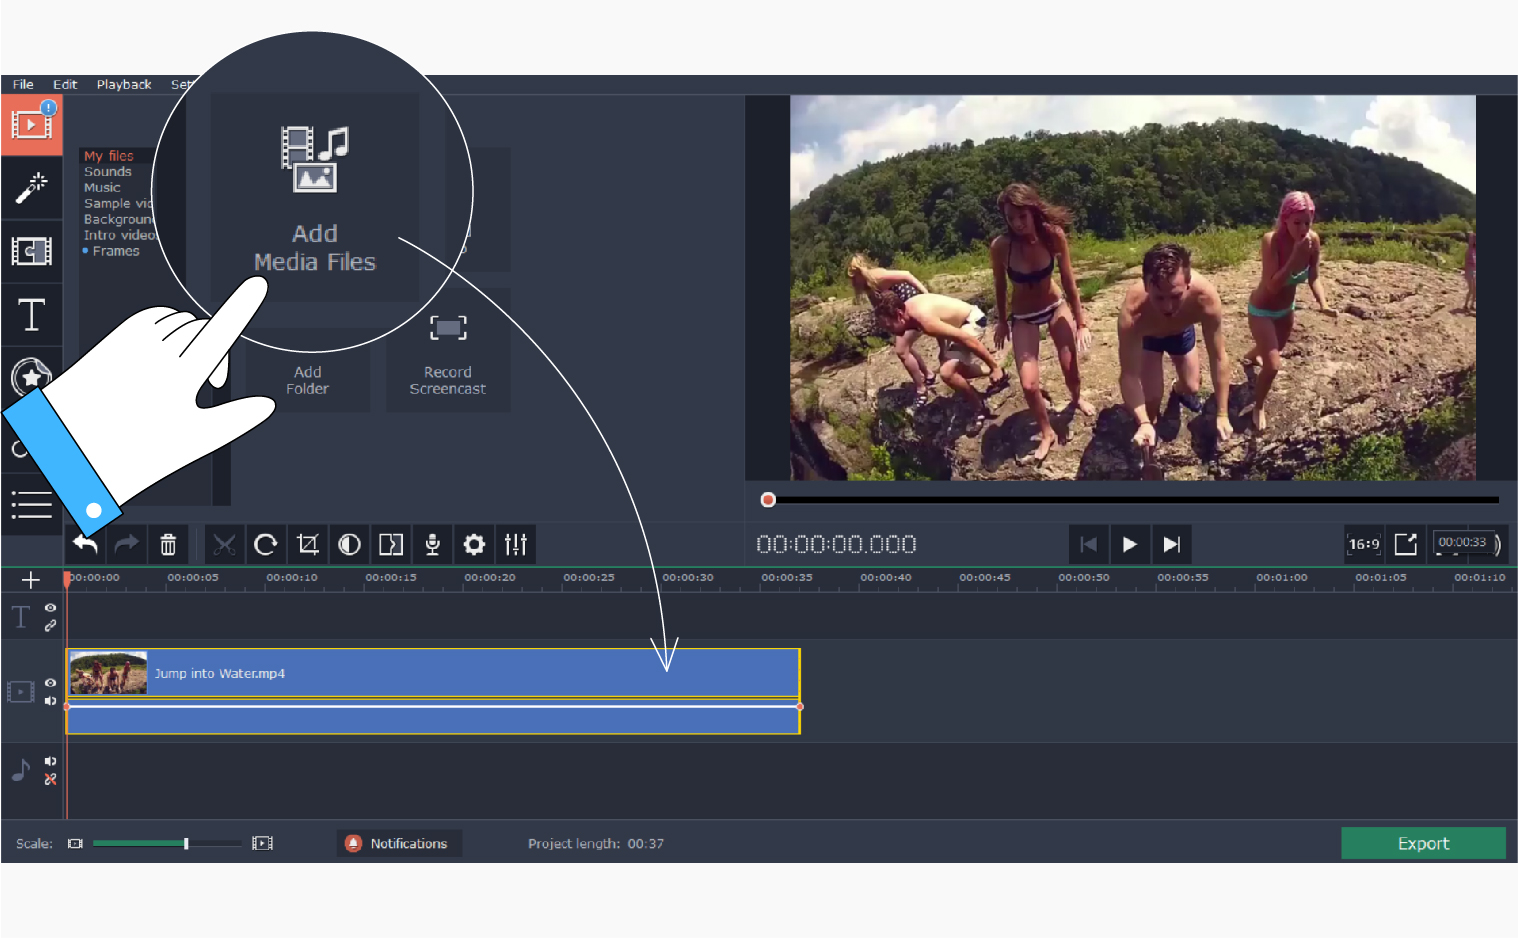
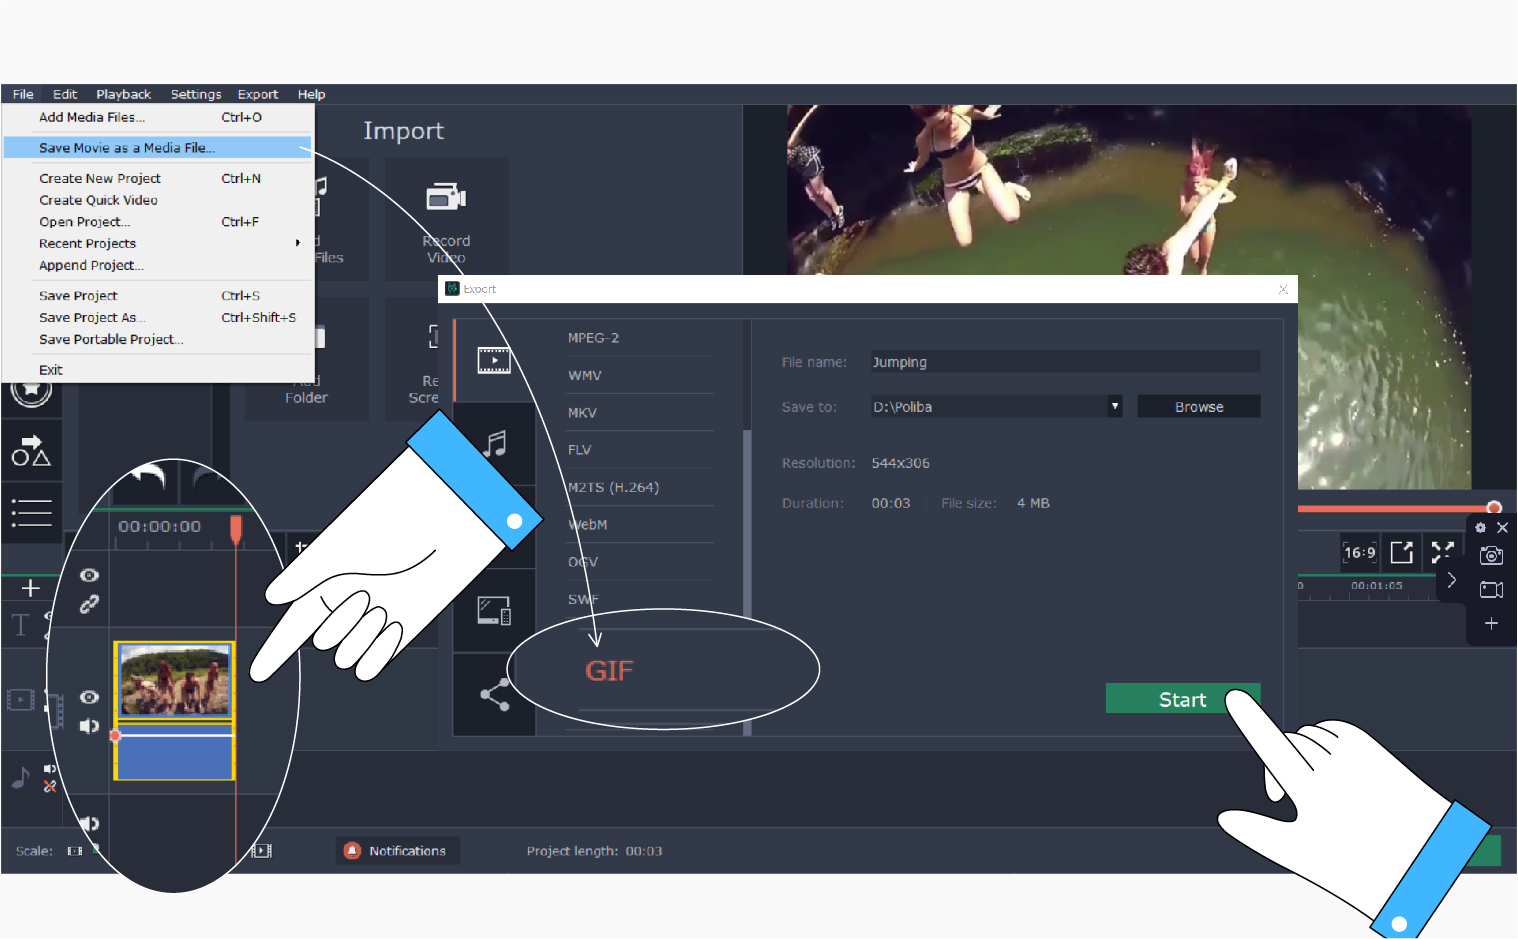
You can also create a GIF from a video in our Movavi Video Editor in just three steps:
Enjoy our special blog reader discount on Movavi Video Editor Plus!
Promocode: SUPERBLOG
Download Movavi Video Editor Plus with 10% discount for Windows
Download Movavi Video Editor Plus with 10% discount for Mac
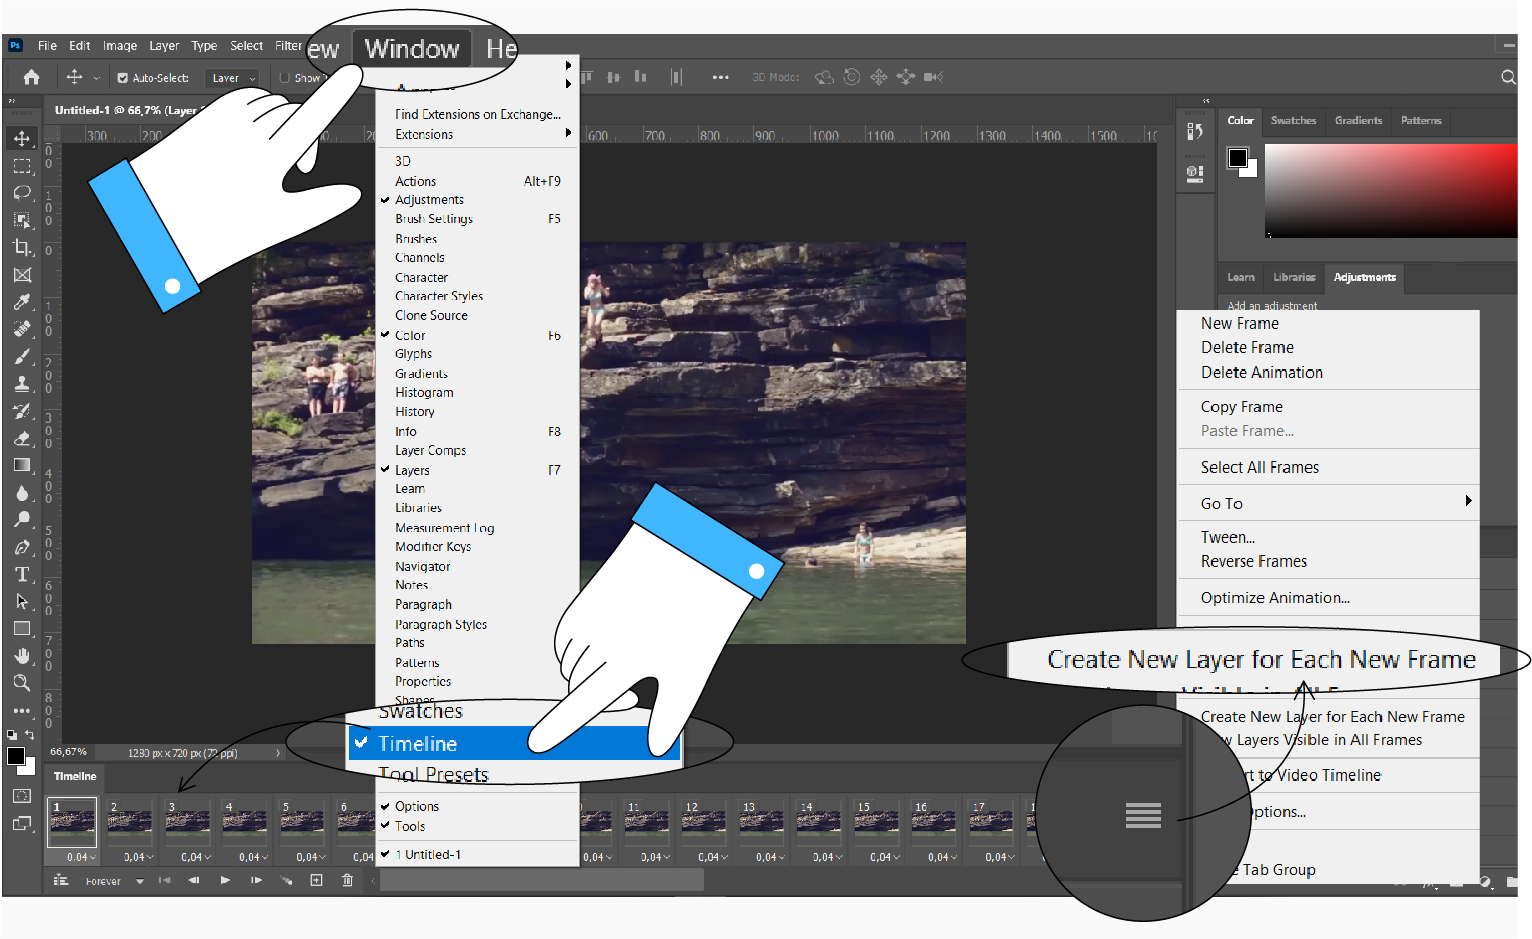
With small video files under 50 MB, you can create GIFs in Photoshop. Larger files are harder for the program to process.
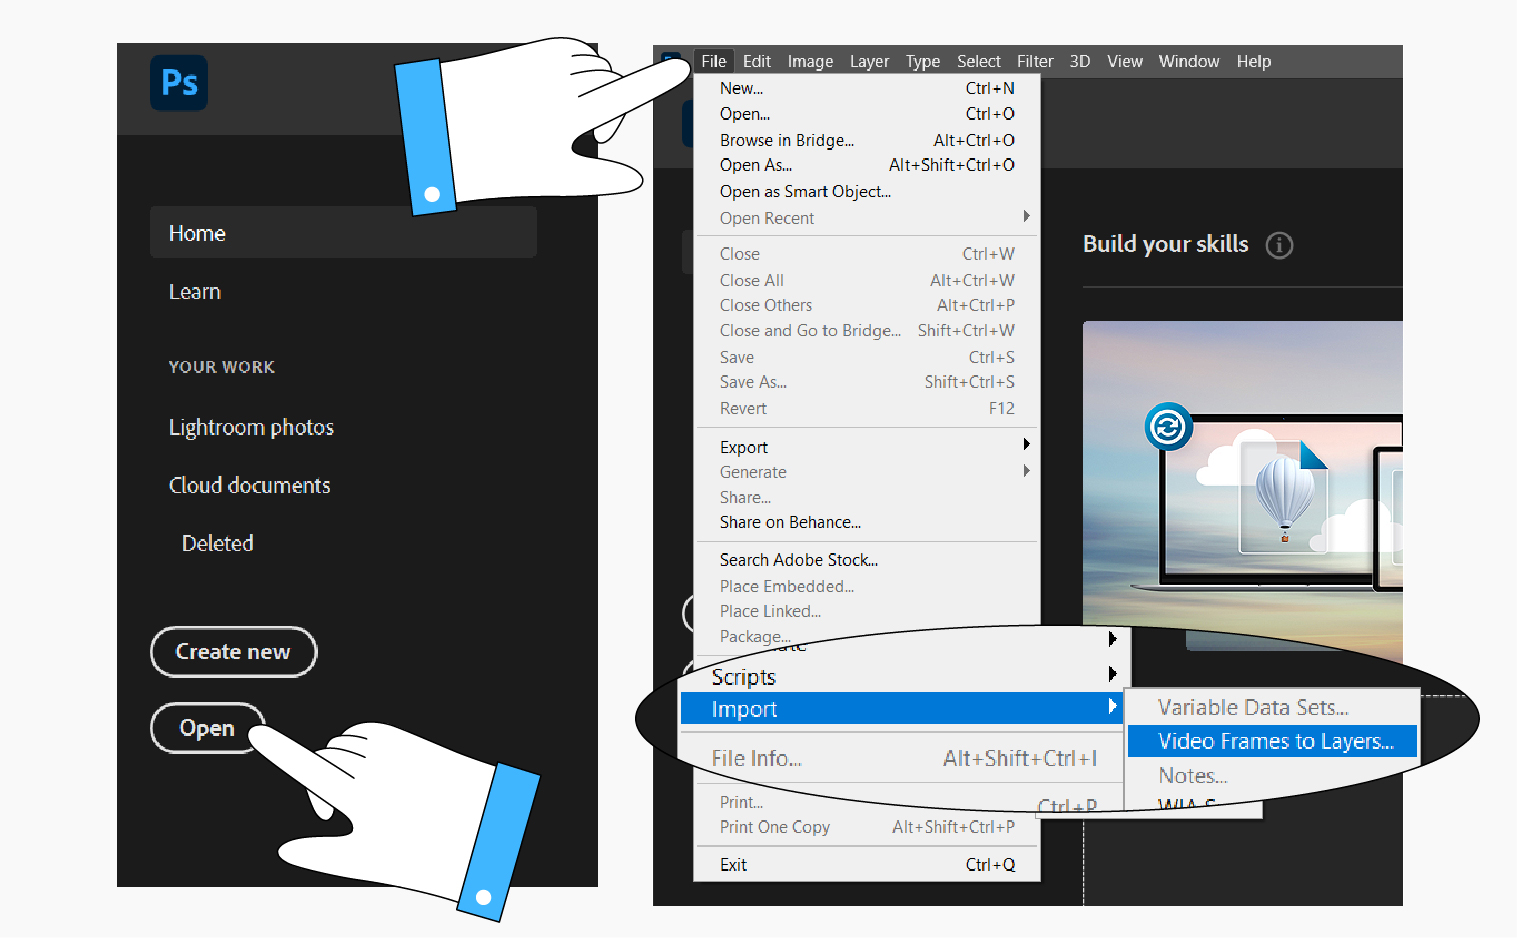
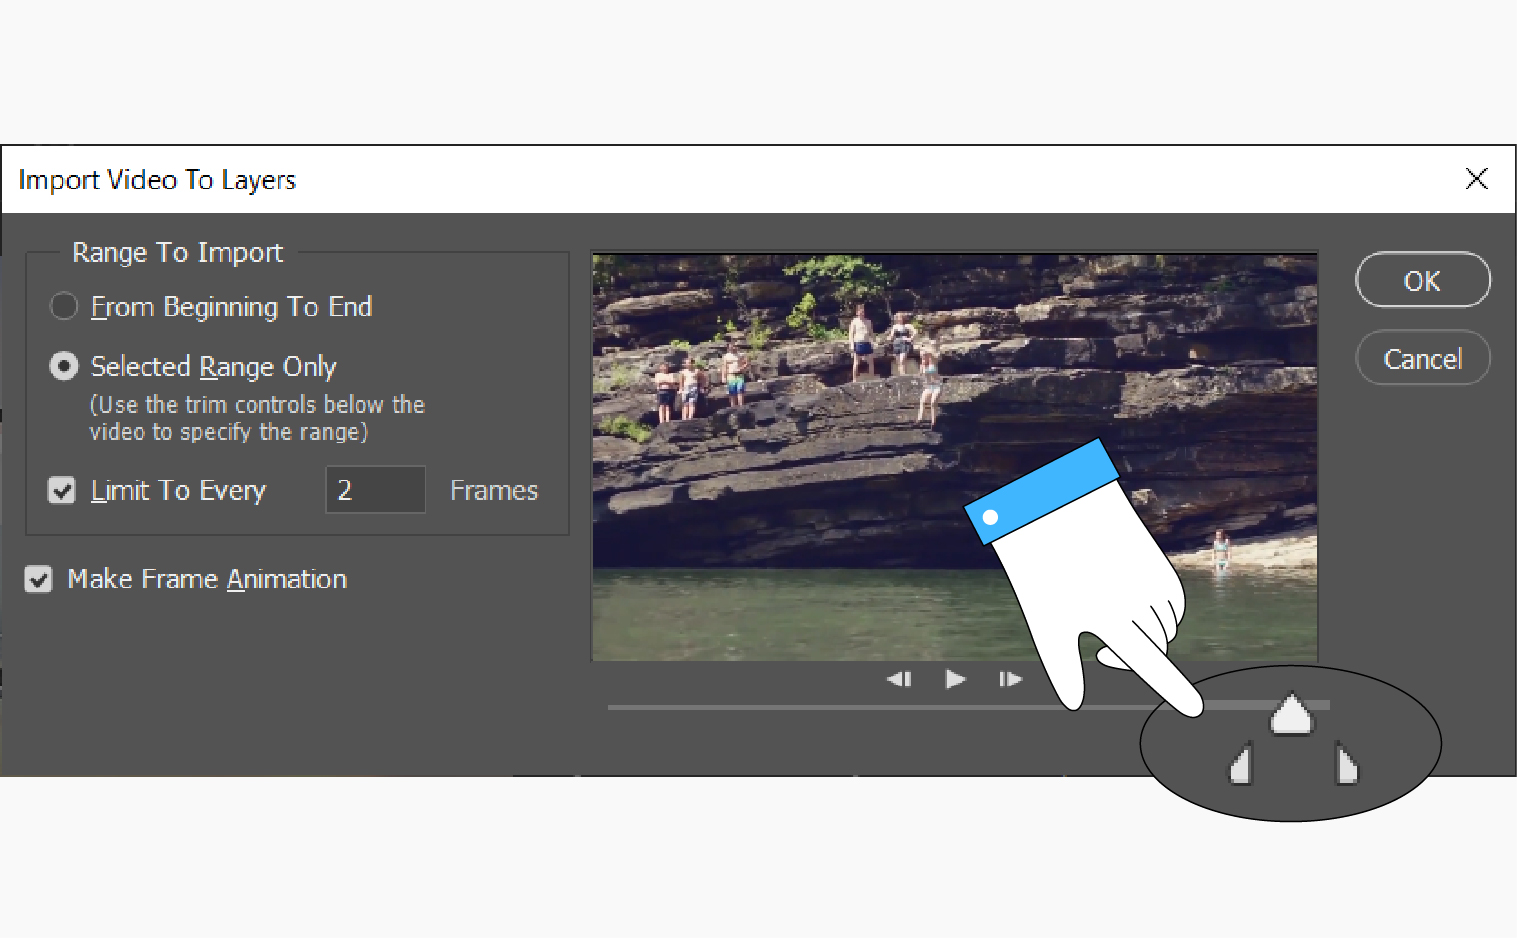
Select a file. Once the import window comes up, select the desired segment. In the Leave every… checkbox, you can put the number 2 or 3 if you want to make the gif smaller. This setting will retain every 2nd or 3rd frame. This will affect the smoothness of the video a little, but the resulting file will be smaller.
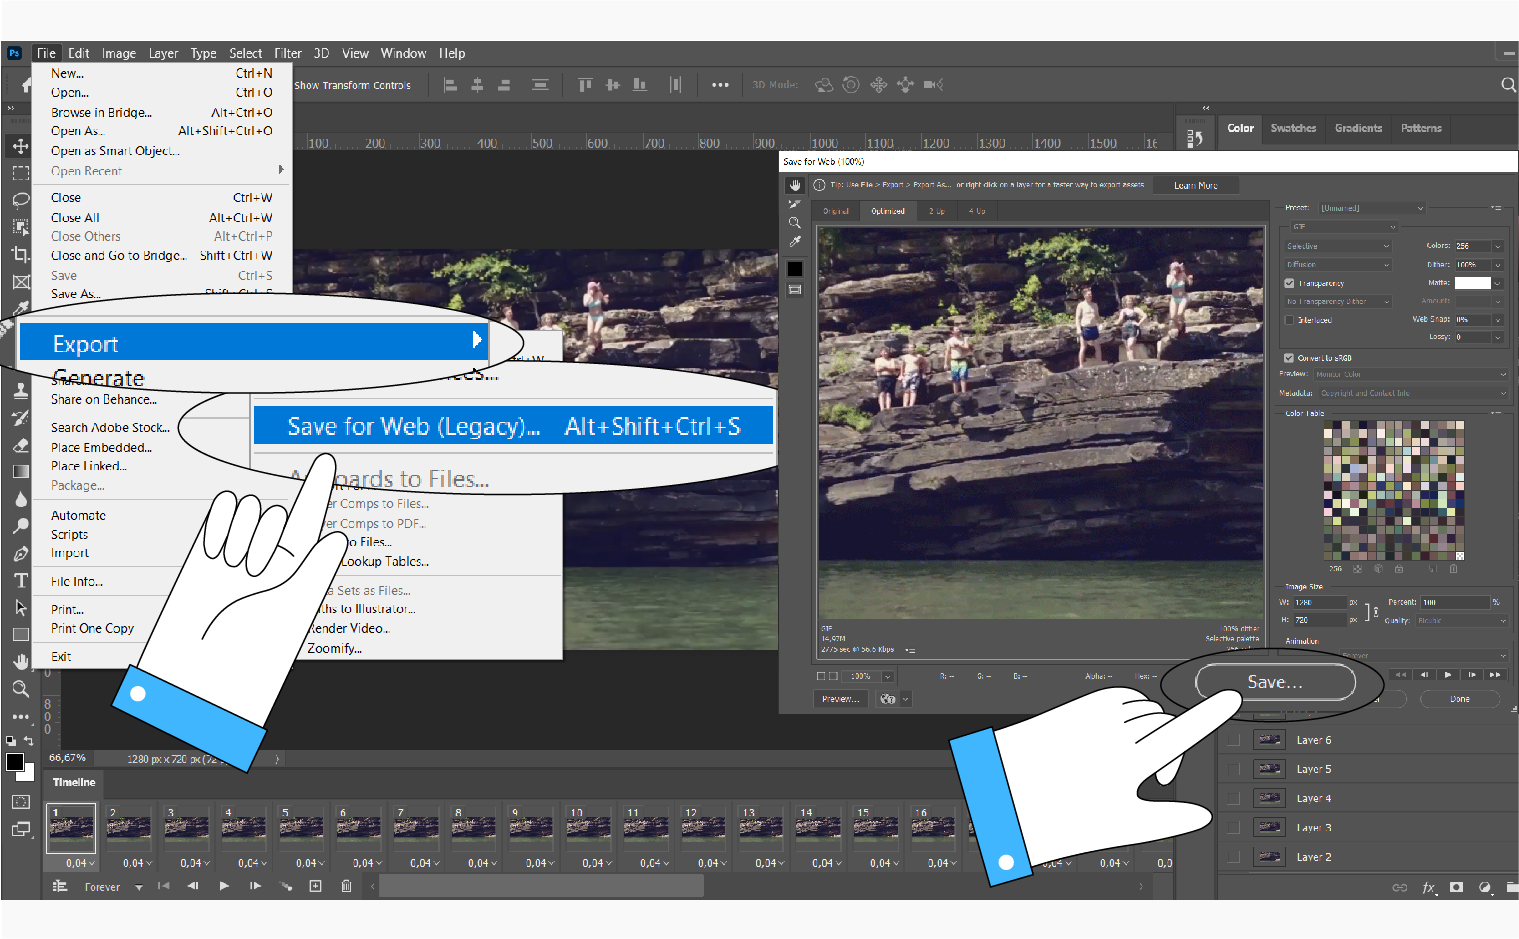
Export the result for the web.
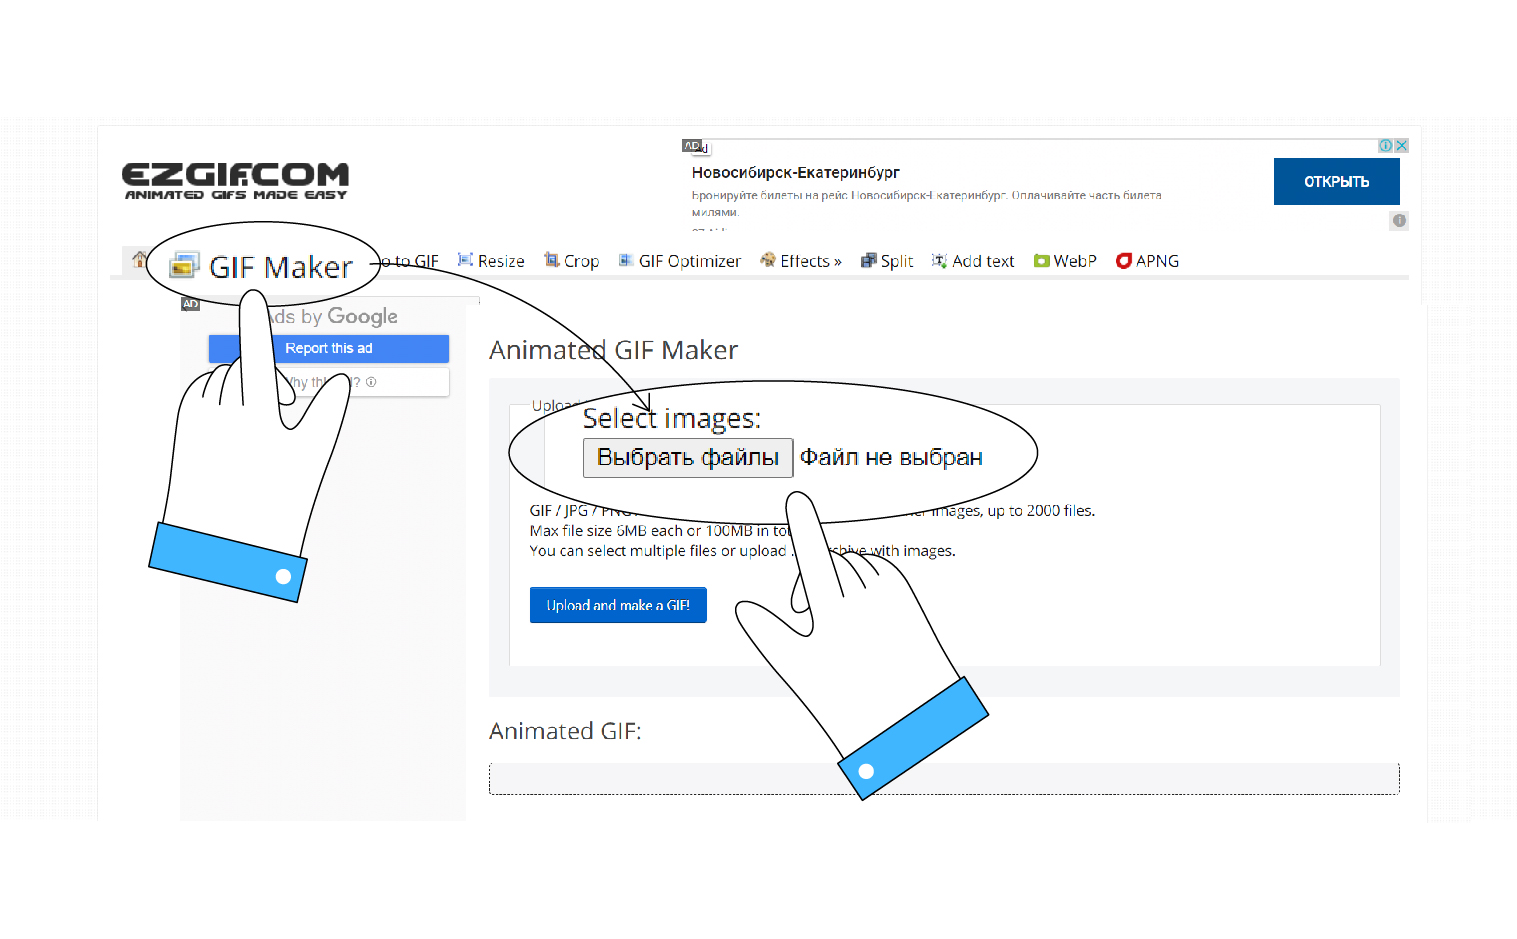
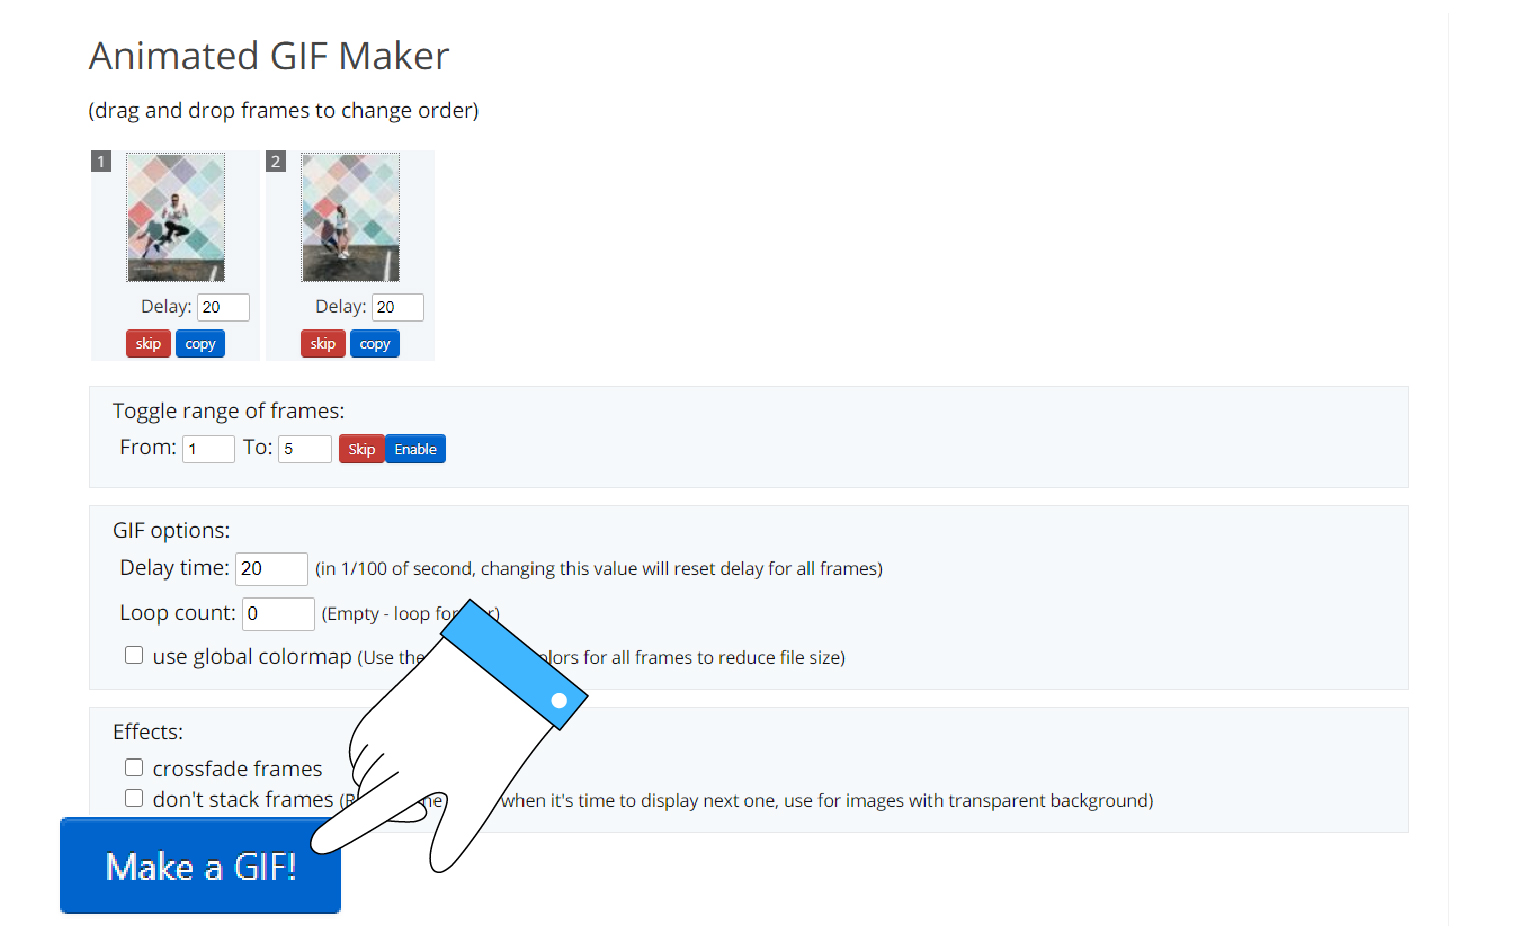
You can also use Photoshop to create an animated file from still images. However, there’s a more accessible tool that you can use online – a free online service called Ezgif.
Saving screen recordings as GIFs is a great option for those occasions when you need to quickly send someone instructions on how to use certain software, save documents in a particular format, and so on. The easiest way to do this is with Movavi Screen Recorder.
1. Run the program on your computer and start recording your screen.
2. Once the recording is finished, you can edit the video in the window that pops up. Cut out everything you don’t need and click Save .
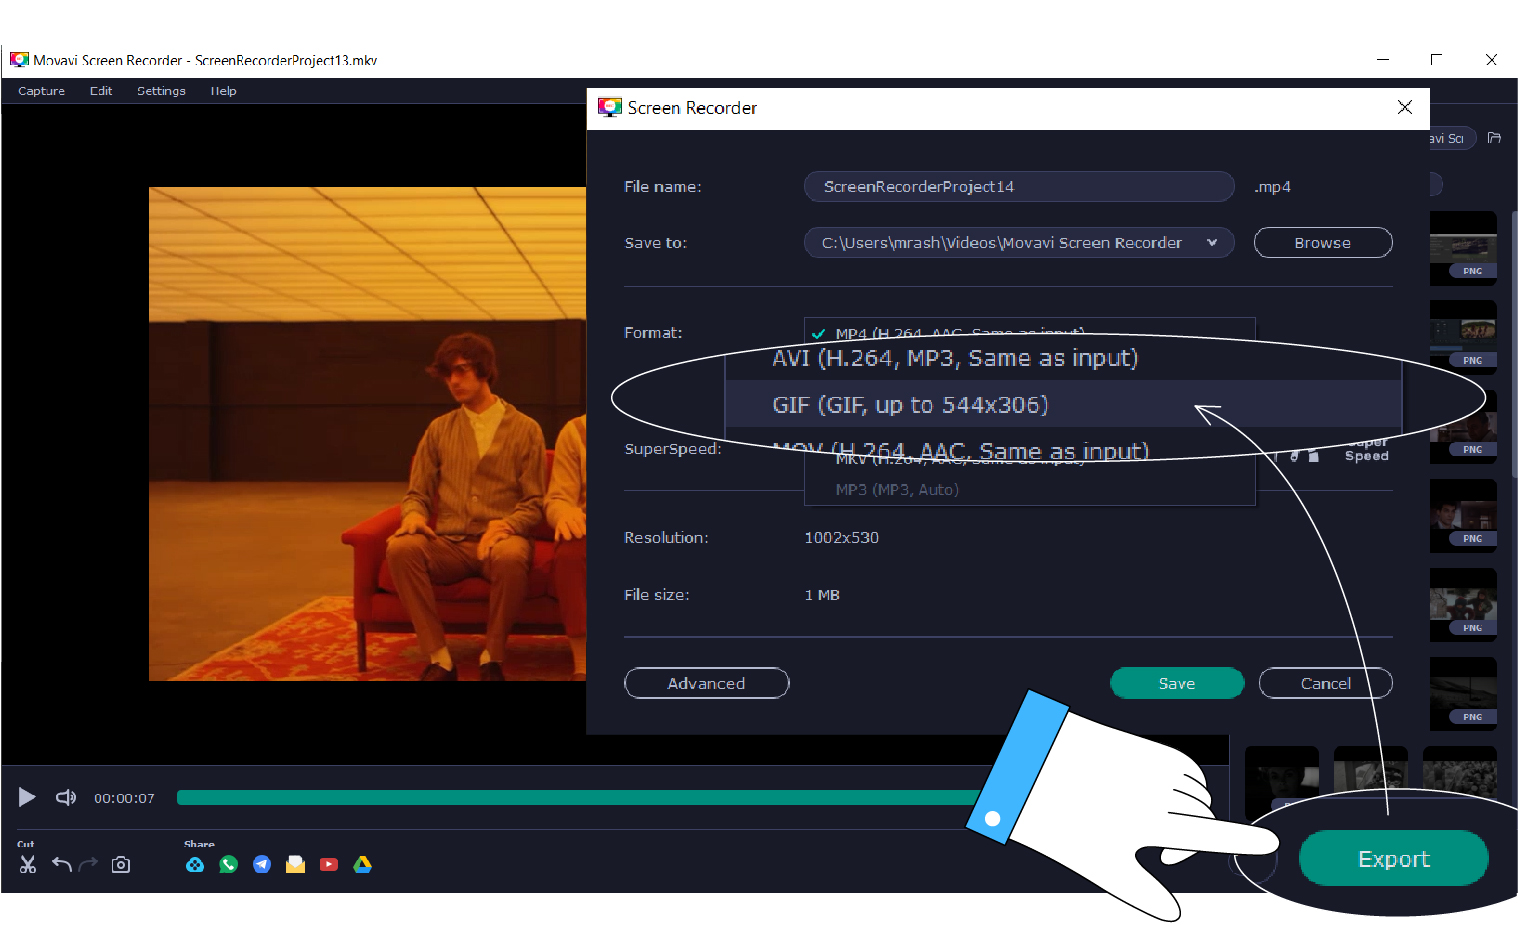
3. In the export settings window, select GIF format. Save the file to your computer.
Now you know how to create GIF instructions for colleagues and friends in minutes.
By the way, we’re offering a special 30% discount on Movavi Screen Recorder for all our blog readers1 Use the promocode BLOG while completing your purchase or simply click on one of the buttons below:
There are a number of apps for turning videos into GIFs on your phone. One of the most convenient ones is Giphy, a close relative of the well-known online service of the same name. It’s available for both Android and iPhone, and it’s free.
1. Open the application and click on the “+” button in the center of the bottom panel.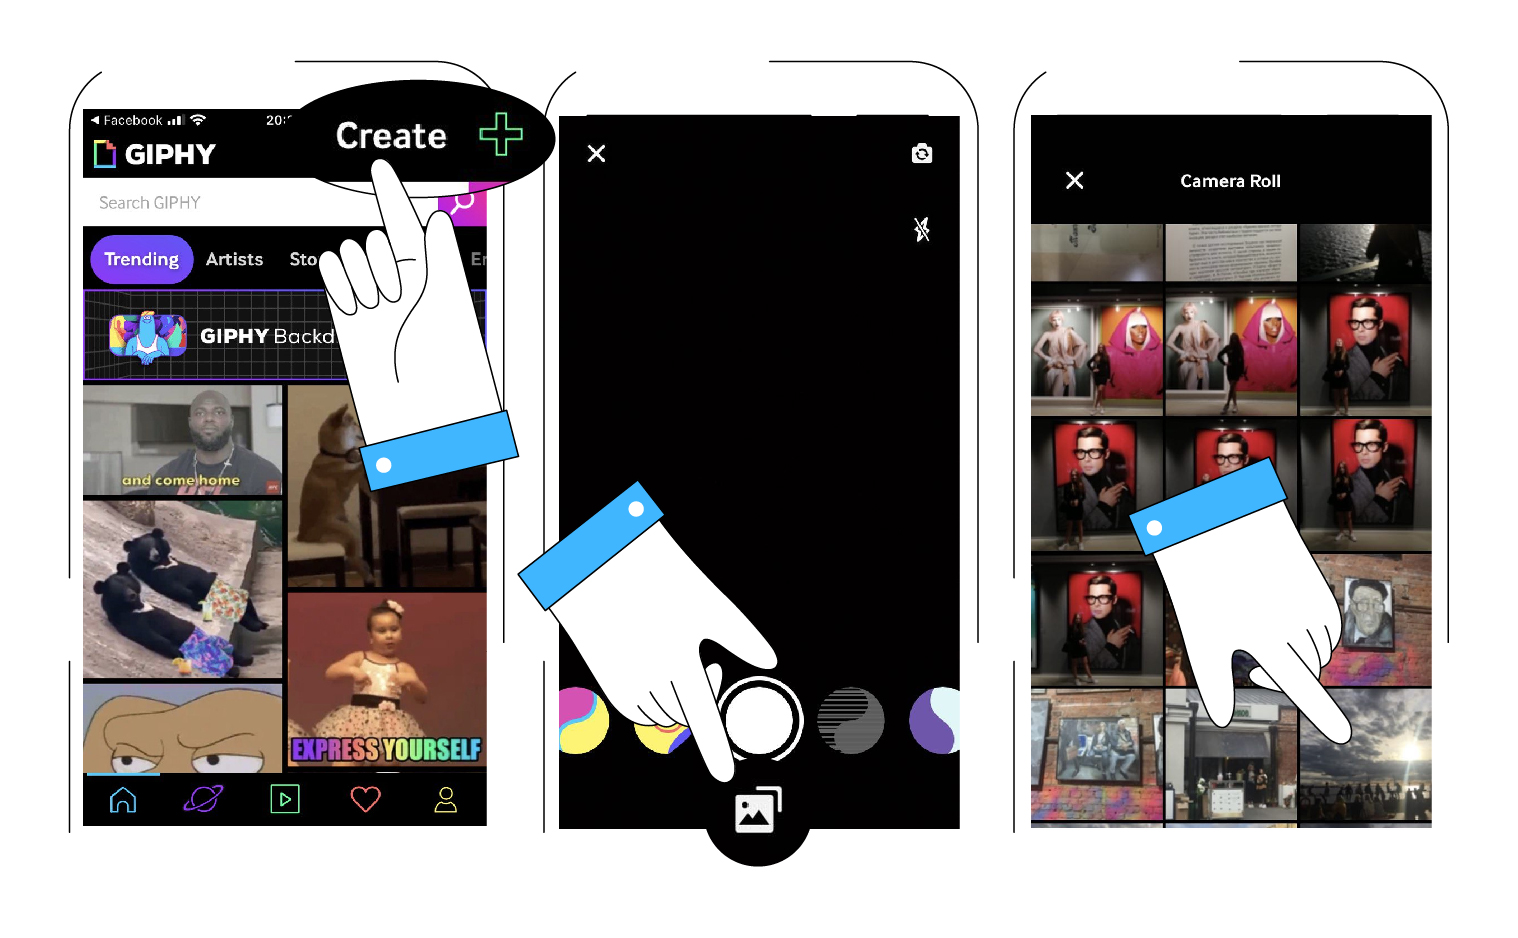
2. Record a video or click on the gallery icon on the right to download the content from your phone.
3. Add titles, filters and stickers as desired.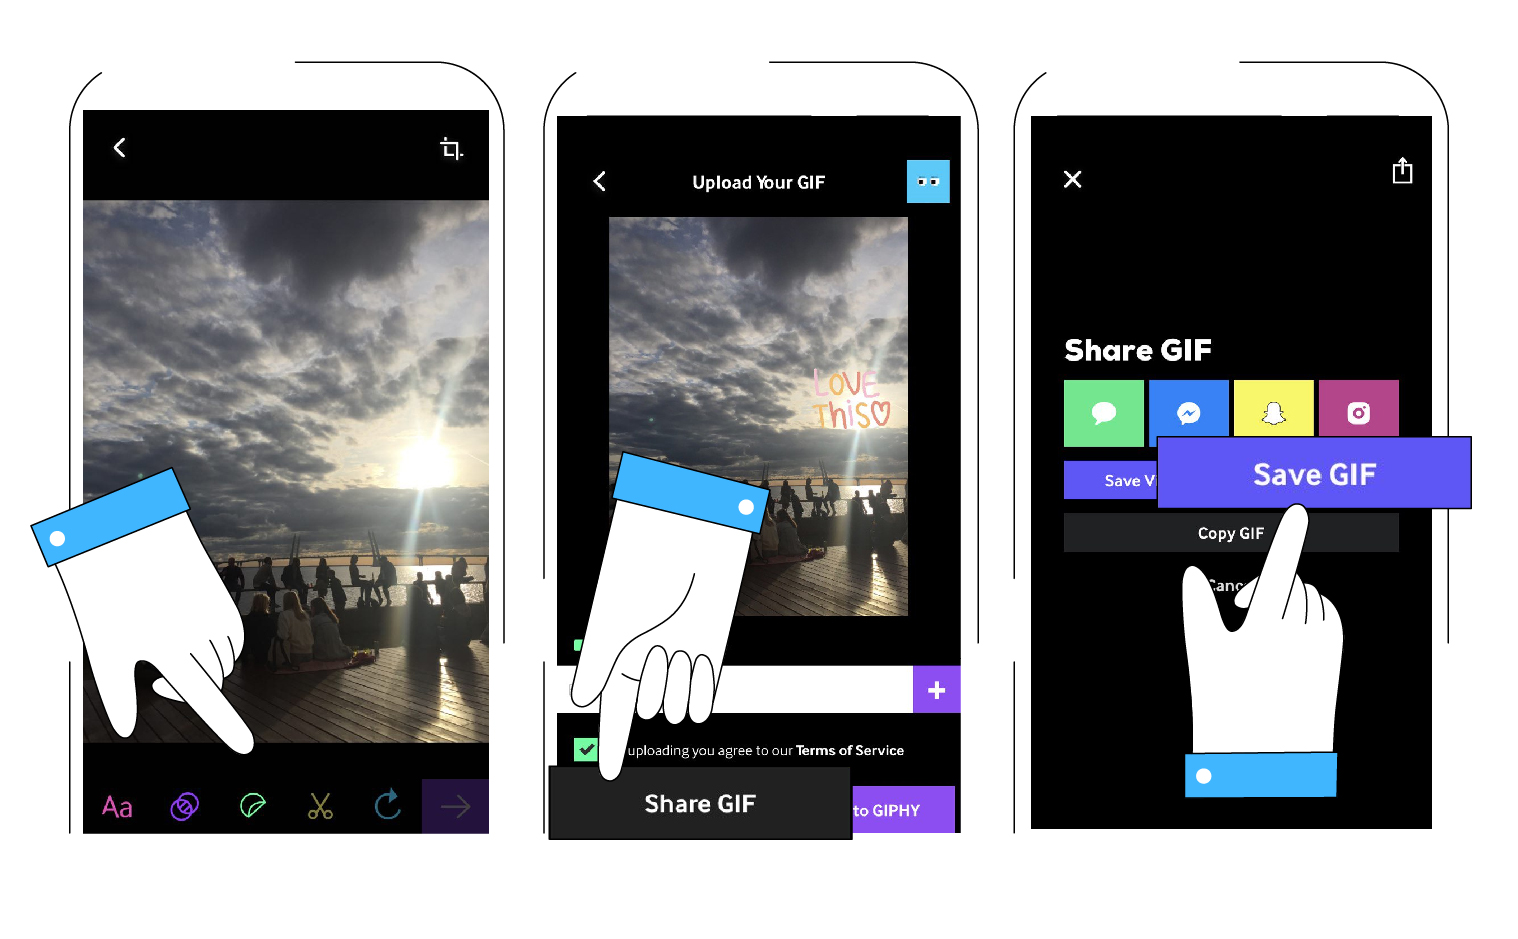
4. Download the finished result in video or GIF format. You can also upload your GIF to the Giphy library.

For those instances when you just need to convert a video to a GIF, any free online service with a convenient interface will do. Most of these resources do not provide extensive editing and customization tools. If that works for you, we’d recommend any of the following options:
Some of the programs we’ve listed above let you set the export parameters including the size of the GIF. If the service of your choice doesn’t provide this option, you can convert your GIF using VEED GIF Compressor or the same website ezgif.com website mentioned earlier. The maximum size of a GIF that can be processed through this service is 35 MB.
Remember that the smaller the GIF, the poorer the quality. You can reduce the number of colors or frames, or you can try applying compression. Think about how sharp you need it to be. If you’re illustrating an article, a presentation or an instruction, it might be worth opting for better quality. If you just want to share a funny moment from a video with your friends, a small file will be easier to transfer via any messenger.

Of course creating your own GIFs is always the more original solution. But sometimes it is useful to have access to ready-made options when you need to respond to something quickly. Here are our favorite resources for such occasions.

As with any other means of digital expression, GIFs need to be handled with caution. Make sure you always use them appropriately. We suggest avoiding GIFs in the following cases:
Animated cards and pictures with no clear purpose. Do not add animation to pictures for the sake of animation: flashing gifs with meaningless congratulations or anecdotes are simply annoying.
Animated interface. There is nothing wrong with animated banners, buttons and other page elements, but JavaScript will do the job better. Using GIFs to animate an interface has long been out of fashion – unless you are trying to recreate the atmosphere of the 90s on your website.
Controversial topics. This is particularly important for public and business accounts. Any GIF on sensitive political and social topics can backfire on your brand: there will always be someone who will find it offensive. In any ambiguous situation, it is best not to use this kind of content when you are speaking on important public issues. In other cases, it is better, in principle, to use already accepted content: a clip from a popular movie, something featuring cute animals, or any of those memes that have already become viral and won’t offend anyone.

If you make GIFs using Movavi programs, don’t forget to tag us in your posts and add relevant hashtags: we look forward to sharing a selection of our users’ GIFs next time. Alternatively, you can send them to us in the comments directly below this post.

