


Audacity is an open-source free digital audio editing and recording software available on Windows, macOS, Linux, and UNIX operating systems. Audacity is one of the great alternatives to Garageband music editing software, or if you want to explore further great audio interface for vocals can be found on the web in a matter of seconds. Audacity is a powerful tool that can help you learn how to record, mix and produce audio. To gain access, simply visit Audacity’s official website to download a copy and begin tweaking your files.
Apart from ease of use, what makes the software so great is that it supports various audio formats, including WMA, MP3, AIFF, WAV, or AAC. This makes it an excellent tool for novices as well as experienced users.
What is Audacity?
Audacity is a free, open-source software program designed as a multi-track editor for various audio formats. It also lets you customize the program interface. From live recording video to playback through different operating systems, Audacity offers a comprehensive set of audio editing features.
Let’s take a look at some of them.
Audio recording and audio effects
Audacity can record audio from a standard microphone or mixer. Other than that, it can also digitize audio files from other recording forms such as videos or recordings. Furthermore, if your computer has the correct type of sound card, Audacity can also record audio from a live stream.
Audacity comes with many built-in effects that are free to use to edit audio files to your liking. With the software, you can:
✅ Do a real-time preview of your LADSPA, LV2, VST, and Audio Unit effects on your Mac devices
✅ Handle plug-ins by using the plug-in manager that can take care of the installation as well as the addition or removal of effects and generators from the menus
✅ Generate different tones, silence, instruments, noise, or rhythm tracks
✅ Alter the pitch without changing the tempo
✅ Alter the tempo without changing the pitch
✅ Remove static, hiss, hums, or any sort of background noises
✅ Modify frequencies with equalization, high-pass, low-pass, bass and treble, and notch filter effects
✅ Adjust the volume in an audio sample with amplify, normalize, compressor, fade in, fade out, studio fade out, crossfade tracks, crossfade clips, and adjustable fade effects
✅ Reduce or isolate vocals
✅ Use the Auto duck effect to create voice-overs for your podcasts
Among other effects, there are:
- Distortion: Using this effect, you can distort your audio file by making it sound ‘crunchy’ or ‘abrasive’
- Truncate Silence: Using this effect, you can reduce passages where the audio is below a certain threshold. It will see how many of these spaces exist and then reduce them to avoid too many silent parts
- Wahwah: This effect creates sound by using a band-pass filter that can be moved. An LFO (low-frequency oscillator) moves the pass-band back and forth in the frequency spectrum
- Phaser: Using this effect, Audacity combines phase-shifted signals with the original signal. The movement of these phase-shifted signals is regulated using a low-frequency oscillator
- Reverb: This effect adds reverberation, which adds quick and altered repetitions which are combined with the original sound to increase the ambiance. This makes the file sound more authentic
- Reverse: This effect reverses the audio – the end is heard first, whereas the beginning moves to the end. People use this to buffer out inaccuracies like inappropriate language. On the other hand, some use this feature to hide hidden messages within the track
- Echo: This effect repeats selected audio again and again to replicate an echo effect. Each progressive repetition is softer and is played after fixed timely intervals
- Limiter: The effect passes signals below a specified input level. This signal can be unaffected or gently reduced while preventing surges of stronger signals from surpassing the defined threshold
- Paulstretch (extreme stretch): This effect slows down the audio significantly; however, the change in pitch is non-existent
Editing and converting audio
The app offers basic and advanced editing features. You can use Audacity to trim audio, split tracks, merge them, and many more. Thanks to the timeline quick-play or scrub and seeking feature, you can pinpoint the exact location where you want to make a change and begin editing.
There are no set limits; you can edit a large number of tracks as many times as you please, with unlimited sequential undo and redos. Also, Audacity lets you keep tracks and labels synchronized, allowing you to label tracks with selectable sync-lock tracks features.
Moreover, the software’s draw tool lets you change individual sample points. The envelope tool enables you to fade the volume up and down effortlessly. The automatic crash recovery feature lets you recover your work in case of a crash or any other problem.
Cross-platform operation
Audacity is a cross-platform app, which means that it can operate across different operating systems. So, for example, an Audacity file edited on a Windows computer can later be edited on an Apple device.
Digital effects and plug-ins
Audacity supports LV2, Nyquist, LADSPA, and Audio Unit plug-ins. Aside from that, Audacity also supports third-party plug-ins. However, only those written in the Nyquist programming language.
Multitrack mixing
In Audacity, you have the ability to import multiple tracks at the same time. Once each track is on the timeline, it will then begin to play on its own. Using Audacity’s handy Time Shift tool, you can then decide when what track will start or stop. You can utilize this functionality for making presentations, editing a short video, or even a full-length film.
How to trim audio in Audacity
This is one of the most important steps when working with Audacity. Particularly for content creators across various platforms as they need to edit and trim various audios that fit their purpose. Read on to learn how to trim in Audacity.
Importing audio in Audacity
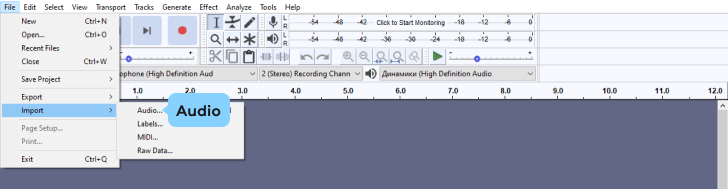
There are three methods to import audio into Audacity:
Click on File, then Import, then Audio. You can choose a single or multiple audio files, which Audacity automatically imports into the existing project.
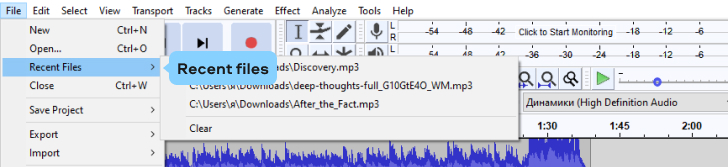
Click on File, then Recent files. Doing this will import the first of the 12 most recently saved or imported files.
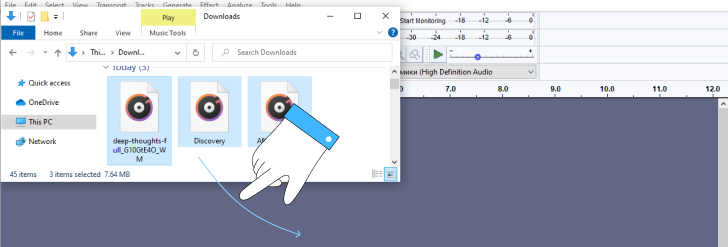
Drag and drop
For Mac and Windows: Audio files can be directly dragged and dropped into an already opened Audacity project. Another way of doing this is to drop the files over the Audacity icon.
For Linux: You can simply drag or drop your files into an Audacity project window that is already open. Or you can choose File, then Import, and then Audio. Or, you can drag and drop one or more files onto the Audacity icon. The first file gets uploaded, but all others will prompt an error.
How to individually trim beginning or end
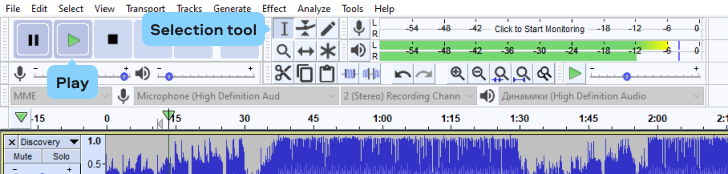
To start the editing session, choose the Selection tool in the toolbar. This tool resembles the letter “I.”

For added accuracy, you should zoom into the timeline. This can be done by using Ctrl + 1 or clicking on View, Zoom, then Zoom-in.
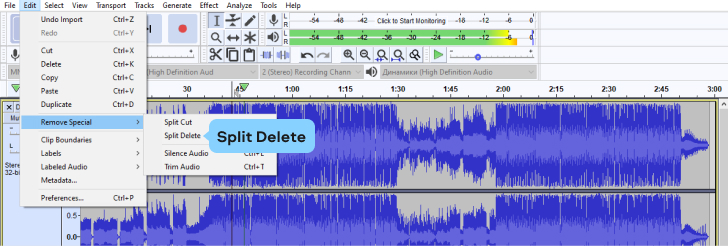
The step that follows requires you to click where it says Edit. Now you can press Alt + K + Ctrl, or you can click on Remove Special and Split Delete within the Edit menu.
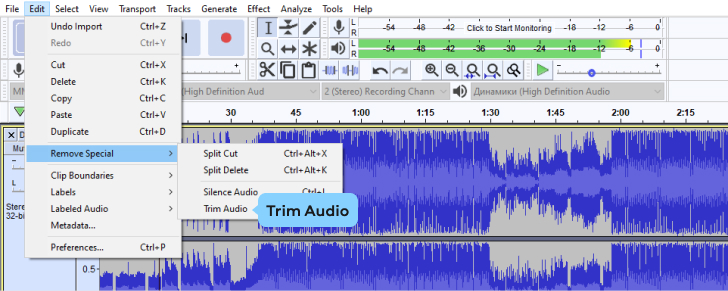
How to trim both beginning and end simultaneously
To trim audio at both ends, you need to use the Trim Audio feature in Audacity. You start by using the Selection Tool to choose the audio that you do not want to be altered.
Press the play button or the spacebar to make sure you have the correct audio file selected. Once done, click on Edit, Remove special, then on Trim Audio or Ctrl + T.
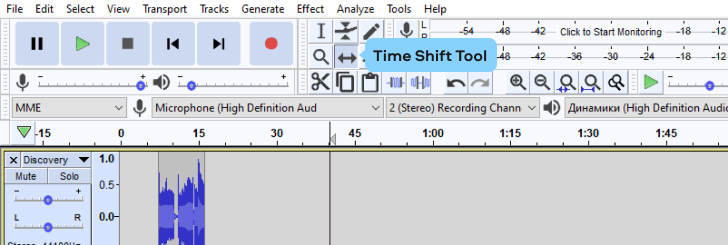
To move the recording to the beginning, use the Time Shift Tool button. Once the tool has been engaged, use the mouse’s left click to drag the recording to the time that you want it to be at.
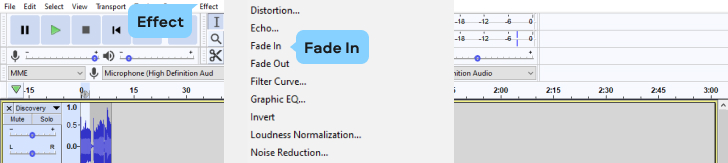
For added refinement, the fade-in or fade-out feature will be of great help. By using the Selection tool, choose the part of the audio you like, then click on Effect, and then on Fade-in or Fade-out.
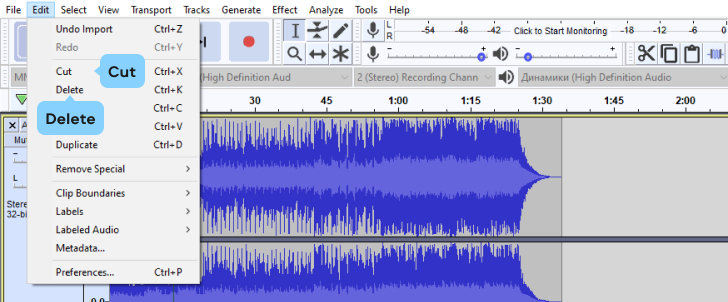
How to cut audio
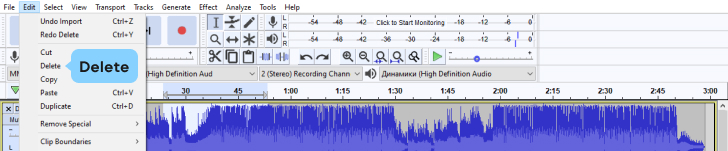
To cut your audio in Audacity, you start by using the Selection tool to select the audio segment you want to omit. This part of the audio will now become darker. For precision, make use of the featured finger tool that allows you to drag in or drag out.
Once you have the correct section selected, play it back to make sure.
Next, press Delete on your keyboard or Edit > Delete on the top menu.
How to split tracks
If you want to split tracks in Audacity, you will start by opening the edit menu, then click on Clip Boundaries, and finally on Split. The point where the audio is split will be divided by a dark line.
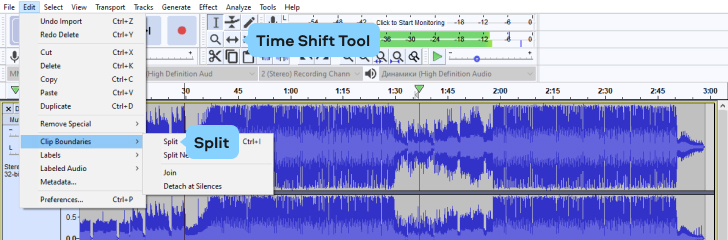
Finally, press the Time Shift Tool so that you can drag the gap in the audio.
Exporting audio
To update your track and save it, start by clicking on Export Audio. Next, type the name of your file and click Save. If you decide to save the file as an MP3, you will be presented with the option to choose the quality or bitrate that fits your needs.
How to trim multiple tracks in Audacity
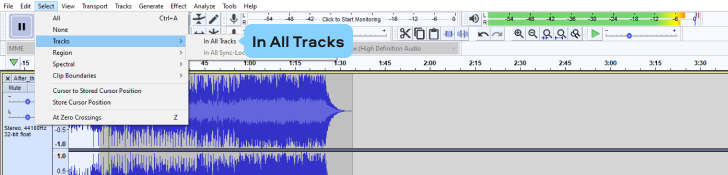
Let’s assume that you have twenty tracks, and you want to trim the first 10 seconds of all of them simultaneously. You can import this batch of tracks into Audacity then follow the steps listed below.
The first step is to select the first 10 seconds in the first track.
Next, click on Edit menu > Select > In all tracks.
Next, click on Edit menu > Cut or Edit > Delete.
Doing this will trim the first ten seconds for all twenty of your tracks at the same time.
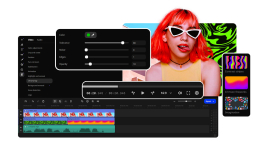
Trimming audio in the Audacity alternative – Movavi Video Editor Plus
With digital content creation on the rise, creators have to edit audio as well as video data to create the final product. How about a product that can do both?
That’s where the Movavi Video Editor Plus comes in. The video editing tool is complete with comprehensive video and audio editing features that you can use to tweak audio data per your requirements. The program offers a free trial so you can check its features before purchasing. If you’re curious about pricing, check the Movavi website for more information.
Ready to trim audio using the Movavi Video Editor? Follow these steps:
Step 1. Install the program
The first step is to install the app. Once you have followed the on-screen instructions and the program is installed, it will launch on its own.
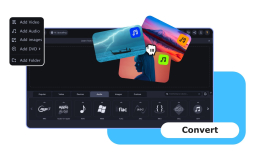
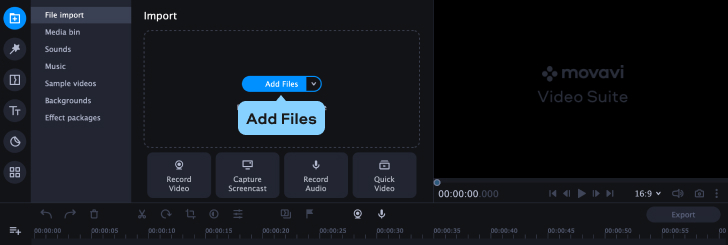
Step 2. Add your files
Next, click Add Files, where you will choose the files that need to be uploaded. You can also drag and drop these files into the program window. The files will be added to the Media Bin. Drag and drop your audio from the Media Bin to the Timeline.
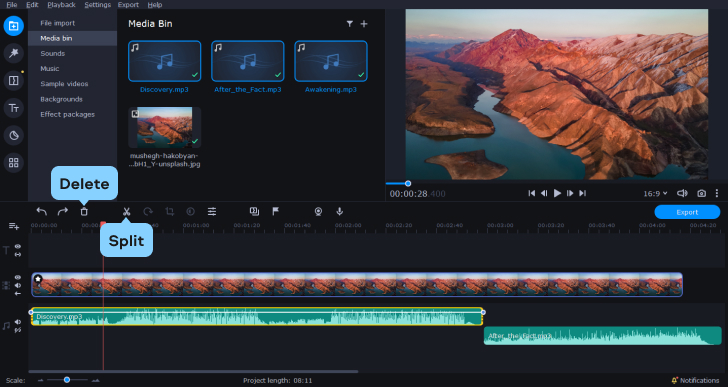
Step 3. Trim your audio
To start trimming the part of the audio you do not want, place the red marker on the piece of the track and click Split. Next, click Delete, and the unwanted part is gone. If you want to do this for multiple files, just position them one after another on the timeline and repeat the same process.
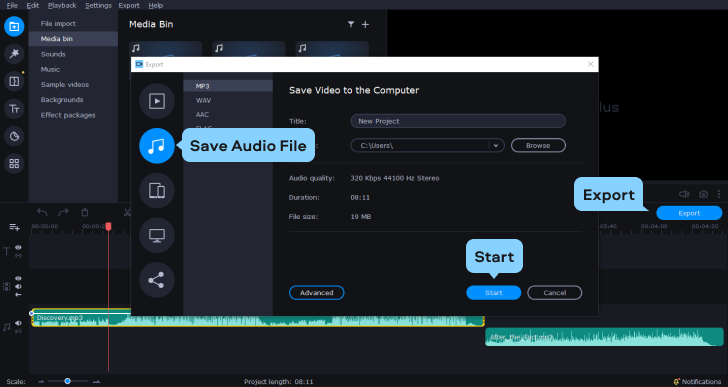
Step 4. Save your audio
Once you are content with what you have, click on the Export button to save the audio file. Next, choose the format you want and hit Start.
Audacity is an extremely powerful open-source tool that is available for free. This convenience allows people to take audio editing into their own hands.
With a simple download, even users with minimal expertise can learn how to take simple audio clips and transform them into refined masterpieces. It has a slight learning curve, but then again, practice makes perfect.
Despite being a free software, Audacity packs a punch. For instance, you can import and edit multiple tracks at the same time. Speed them up, slow them down, make them louder, or make them quieter – your call! Once you are done tweaking the stereo audio file to your liking, Audacity lets you save the file in a format you fancy.
You can do this with existing files, or you could record new ones directly into the Audacity software using a mic or an audio interface.