We use cookies to improve the services we offer you. By continuing to browse this site, you consent to keep them in accordance with our Privacy Policy.
×We use cookies to improve the services we offer you. By continuing to browse this site, you consent to keep them in accordance with our Privacy Policy.
×
 43
43
 10 min
iMovie vertical video on Mac is possible, but it requires a workaround – the standard iMovie project on Mac is locked to a 16:9 landscape canvas with no setting to switch to portrait mode. Vertical 9:16 content for TikTok, Reels, or YouTube Shorts can be produced via two methods: the built-in App Preview project type, or a crop-rotate-QuickTime workflow.
This guide covers both Mac methods honestly – what each one produces, where the limitations are, and which title styles and effects get lost along the way.
Working with vertical video in iMovie on Mac is certainly possible, but it comes with distinct trade-offs you need to keep in mind. On the plus side, using the App Preview project type or leveraging a Crop-Rotate-QuickTime workflow allows you to export a native 9:16 (1080×1920) portrait file. However, iMovie’s core engine remains firmly locked to a 16:9 aspect ratio: standard projects will automatically letterbox vertical clips with black sidebars, custom ratios like 1:1 or 4:5 are completely unsupported, and switching to App Preview restricts your access to certain title styles, themes, and transitions.
The App Preview project type is iMovie’s built-in way to work in a portrait canvas on Mac. It was designed for App Store preview videos, but it’s the cleanest how to make iMovie vertical option available without third-party software.
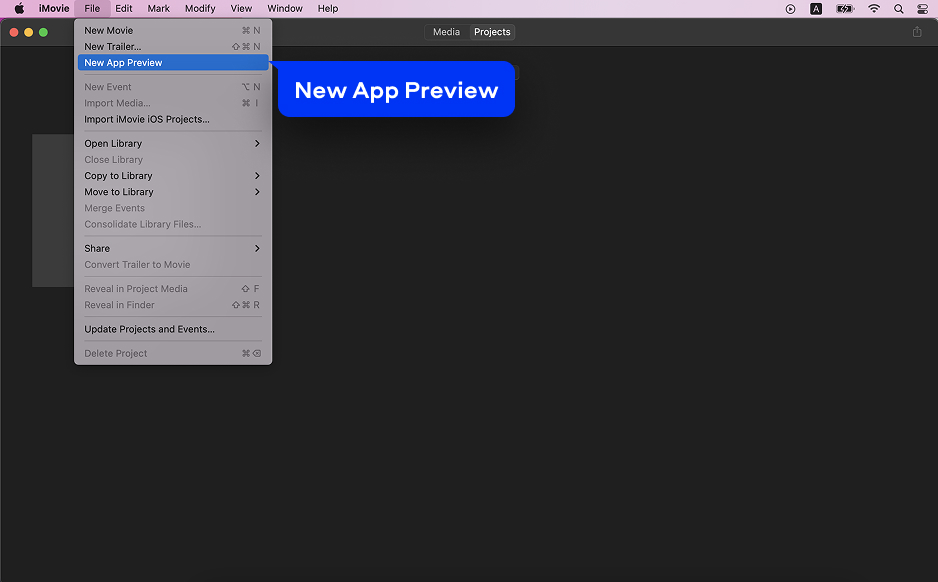
Open iMovie on your Mac. In the menu bar click File → New App Preview. A new project opens with a portrait 9:16 canvas visible in the preview window – the frame is taller than it is wide, ready for vertical video content.
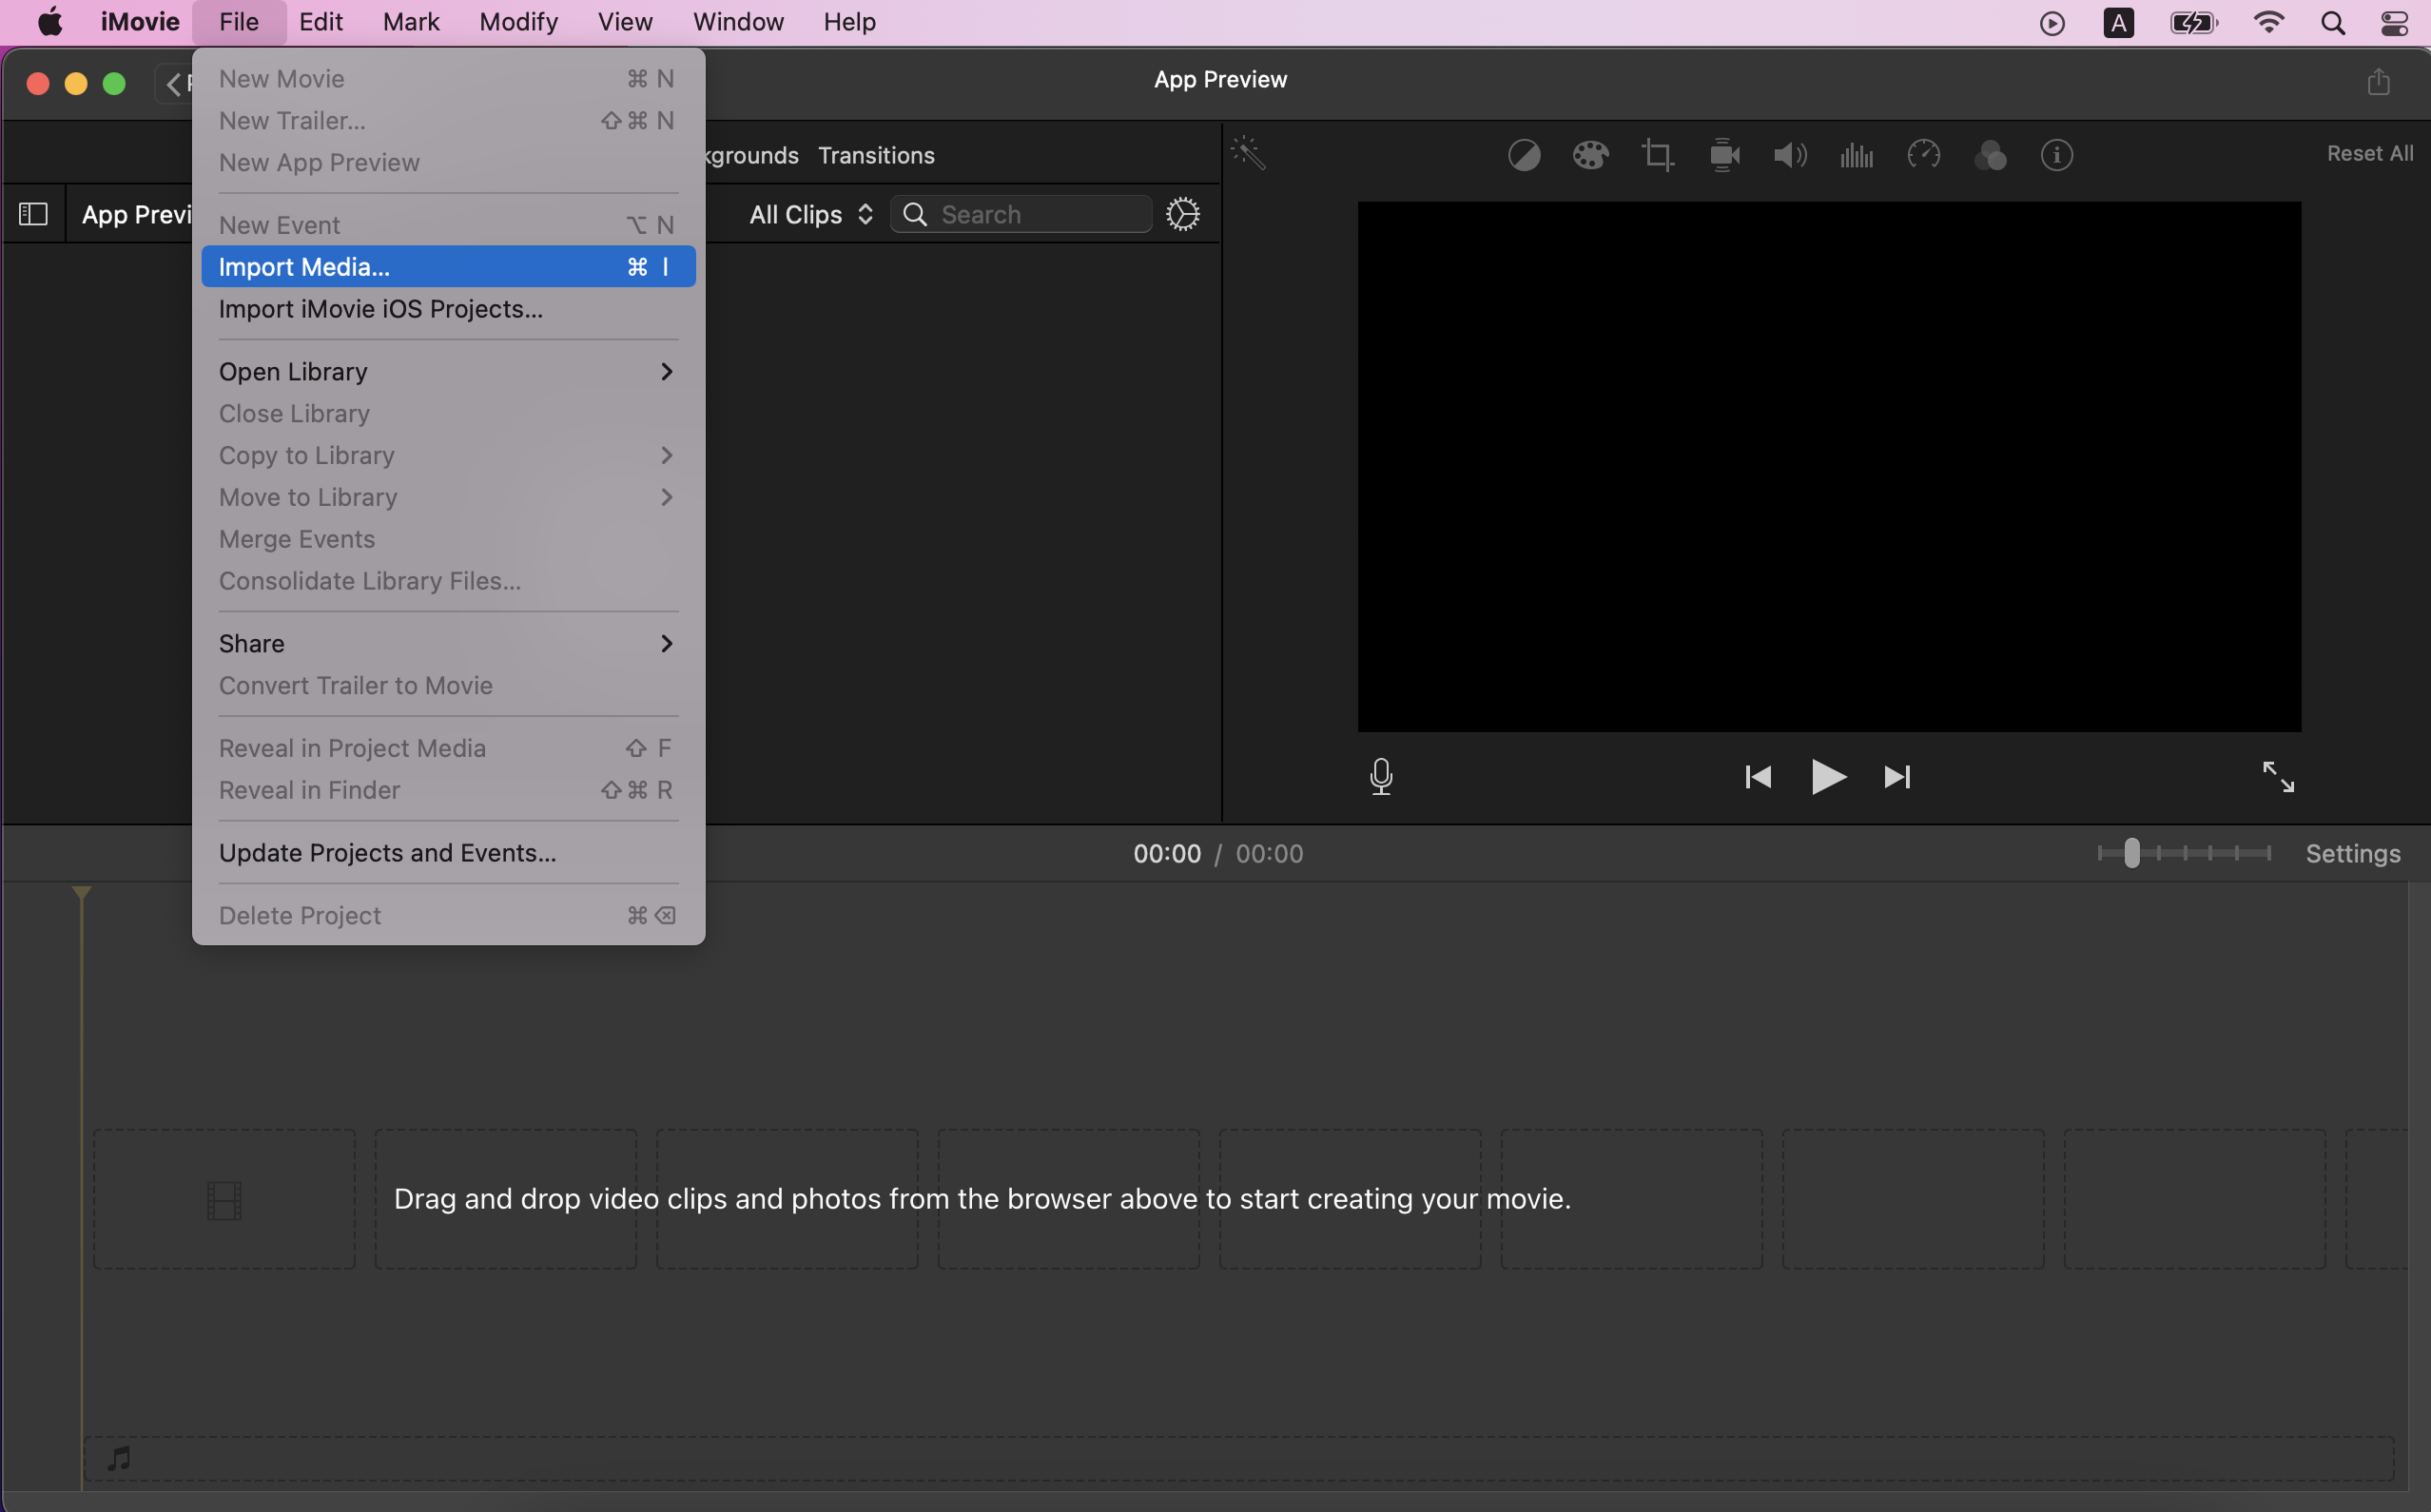
Click File → Import Media… and import your footage. For best results, add a vertical placeholder image or clip first – this anchors the project firmly to 9:16 before your main footage loads. Then drag your main video clips onto the timeline. Use the Crop to Fill tool in the preview toolbar to reframe each clip within the portrait canvas so the subject is centered vertically.
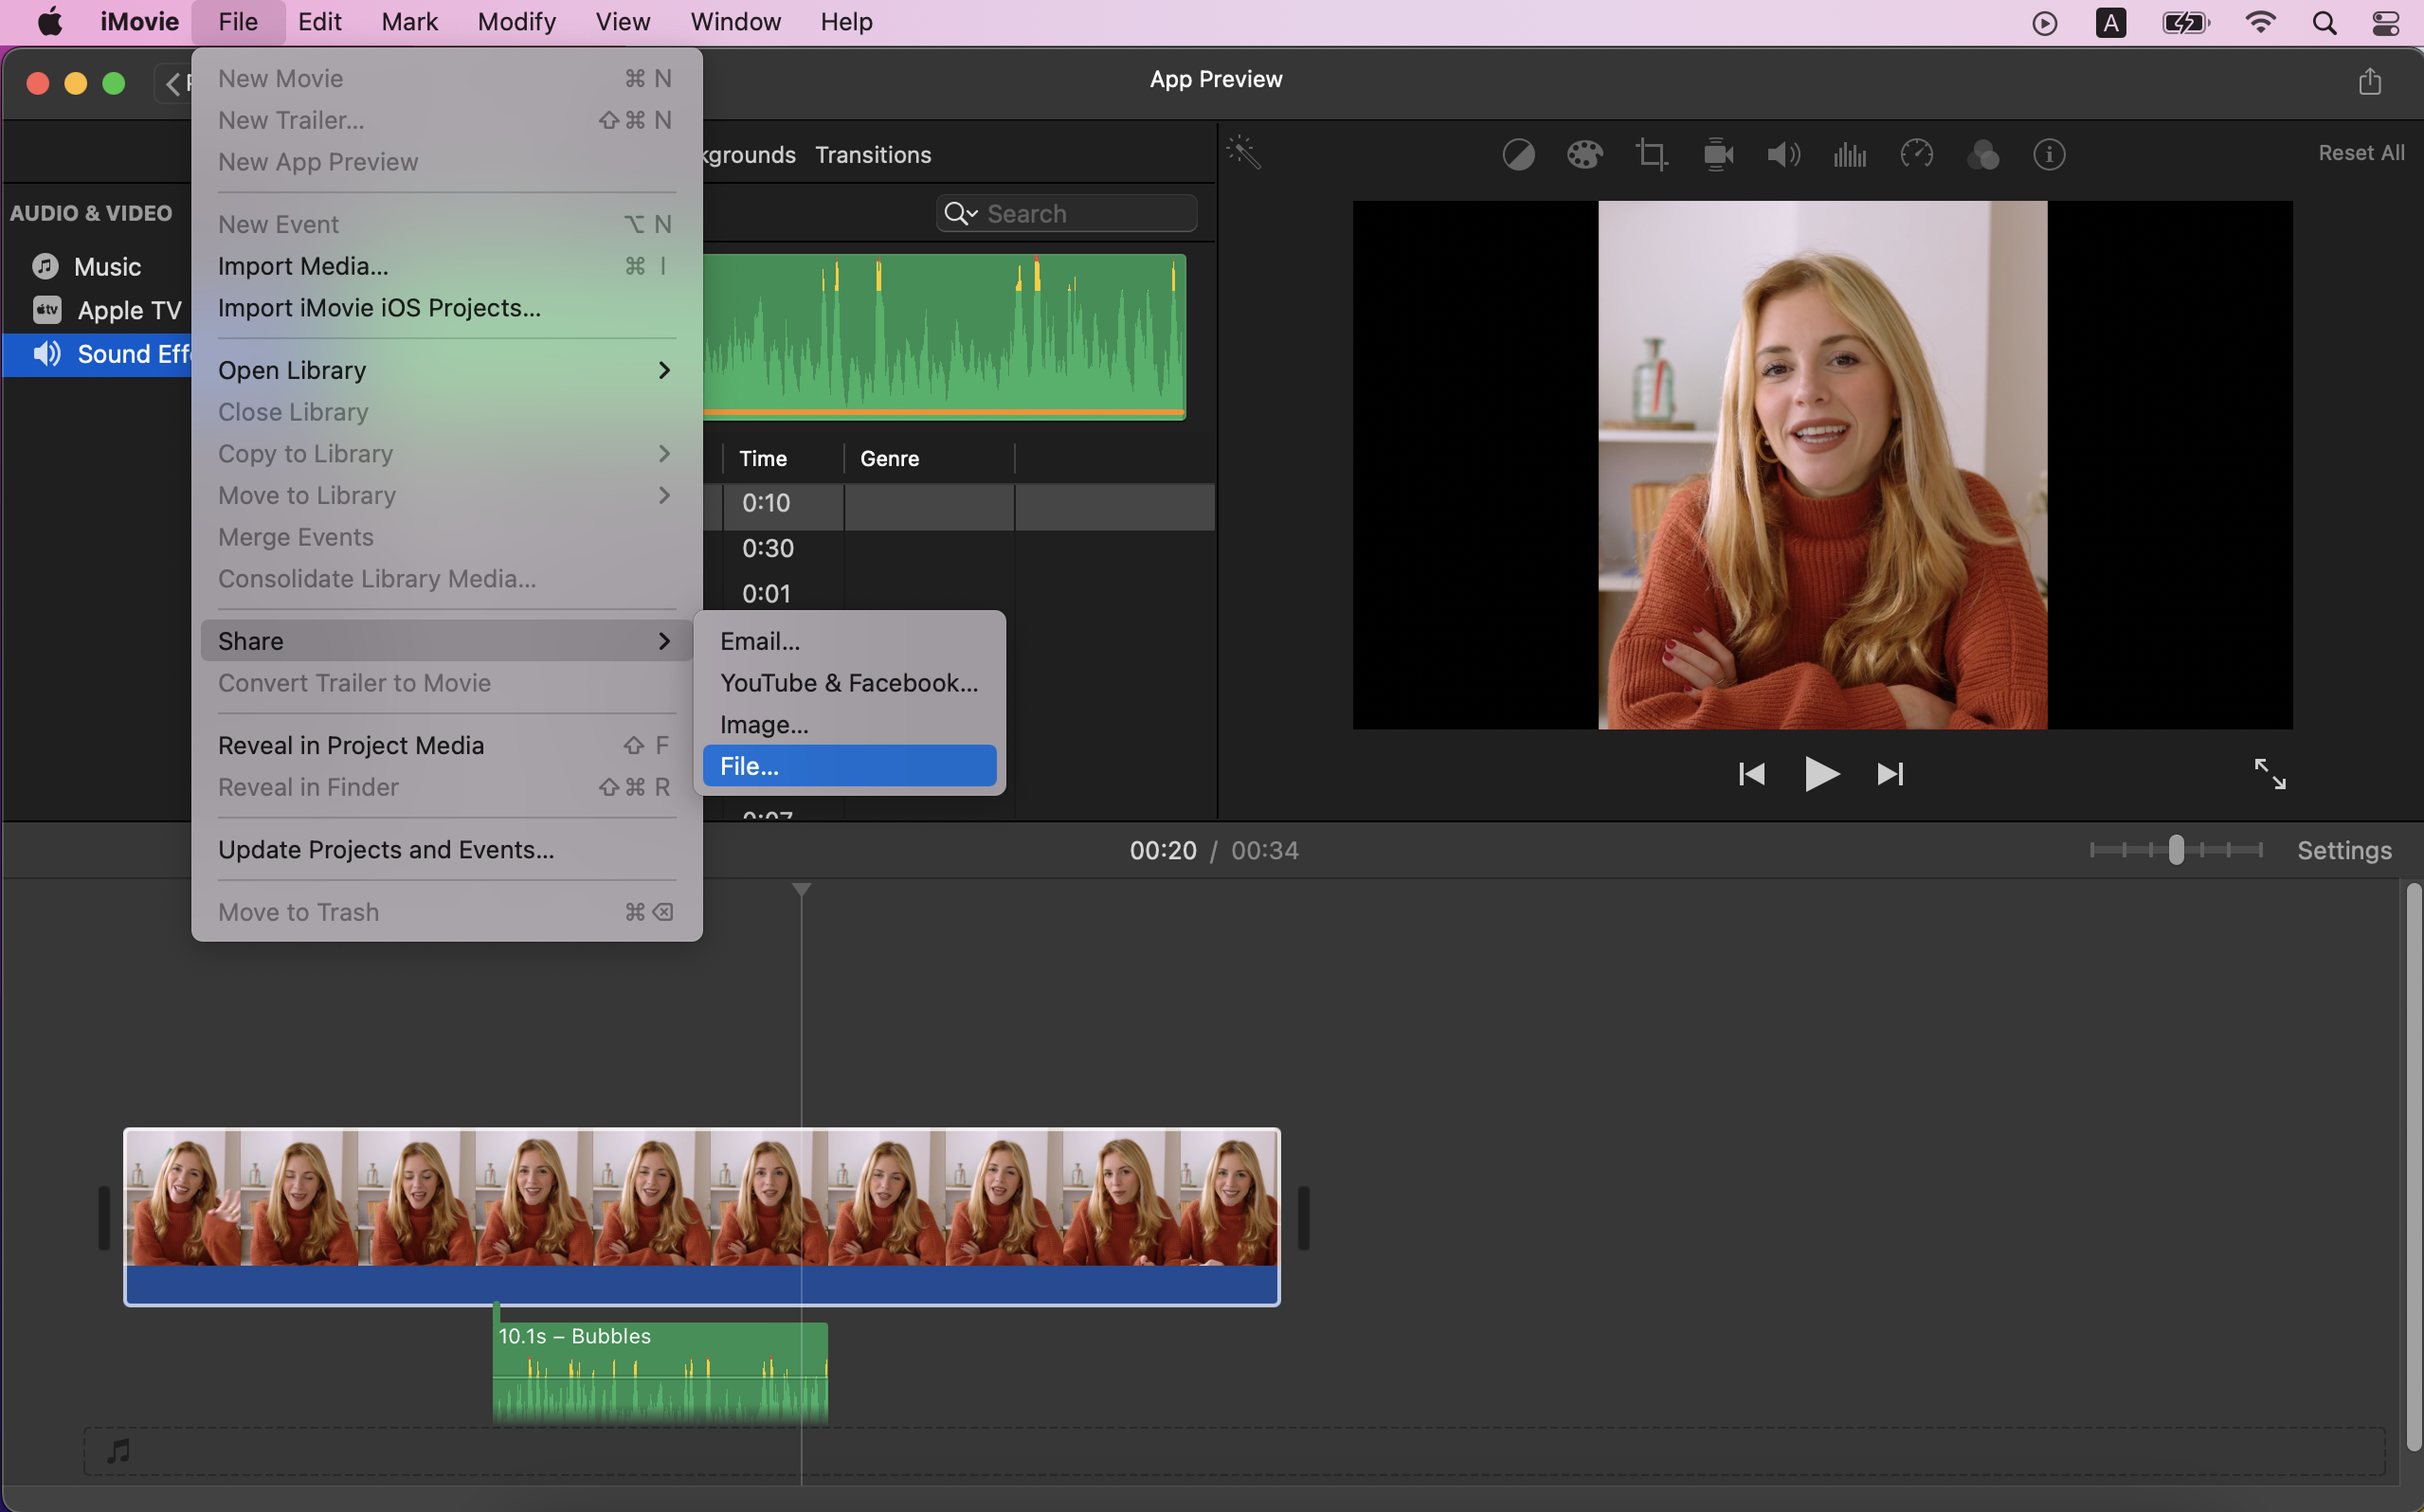
Trim clips, add titles (note: some title styles are unavailable in App Preview mode), and add music via the Audio & Video tab. When finished, click File → Share → File…, set Resolution to 1080p, Quality to High, and click Next to save. If the exported file plays sideways in QuickTime Player, open it in QuickTime, go to Edit → Rotate Left or Right to correct the orientation, then File → Export As → 1080p to save the corrected file.
iMovie on Mac accepts these video formats for vertical video projects:
| Input formats – iMovie (Mac) |
| MP4 (H.264 and H.265/HEVC) – fully supported |
| MOV (QuickTime) – Apple native, all codecs |
| M4V (iTunes video format) |
| AVCHD / MTS / M2TS (camcorder footage) |
| 3GP / 3GPP (mobile video imported to Mac) |
| 4K / ProRes (from Apple devices and cameras) |
| DV (Digital Video tape) |
| NOTE: vertical clips in a standard 16:9 project get black bars; use App Preview or the rotate method below |
To take a standard 16:9 landscape clip and make it display as a vertical 9:16 video, use iMovie’s Crop-and-Rotate method. This crops the center of the landscape frame and rotates the export for portrait playback.
Open a standard iMovie Movie project. Import the landscape video via File → Import Media… and drag it to the timeline. Select the clip and click the Crop icon in the preview toolbar. Choose Crop to Fill. A yellow crop frame appears over the preview. Drag the handles to select only the vertical center portion of the landscape frame – the column containing your subject. Click the blue checkmark to apply.
With the clip selected in the timeline, click the Clip Information button above the preview. The Clip Information panel opens. Click the Rotate 90° counterclockwise button (or clockwise, depending on the footage orientation). The clip now appears sideways in the 16:9 canvas. This sideways orientation is intentional – the final rotation back to upright will be done in QuickTime Player after export.
Step 6. Export from iMovie and rotate in QuickTime Player
Click File → Share → File…. Set Resolution to 1080p and Quality to Best. Click Next and save. Open the exported file in QuickTime Player. Go to Edit → Rotate Left (or Rotate Right) to correct the orientation – the clip now displays upright in portrait. Go to File → Export As → 1080p to save the final file. QuickTime writes the orientation flag without re-encoding, so quality is preserved. The result is a true 1080×1920 vertical video file.
| Output Formats – iMovie (Mac, Vertical) |
| MP4 (H.264 or H.265) – recommended for TikTok, Reels, Shorts |
| MOV (ProRes) – high quality via Export File > ProRes |
| 4K, 1080p, 720p – resolution presets at export |
| App Preview method: exports 9:16 portrait directly in most cases |
| Crop-Rotate method: exports 16:9 sideways – rotate in QuickTime to get 1080×1920 |
| NOTE: iMovie exports 16:9 by default; App Preview + QuickTime needed for true portrait |
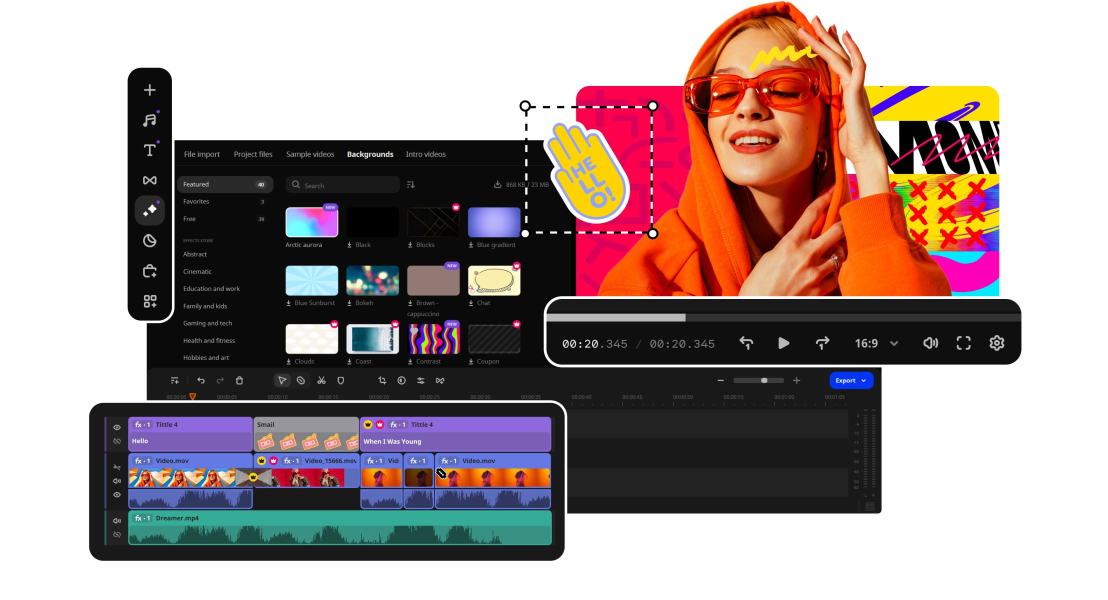
Movavi Video Editor is the practical alternative that solves every limitation of iMovie portrait mode on Mac. Set the canvas to 9:16 in Settings in one click – every title style, transition, color tool, and effect works normally within the vertical frame. No App Preview restrictions, no QuickTime rotation step, no black bars.
Available as a free download for Mac and Windows PC at movavi.com/videoeditor. The 7-day trial unlocks every feature including the 9:16 canvas, AI Auto Subtitles, all export formats, and the full effects library. The paid version removes the watermark.
| 🏷️ Save on Movavi Video Editor
Use a Movavi promo code for a discount on your license. Check current promo codes → |
Three steps to a clean 1080×1920 vertical video export on Mac – no workarounds.
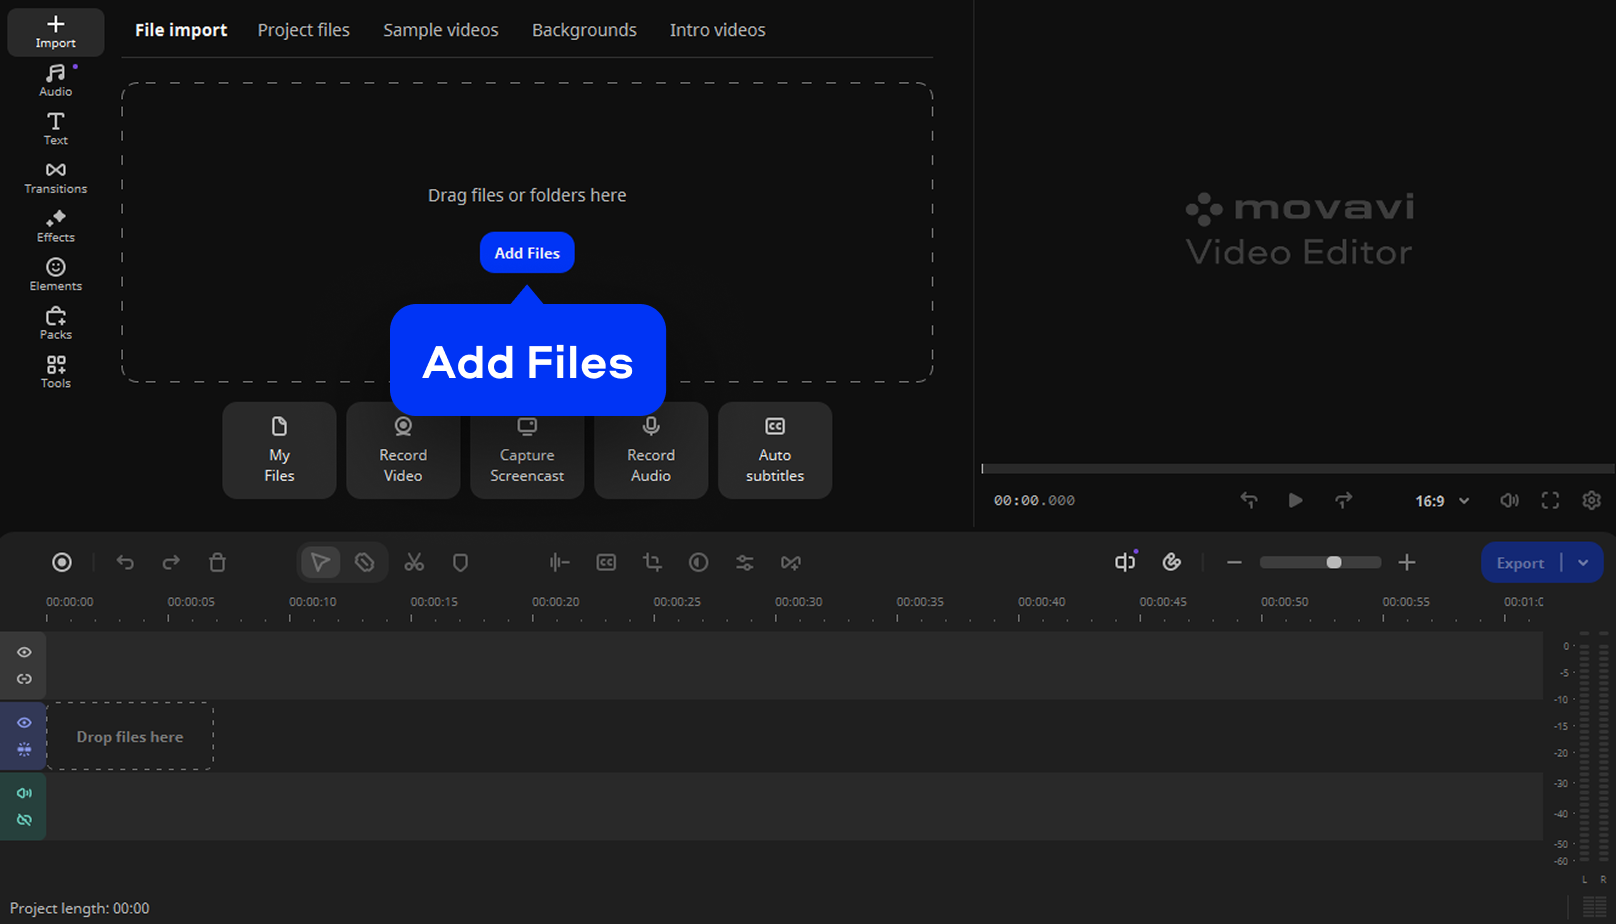
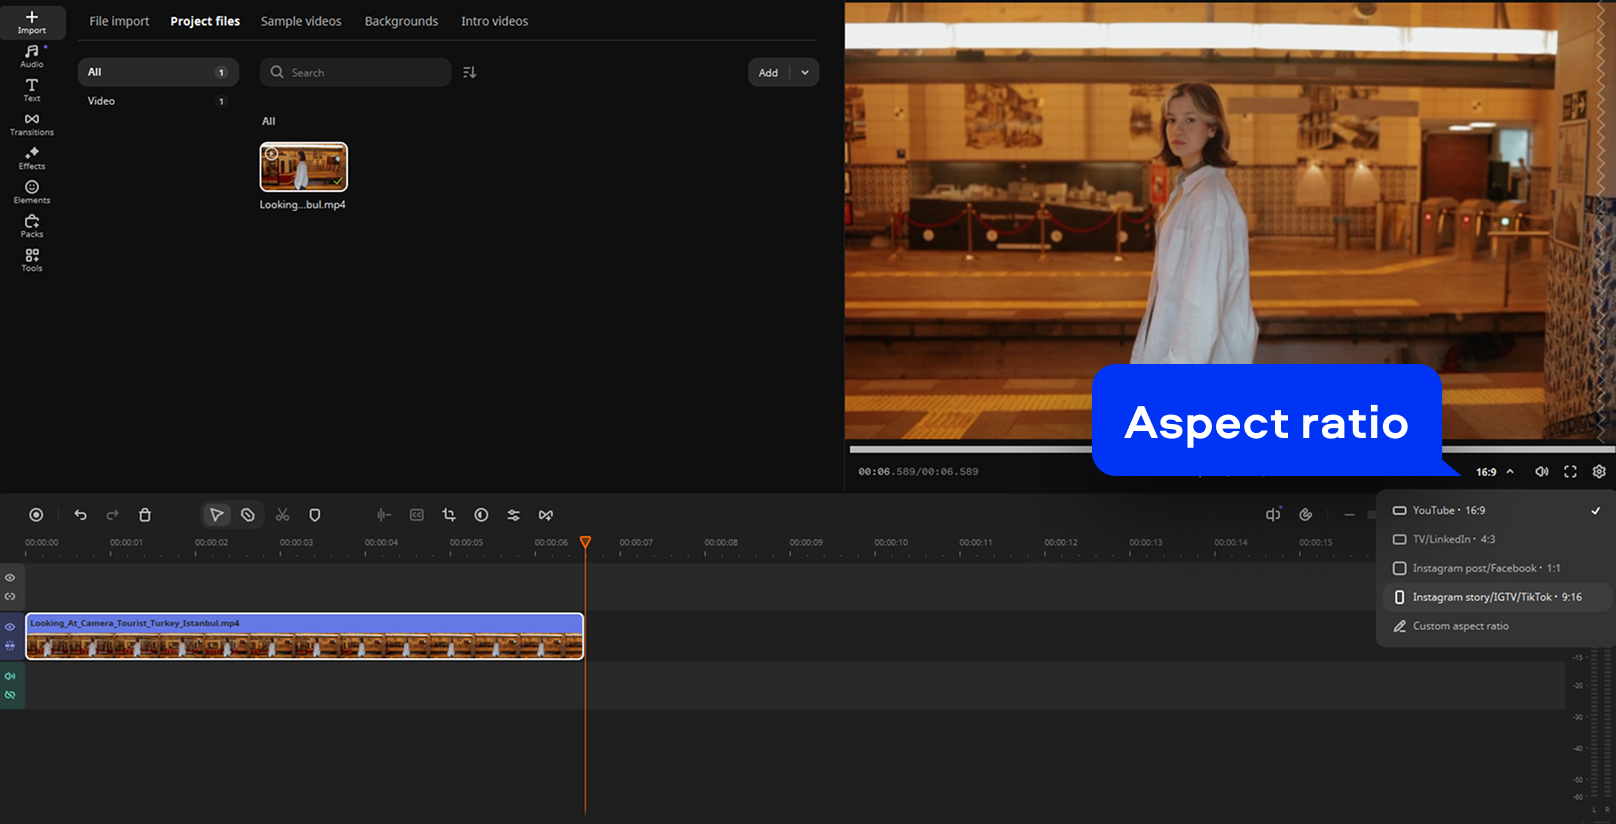
Launch Movavi Video Editor and click Add Files to import your video. Drag the clip onto the timeline to begin working with the file. Open the aspect ratio list under the preview window and select 9:16 so the canvas immediately switches to a portrait frame.
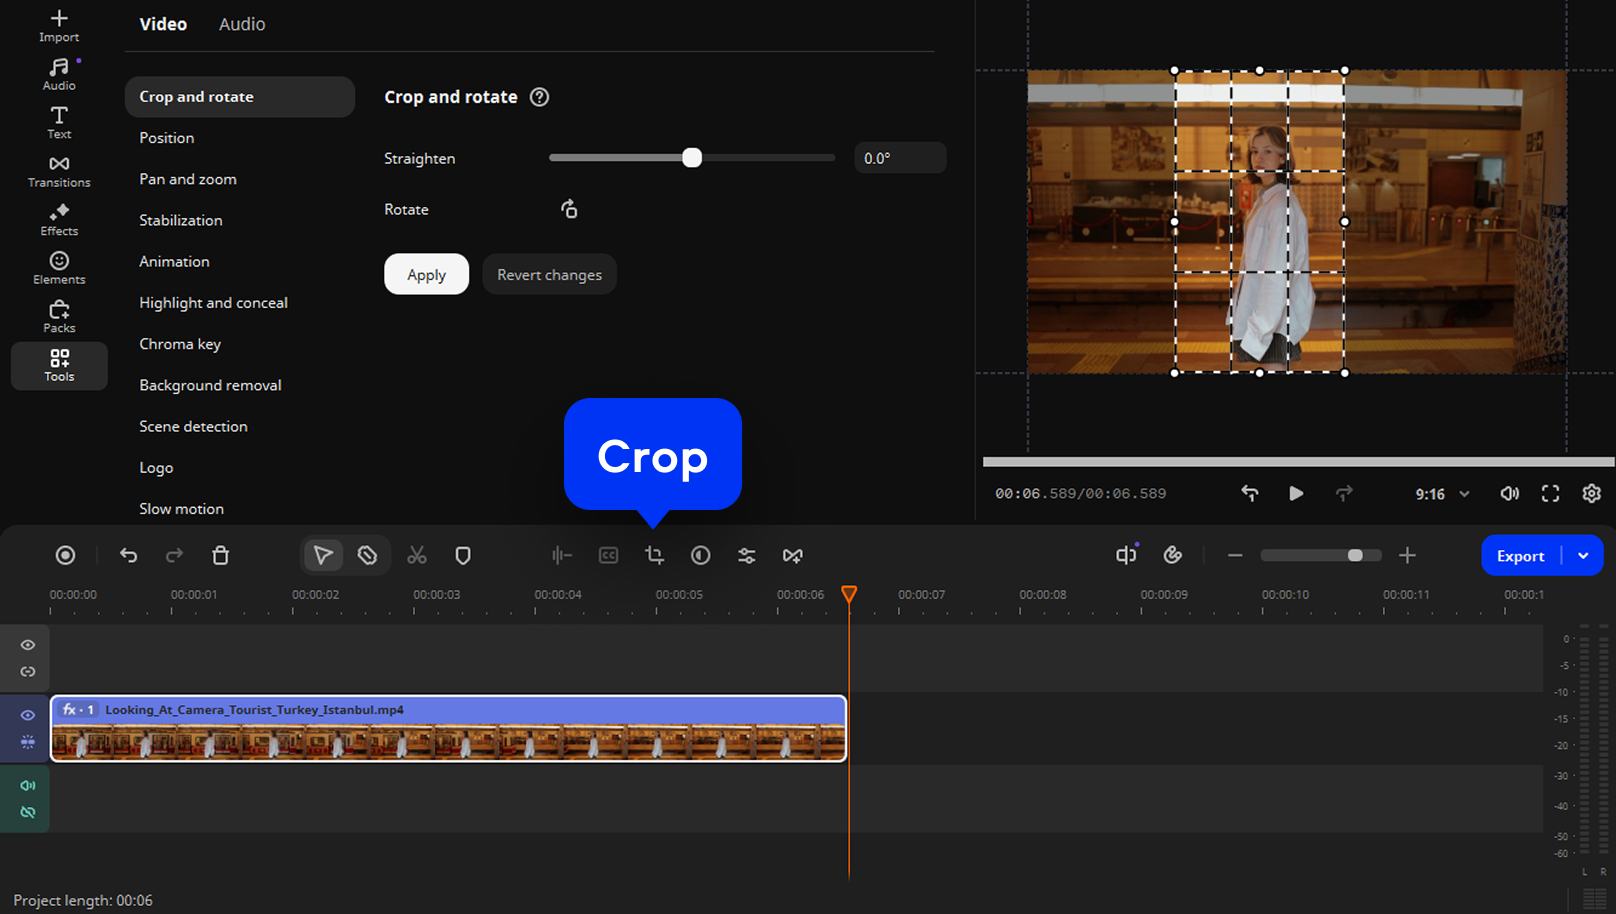
Use the crop tools and preview window to adjust selective framing within the vertical canvas. You can enter exact width and height values or position the footage directly – the editor functions as a precise video size changer, not a generic converter.
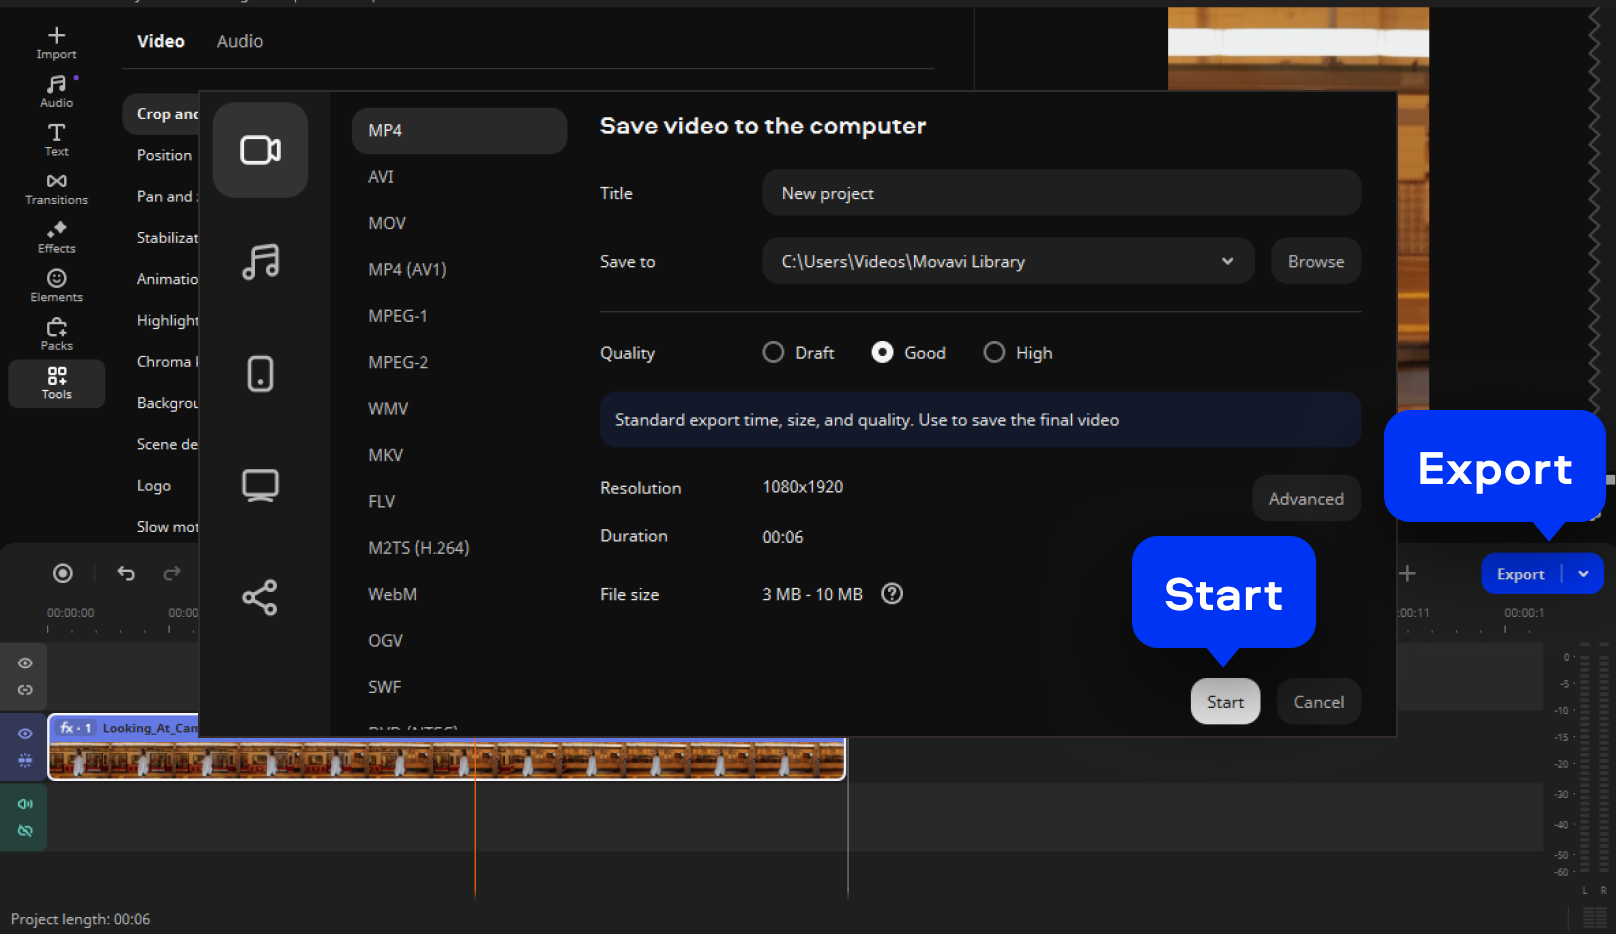
When the frame looks correct, click Export to open output settings. Choose MP4 and ensure the resolution is set to 1080×1920 for the final file. The software applies resizing cleanly, avoiding unnecessary compression and exporting a true portrait video without black bars.
iMovie vertical video on Mac requires a workaround in @year – there is no native portrait project setting in the standard Movie project type. The App Preview method creates a true 9:16 canvas but limits some editing features. The crop-rotate-QuickTime method works for converting any landscape source to portrait, at the cost of extra steps.
For a Mac workflow with a native vertical 9:16 canvas, all title styles, and no post-export rotation steps, Movavi Video Editor is the cleaner software. It’s available as a free trial download that covers the complete portrait editing workflow from import to export.
Yes, with workarounds. iMovie on Mac does not have a native portrait mode in the standard Movie project. Two methods work:
1. File → New App Preview. Creates a 9:16 canvas directly, but limits some title and theme options.
To change clip orientation in iMovie on Mac:
1. Select the clip in the timeline.
iMovie on Mac cuts off vertical video because the standard project canvas is 16:9. When you add a 9:16 portrait clip, iMovie either fills the 16:9 frame by zooming in and cutting off the top and bottom (Crop to Fill behavior) or adds black bars on the sides (Fit behavior). To avoid cropping: use Fit in the Crop settings to see the full frame with black bars, or switch to the App Preview project type for a portrait canvas where vertical clips display without being cut off. Movavi Video Editor’s 9:16 project setting also prevents this completely.
On Mac, the direct way how to make iMovie vertical with a portrait canvas:
1. Go to File → New App Preview in iMovie to create a native 9:16 portrait project canvas.
Use a one-step alternative (like Movavi Video Editor):
1. Install Movavi Video Editor (available as a free trial download).
The canvas switches to portrait instantly and every editing feature works normally.