We use cookies to improve the services we offer you. By continuing to browse this site, you consent to keep them in accordance with our Privacy Policy.
×We use cookies to improve the services we offer you. By continuing to browse this site, you consent to keep them in accordance with our Privacy Policy.
×
 116
116
 11 min

You can merge videos in VLC but it comes with conditions. VLC can combine videos using two methods: the GUI approach and the command line. Both work on Windows PCs and require all source files to be in the same format and codec. On a Mac, the GUI method is not available, making the command line the only option.
But there’s a catch. After VLC combines videos, it sometimes produces files with no video, audio sync errors, or black screens if the source clips differ in resolution, orientation, or codec. This guide covers both methods with troubleshooting steps, explains the limitations, and introduces Movavi Video Editor as a reliable software alternative that joins videos from any format in a visual timeline on any PC or laptop.
The GUI method works on Windows via Media > Open Multiple Files. This option is not available on a Mac. Mac users must use the command line method in section 4.
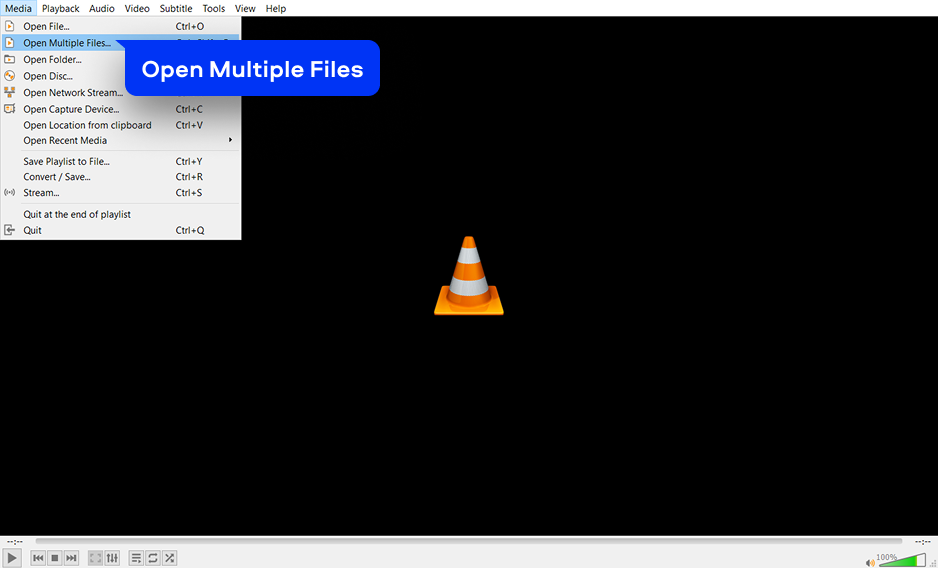
Launch VLC on your Windows PC or laptop. Click Media in the top menu bar and select Open Multiple Files from the dropdown or use the keyboard shortcut Ctrl + Shift + O. The Open Media dialog opens on the File tab.
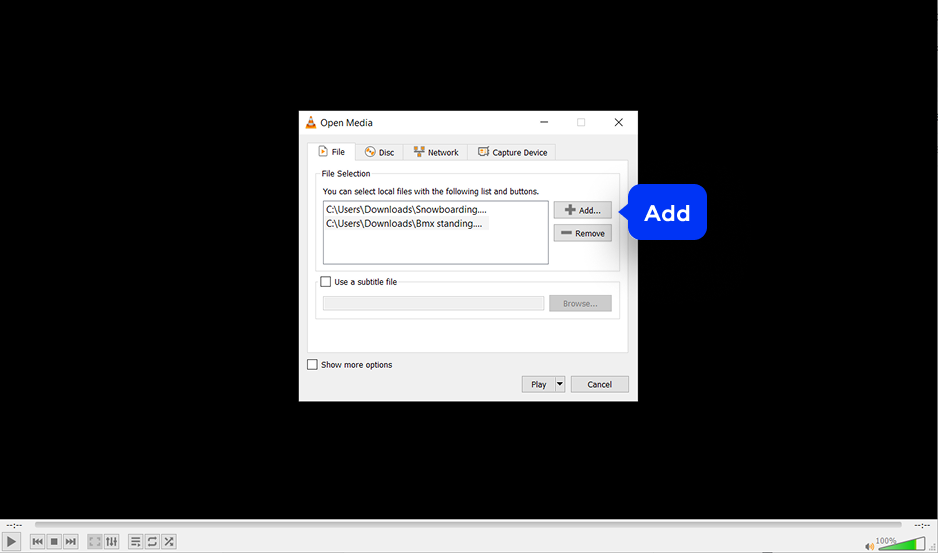
Click the Add button in the Open Media window and select the first video file you want to merge. Click Add again to add the second file, and repeat for any additional clips. The files will merge in the order they appear in the list. You cannot reorder them after adding, so add them in the correct sequence. All clips must be the same format and codec (e.g., all MP4 H.264) for the merge to work correctly.
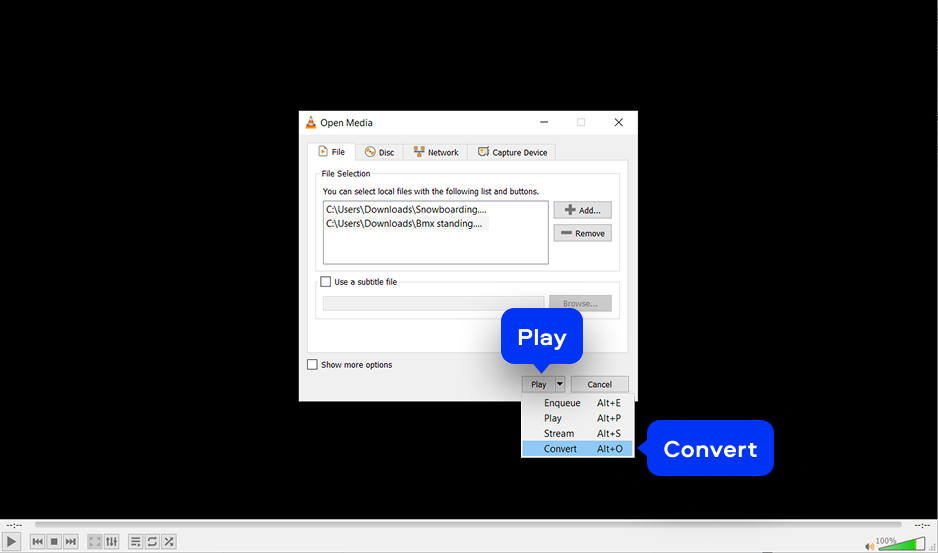
After adding all files, look at the bottom-right corner of the Open Media window. Click the small dropdown arrow next to the Play button and select Convert from the list (not Play – clicking it will only play the files back-to-back without saving them as a merged file). The Convert window opens.
In the Convert window, click the Profile dropdown and select Video – H.264 + MP3 (MP4) for the most compatible merged output.
Optionally check Append ‘-converted’ to filename to avoid overwriting source files.
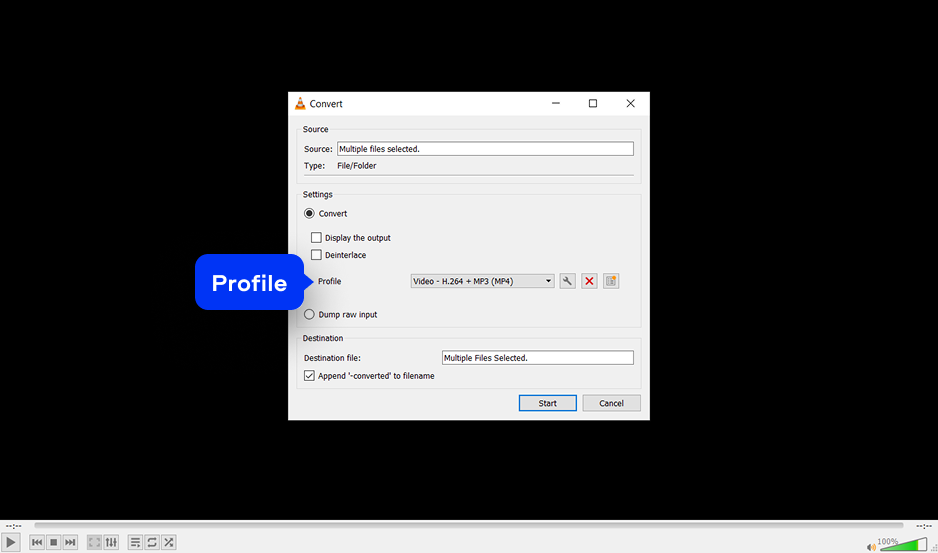
Click Start. VLC processes all the files in sequence and saves the merged video permanently. The progress bar in VLC’s main window shows the conversion status. Total processing time equals the combined duration of all source files. When the bar reaches 100%, navigate to the destination folder to verify the merged file.
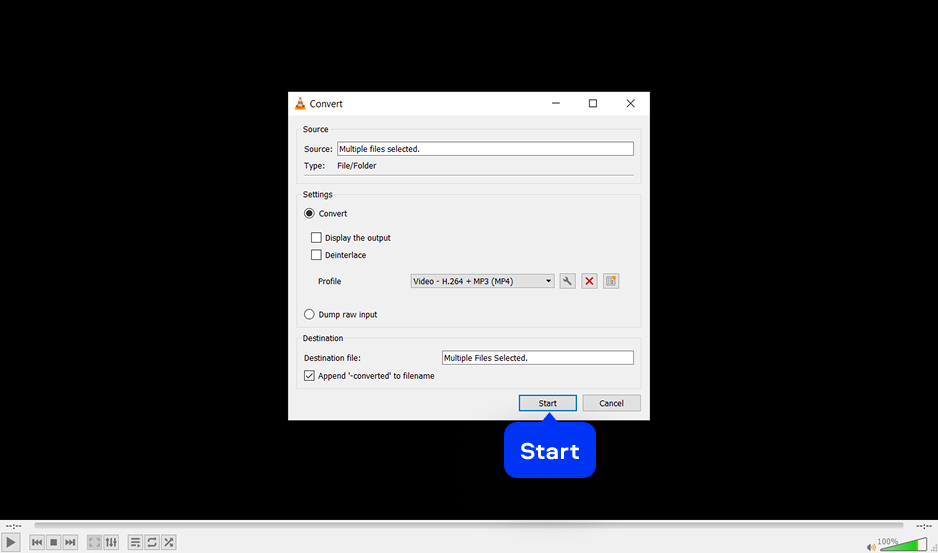
| 📁 Where is the merged file saved? The file saves to the location you chose in the Browse step. If you skipped this step, VLC may save to the same folder as the first source video. Check C:\Users\[username]\Videos as a fallback. |
VLC accepts a wide range of videos as input for the merge workflow. All source files must share the same format and codec for a successful merge.
| MP4 / M4V (H.264 or H.265) – best results when all clips match exactly |
| MKV (Matroska Video) – supported, same codec required |
| AVI (Audio Video Interleave) – supported with limitations |
| MOV (Apple QuickTime) – supported on both Windows and Mac |
| WMV / WMA (Windows Media) – Windows only |
| TS / MPEG-TS (Transport Stream) – strong merge compatibility |
| MPEG-1 / MPEG-2 |
| FLV / F4V (Flash Video) |
| WebM (VP8 / VP9) |
| OGV / Ogg |
The Convert step lets you save the merged video in any of these output formats.
| MP4 / M4V (H.264 + MP3 or AAC) – recommended, widest compatibility |
| MKV (Matroska Video) – lossless container |
| MPEG-TS (Transport Stream) – reliable for same-codec merges |
| WebM (VP80 + Vorbis) |
| OGV (Theora + Vorbis) |
| ASF / WMV (Windows Media) |
| AVI – limited compatibility in merge output |
| ⚠️ Critical requirement: all source video files must have the same format, codec, resolution, and frame rate. Mixing MP4 and MOV, or 1080p and 720p clips, will produce a file with no video, audio-only output, or black screen. Convert all clips to the same format first if needed. |
The command line method is the only reliable way to merge videos in VLC on a Mac, and is also available on Windows. It requires all source files to share the same format.
Move all files you want to join into a single folder and rename them to simple names (e.g., 1.mp4, 2.mp4, 3.mp4).
On Windows, hold Shift and right-click the folder > Open Command Prompt here.
On Mac, open Terminal and navigate to the folder with cd/path/to/folder.
On Windows, run this command in Command Prompt (update the VLC path if your installation is in a different location):
| “C:\Program Files\VideoLAN\VLC\vlc.exe” 1.mp4 2.mp4 –sout “#gather:std{access=file,mux=ts,dst=merged.mp4}” –sout-keep |
On Mac, run this in Terminal:
| /Applications/VLC.app/Contents/MacOS/VLC 1.mp4 2.mp4 –sout “#gather:std{access=file,mux=ts,dst=merged.mp4}” –sout-keep |
Replace 1.mp4 2.mp4 with your actual filenames in order and merged.mp4 with your desired output filename. Press Enter. VLC opens, processes the files, and saves the combined file permanently to the same folder. Close VLC when the progress bar finishes.
| 📌 Note: the merge command uses mux=ts (MPEG Transport Stream) internally, which produces the most reliable results. If you need a pure MP4 output, convert the merged .mp4 output file using VLC or a desktop converter afterward. |
It’s the most common failure when source files have different codecs, resolutions, or orientations. To fix it, convert all clips to identical settings using VLC’s Convert / Save feature on each individual file first, then merge the converted versions.
VLC for a Mac does not offer the Open Multiple Files option in the GUI. The command line method in the section above is the only supported way to merge videos in VLC on a Mac.
If merged clips have different frame rates or sample rates, standardize all files to the same frame rate (e.g., 30 FPS) and audio sample rate (44,100 Hz) before attempting the merge.
Movavi Video Editor is an alternative to VLC that works on any format mix. Drag MP4, MOV, MKV, AVI, or any other file onto the timeline in any order – no pre-conversion required, no command line, and no risk of audio-only output. The merge happens automatically at export.
Beyond merging, Movavi Video Editor is a complete video-editing software: trim, color-correct, add transitions, titles, and music – all before the final export. Works natively on both Windows and Mac, including Apple Silicon. It has a free 7-day trial, and the paid version removes the watermark and other limitations. To learn more about what you can do beyond merging clips, check out this Movavi Video Editor review, which explores the editing workflow, templates, and AI tools.
| 🏷️ Save on Movavi Video Editor
Use a Movavi promo code at checkout and save on your license. Check current promo code → |
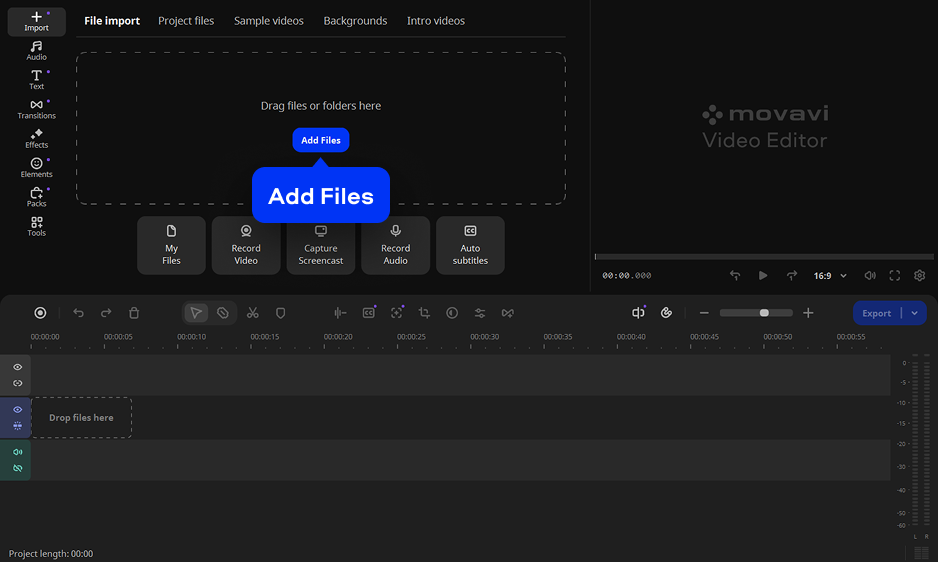
Download and install Movavi Video Editor. Click Add Files and import all the videos you want to merge. They appear in the Project files tab. You can import MP4, MOV, MKV, AVI, and any other common format – no pre-conversion needed.
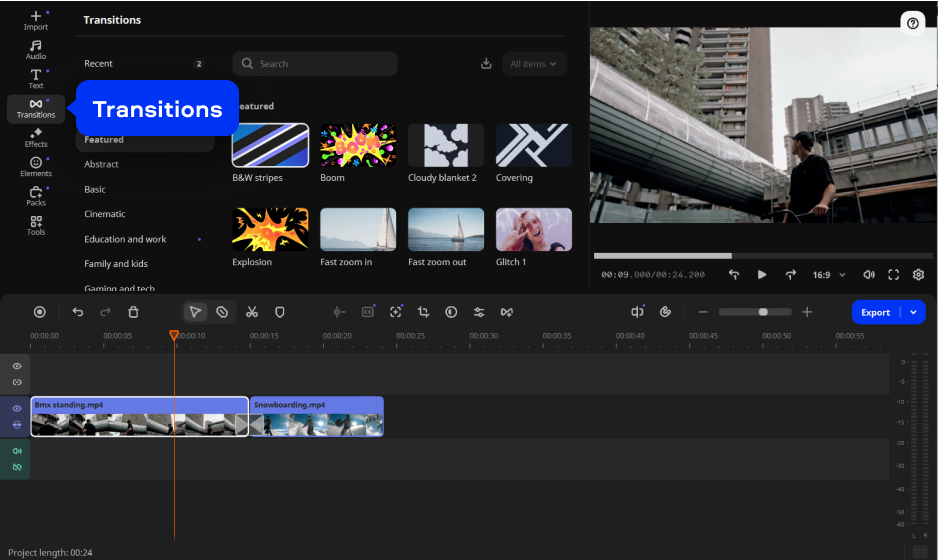
Drag each video from Project files onto the Timeline in the order you want them to play. Drag clips left or right to reorder at any time. Snap clips end-to-end on the same track to create a seamless join. Add transitions between clips from the Transitions tab if you want a smooth fade between scenes. Trim dead frames at the start and end of each clip by dragging the clip edges on the Timeline.
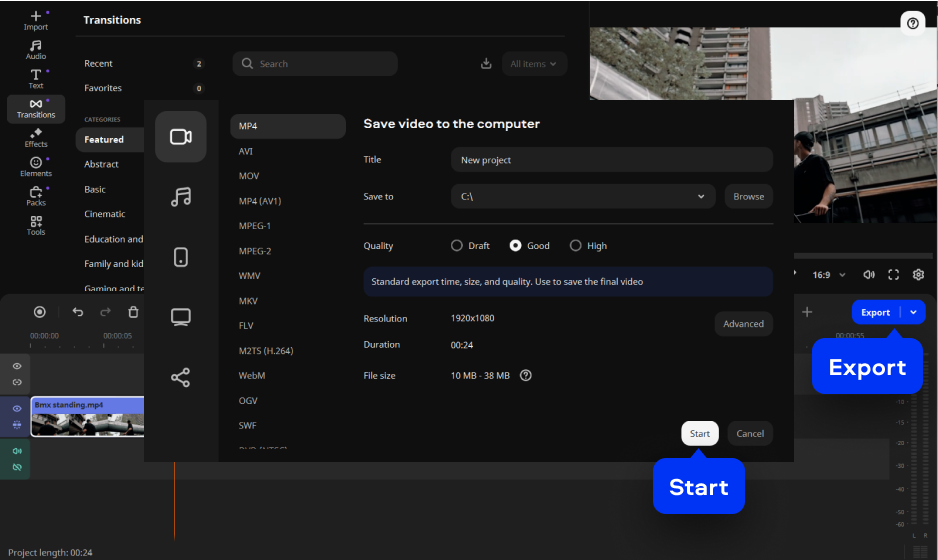
Click Export. Choose your output format – MP4 H.264 is recommended for the widest compatibility. Set resolution, quality level, and save location, then click Start. Movavi renders all clips on the Timeline into one continuous file and saves it permanently to your chosen folder. The folder opens automatically when export is complete.
Video merging in VLC works when all source files share the same format, codec, and resolution. The GUI method works on Windows; the command line method works on both Windows and Mac computers. Both are free and produce a permanently saved merged file with no extra software needed.
When your clips are in different formats or you need a visual tool with reordering, trimming, and transitions, Movavi Video Editor handles the join in three drag-and-drop steps on any PC, laptop, or Mac. Try the 7-day free trial and merge your first video in minutes.
To merge two videos into one in VLC on Windows:
On a Mac, use the command line:
/Applications/VLC.app/Contents/MacOS/VLC 1.mp4 2.mp4 –sout “#gather:std{access=file,mux=ts,dst=merged.mp4}” –sout-keep.
Both methods require the source files to be in the same format.
To combine MP4 files in VLC, ensure both files use the same codec (H.264 is the most common and reliable). Then use Media > Open Multiple Files (Windows) or the command line (Mac/Windows) as described above. If the files use different codecs, convert them to a matching format first via Media > Convert/Save. Process each file individually to H.264 MP4, then merge the converted versions. For a simpler workflow that handles any MP4 variant, use Movavi Video Editor: drag both files to the Timeline and click Export.
Yes, VLC can combine a video file with a separate audio file.
For more control over audio-video alignment and volume mixing, Movavi Video Editor’s timeline lets you manage audio and video tracks independently before saving the final file permanently.
The command line to join videos in VLC is:
“VLC_PATH” file1.mp4 file2.mp4 –sout “#gather:std{access=file,mux=ts,dst=output.mp4}” –sout-keep.
Replace VLC_PATH with your VLC installation path (Windows: C:\Program Files\VideoLAN\VLC\vlc.exe; Mac: /Applications/VLC.app/Contents/MacOS/VLC).
List all source files in the order you want, and set dst=output.mp4 to your desired output filename. On Windows, open Command Prompt in the video folder. On aMac, use Terminal with cd to navigate to the folder first. The –sout-keep flag keeps the stream output chain active for multiple files. This is the only method that works on a Mac to combine videos.