We use cookies to improve the services we offer you. By continuing to browse this site, you consent to keep them in accordance with our Privacy Policy.
×We use cookies to improve the services we offer you. By continuing to browse this site, you consent to keep them in accordance with our Privacy Policy.
×
 12,830
 10 min
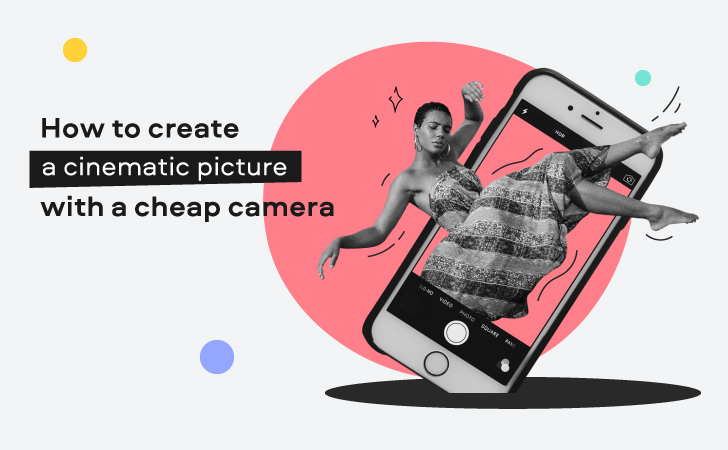
You don’t need an expensive professional camera to create cinematic videos and take great photos. Beginner-level DSLRs, point-and-shoot cameras, and smartphones can help you get beautiful images, too. Your technique is much more important than your gear! Check out our video proposal template if you want some tips on how to make your next project stand out from others. It is one way in which beginners could improve their skills even if they do not have any previous experience using these devices.
Let’s see how to get a cinematic picture when you don’t have a $5000 camera!
In photography and videography, lighting is everything. So, the first thing you should do is set the lights correctly.
You’ve probably heard several times that natural light is the best lighting you can get for your shoots. Well, it’s definitely the cheapest option, and, indeed, it can help you create beautiful videos. But there are a couple of things you should take into account when going out to shoot.
First, check the weather forecast. You want to keep lighting consistent – and that will be extremely hard to do on a day with periodic rain or snowfall. Not to mention that, in general, it’s not the nicest experience to shoot videos when it’s wet and cold outside – although we do have an article on taking pictures in rainy weather. Make sure to check it out if you want to create some dramatic shots (most of the tips apply to making videos, too).
On the other hand, if it’s consistently cloudy during the day, you’ll get a nice diffused light and will be able to shoot even at noon.
On a sunny day, it’s better to shoot in the early morning or in the evening and avoid hours when the sun is at its highest point. Try to catch the golden hour to get the best natural light possible. Read our article about golden hour photography to get a better idea of what that is. You can apply most of these tips to videography, too.
When shooting inside, ideally, you’ll need two or three sources of light – none of which is a ceiling light.
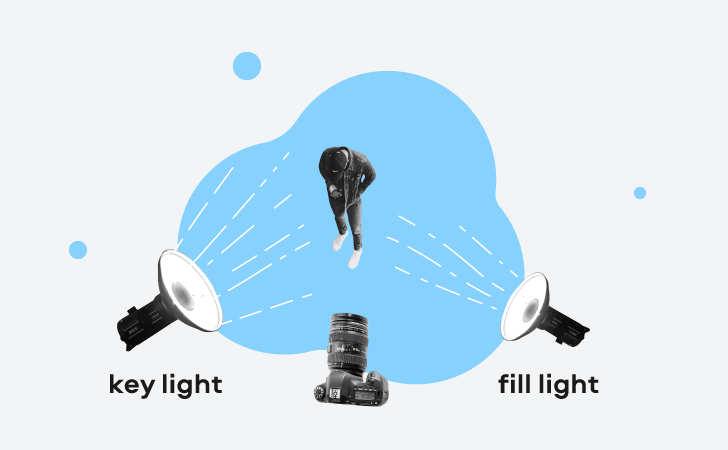
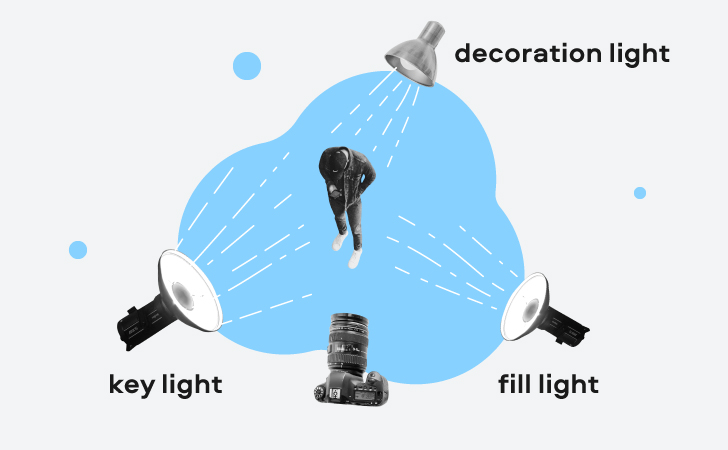
First, choose a key light – the main source of light that will give the most light to your subject. Place the key light not right in front of the subject, but a bit angled so that one side of the subject gets more light than the other.
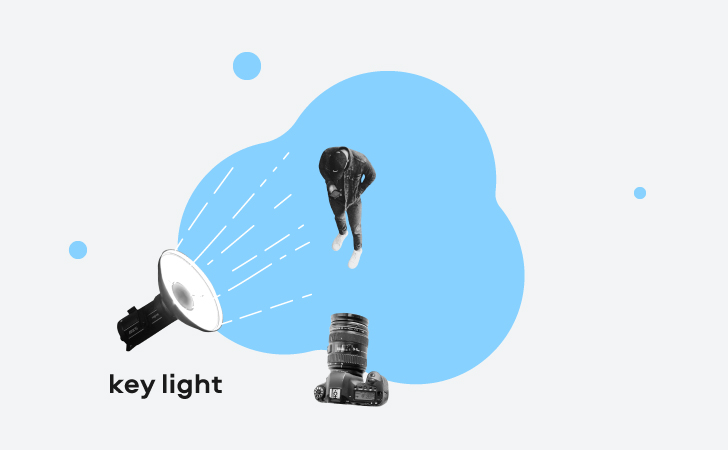
Use a softbox to make the lighting softer and avoid harsh shadows. Instead of a professional softbox, you can use a white sheet – just stretch it and cover the lamp with it so that the light distributes.
You will also need a fill light – a less powerful source of light to place on the opposite side from the key light. This should subtly light up the part of the subject that remains in the shadow. Use a softbox for that light, too.
Finally, to make the image look more interesting and truly cinematic, add some decorative colored lights to your set. This could be LEDs, table lamps with warm light, or even string lights – depending on what mood you want to create in your video. For example, LEDs can give you a nice futuristic look, while table lamps and string lights will help to achieve a warm and cozy atmosphere for your movie. Usually, these lights are placed in the background, or light up the background of the set.
Of course, this is not the only way to set up your lighting. There are many different lighting schemes, and this is only one of them – the easiest one that will help you achieve a cinematic effect.
If you don’t have that many lights at your place, you can get away with only one key light. In this case, you need to really get the angle of the light right and have the perfect dark background. Learn more from this video from the Movavi Vlog:
By the way, we have another video on creating good lighting – this time, with what you have at home. This will be helpful, too:
Getting the right lighting is a very important part of creating a cinematic video, but not the only important thing. You also need to set up your camera right. On a DSLR – even if it’s a cheap one – it will be much easier to do. But you can also change the settings of your phone camera to get closer to a cinematic picture.
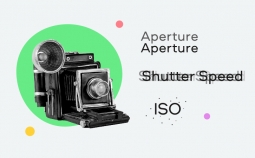
DSLR
If you want to get a really nice image, you’ll have to turn off that auto mode on your camera and adjust the exposure manually. If you’ve never done that before, we recommend reading this article about basic camera settings first.
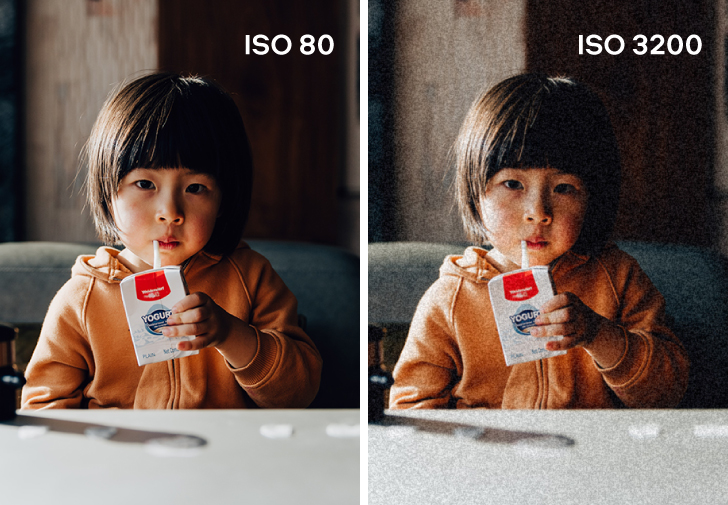
✔️ Lower your ISO as much as you can with your lighting to remove grain from the image. If you’re using multiple light sources or shooting outside during the day, 200-400 ISO should be enough. If the image looks too dark, raise the ISO a little bit – or, first adjust the aperture and then get back to ISO.
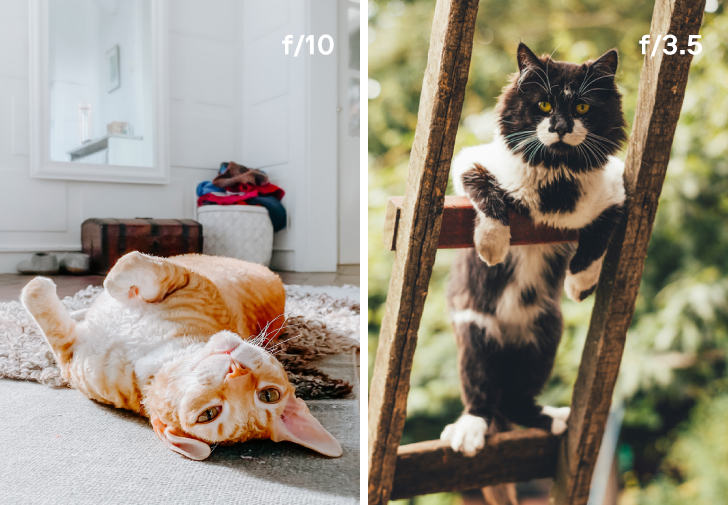
✔️ Making the background blurry will make the image look better and will add depth to it. Lower the aperture. Try bringing it to F/2.8. Then increase, if necessary.
✔️ To make the colors look natural, set the white balance carefully. If you know the Kelvin number of your light, set the same number in the WB settings of your camera. When shooting outside, you can use the built-in white balance presets of your camera. Or you can take a picture of something white (for example, a piece of paper) and custom set it as white in your camera.
Smartphones usually have fewer options to setting the exposure manually. To change that, you can use one of the apps that give you more control over your camera settings, such as DSLR Camera for iPhones and ProCam X for Android phones.
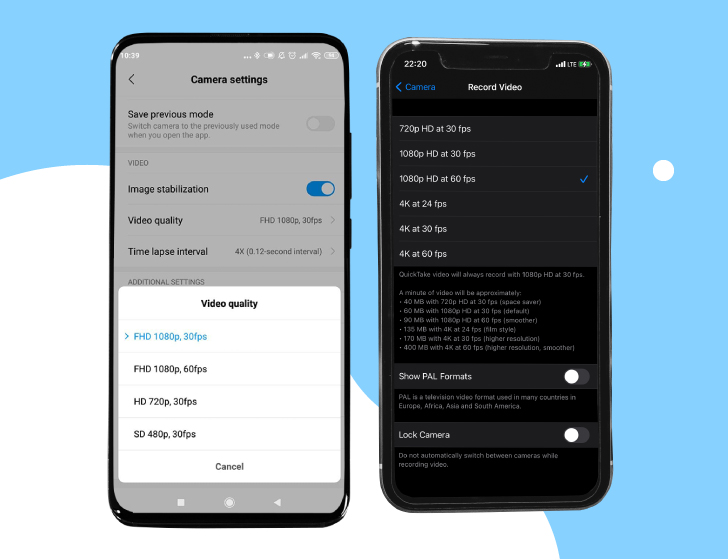
But before downloading any of these apps, change the default video settings on your smartphones. For example, you can choose the video quality and frame rate (fps) in most modern phones – both iPhones and Androids.
While you don’t have to choose the highest quality possible (1080p is more than enough), set the highest frame rate that your phone allows you to. This will help you when you’re editing the video: you will be able to slow it down a little and get smoother and more epic footage.
During the shoot, lock the exposure: find the right exposure point for your lighting and set it as consistent for the whole video – this way, the autofocus won’t change the exposure once you move your camera to a bit darker place.
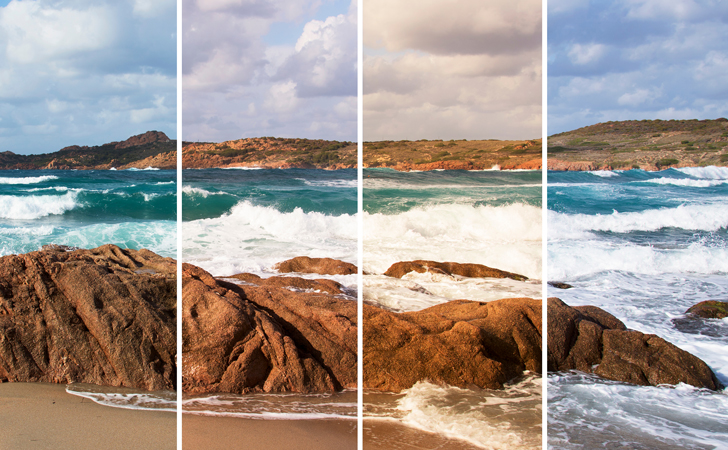
How you frame and compose your shots also matters. You can use the basic composition techniques to achieve a cinematic look in your movie – the rule of thirds, symmetry, or the golden ratio. These techniques are easier to show than to explain, so that’s why we invite you to watch this video:
Also, make sure the image doesn’t look flat but has depth to it. Here’s how you achieve that:
But these are, of course, not the only ways to compose your shots. If you feel comfortable enough with your camera, go ahead and start experimenting with different angles and perspectives!
Last but not least, color grading. No matter how great your video turned out – it will look a hundred times better if you spend 15 minutes editing and color grading it.
The first step to editing your video perfectly is picking the right software to do that. If you’re not a professional video editor, we suggest choosing something with a user-friendly and straightforward interface and easy-to-use tools. For example, Movavi Video Editor Plus – a video editing application that has all the powerful features to create a professional-looking movie, but at the same time doesn’t overwhelm users with hundreds of difficult controllers and a complex layout.
So how exactly do you create a cinematic image with Movavi Video Editor Plus? Here’s how:
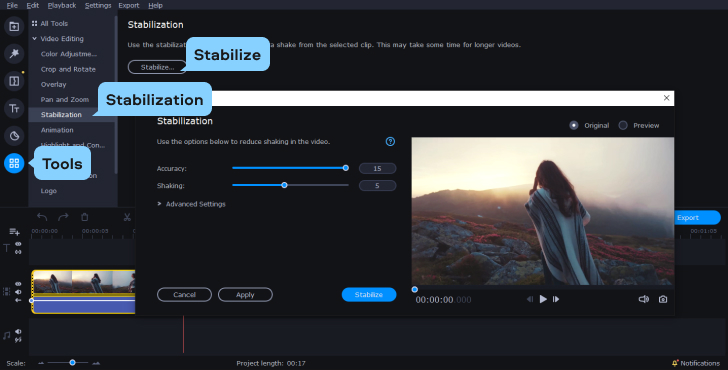
1. First, stabilize your video. If your footage is even a little bit shaky, it won’t look cinematic – no matter how great your composition and color grading are. To stabilize your video, go to the Tools tab and choose the Stabilization feature. Hit Stabilize and choose the desired settings.
2. Remember we told you that you can slow down your footage a little bit to make it look more epic? Well, now’s the time to do that! In the same Tools tab, hit the Slow Motion feature and set the desired speed for your video. We suggest first trying slowing down the footage for just a little bit – for example, something in between 50% and 75% of the original video speed. Check it and see. Your video already looks much more cinematic!
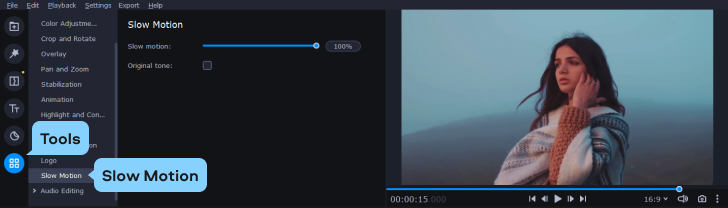
❗️The slow motion trick won’t work if you have an interview video or a talking head video.
3. Now the time has finally come to color grading! If you want to get a nice result quickly, just use one of the built-in filters of your video editing app. Go to Color Filters and choose the one you like. Or stay in the Tools tab, and go to Color Adjustments. There you’ll also find some great presets for your movie.
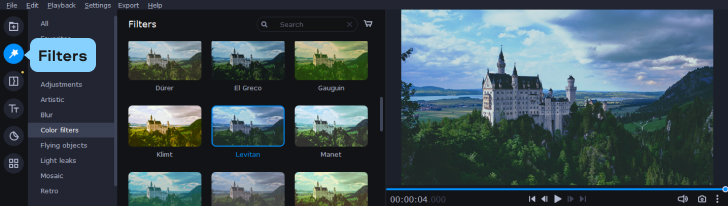
The result will probably need some more minor adjustments. Go to the Advanced tab and set the color settings manually, if needed.
That’s it. Now you can create a truly cinematic video to show off to your friends on Instagram or YouTube! Good luck 😉