


How to Remove Audio From a Video in Premiere® Pro
Knowing how to remove audio from a video in Premiere® Pro can be a vital skill for video editors from all walks of life. Whether you want to cut out some annoying sounds from the background of your video files or replace the existing audio of your film with a new soundtrack, it’s vital to know how to get rid of audio you don’t want or need. This guide will look at how to remove audio with the help of Premiere® Pro across different devices, as well as a potential alternative you may want to use.
How to mute a video in Premiere® Pro
Adobe® Premiere® Pro makes it easy to remove audio from your video or mute the existing audio without needing to take it out. Find out how to do so with our simple step-by-step tutorial below:
Step 1. Download and install the program
The first step is to make sure that you actually have Adobe® Premiere® Pro up and running on your device. If the program is already installed, you can continue to the next step to remove your audio. If not, you’ll need to head to the official Adobe site and download Premiere® Pro to your system. Follow all of the on-screen instructions to install the program and then open it up to start using it.
Step 2. Create a new project
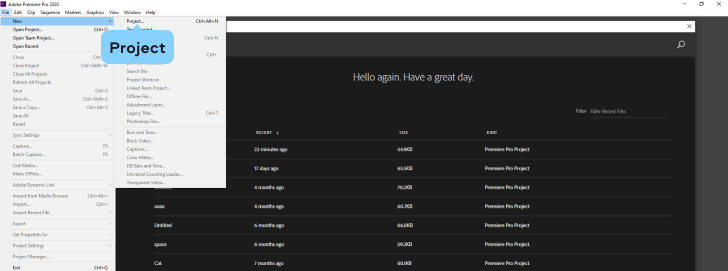
Once the program is running on your device, you’ll need to open it up and start a new project. To do this, click on File and then click on New to start a new project.
Step 3. Import your video
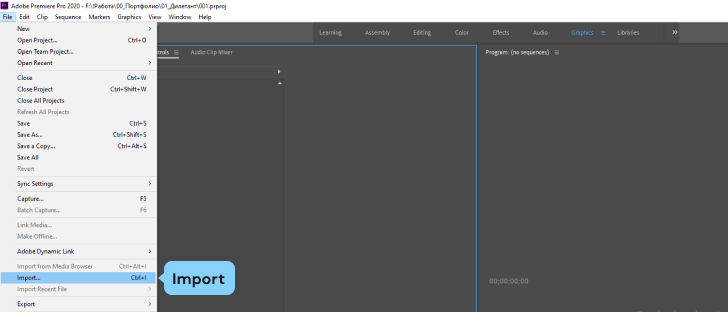
Next, you need to import the video you want to edit. To do this, head back to the File menu and then click Import from there, near the bottom of the menu. This will allow you to browse through your system files and folders to find the video you want to work with.
Step 4. Add the video to the timeline
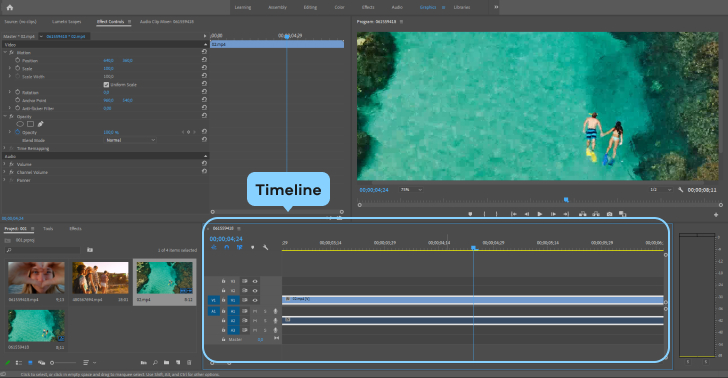
Once you have added the video you want to remove audio from to the app, you can then drag and drop it from the Project area of the window into the Timeline section. Once this has been done, the video will be ready for editing and you can get to work on getting rid of the audio.
Step 5. Start to remove the audio
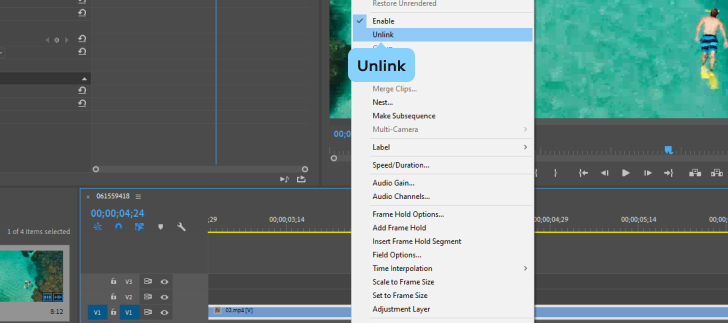
Now, it’s time to finally get rid of the audio from your video. There are two main steps to do this process in Premiere® Pro. The first step is to click on the video clip in the Timeline and then right click on the video. Choose Unlink in the new menu that appears. What this does is basically separate the audio and the video tracks from one another, making it much easier for you to work individually with the audio part of your clip without having any effects on the video itself.
Step 6. Get rid of the audio completely
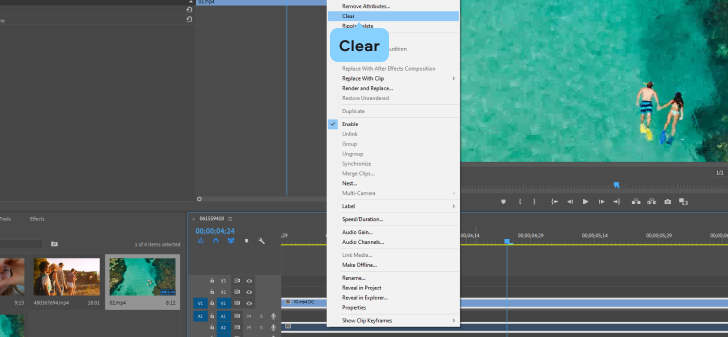
The next step, once the audio and video tracks have been separated, is to delete the audio. There are a couple of ways you can do this. You can either click on the audio and hit the Delete key on your keyboard. Or, you can right-click on the audio layer that has appeared in your timeline after you pressed Unlink and then click the Clear button in the menu that appears after you click. Either way, this will result in the audio being removed from your video.
Step 7. Add audio (optional) and save
The final step of the process is to finish off editing your file. Once the original audio has been removed, you’re free to use Premiere® Pro to add replacement audio in the form of your own music and sound files. This is an optional step, so it’s up to you if you want to do it. If you do, you can simply use the Import method to add your audio files and then drag them to the Timeline accordingly. If not, the last key step of the process is to save your new video, without audio, to your device.
How to mute a video in Premiere® Pro using different devices
It’s important to note that Adobe® Premiere® Pro can be used across different devices for audio removal from video files. You can use it on Macs, Windows laptops and computers, and even on mobile devices like iPhones and Android phones. Below, we’ll look at ways to use Adobe Premiere® Pro to get rid of audio on different devices.
Muting videos on mobile devices with Premiere® Pro
Step 1. Download and install Premiere Rush
If you want to use Premiere® Pro on a mobile device, you’ll need to download the Premiere® Rush app. This is a specially designed version of Premiere® Pro, suitable for mobile devices, offering most of the same features and functions you would find on the desktop version of Premiere® Pro.
Step 2. Start a project
Open the Premiere® Rush app on your phone and then tap to create a new project. You will then be able to browse through your system storage or synced devices to find the video file you want to work with. Once you’ve found the video you want to remove the audio from, tap to import it to your project screen.
Step 3. Long press on the clip
Once the video has been added to your Timeline on Premiere® Rush, you’ll need to long-press on it. Hold your finger down on the video clip until a new menu appears.
Step 4. Separate audio
Once the menu has appeared after your long press, you can click on the Separate Audio button. Just like on the desktop version of Premiere® Pro, this button separates the audio and video tracks from one another, allowing you to work individually with the audio from your file to remove it if needed.
Step 5. Delete or mute audio
Premiere® Rush will then allow you to either mute the audio entirely so that your video runs silently or delete the audio track so that you can then add in your own custom audio files as a soundtrack to modify your original video file.
Step 6. Save the clip
Whichever option you choose, the final step of the process is to make sure that your video is saved. You can save it straight onto your mobile device or export it to connected devices or systems, as desired. With Premiere® Pro and Premiere® Rush, you may also choose to upload your newly edited videos online to sites like Instagram, YouTube, Facebook, and TikTok if you want to share them with family, friends, and followers on the internet.
Muting videos on desktop with Premiere® Pro
Step 1. Download and install the program
The first step is to ensure that you have Adobe® Premiere® Pro installed on your device. You can visit the official Adobe site to download and install it, following the on-screen instructions.
Step 2. Start a new project
Open up Premiere® Pro. Then click File and then New Project.
Step 3. Add your video
Click back on the File menu and then press Import. Browse your system to find the video you want to edit and add it to the project.
Step 4. Add the video to the timeline
After the video has been added to the project screen, you can then drag and drop it over to the Timeline section to start editing it.
Step 5. Unlink the audio
Once you’re ready to remove the audio, click on the video clip to select it and then right-click. Press Unlink to separate the audio and video tracks from one another.
Step 6. Delete the audio
After the audio and video tracks have been separated, you can start to delete the audio. You can either click on it to select it and then press the Delete key on your keyboard, or you can right-click on it and press the Clear function.
Step 7. Add audio (optional) and save
You can then use some of Adobe® Premiere® Pro’s other features and tools to make extra changes to your file. You can add custom sounds or music tracks, for example, to replace the deleted audio. You can also make other edits to the video track itself like cutting, copying, and so on. Once you’re finished, you can save the new file to your desktop or export it to another device.
How to mute a video in the Premiere® Pro alternative
Another option you have for muting videos or removing audio from videos is to use a different type of software. Movavi Video Editor Plus is a popular Premiere® Pro alternative you can use for all kinds of video editing, including muting videos. This app is available for both Windows and Mac devices, and you can try it for free before upgrading to the full version.
Movavi Video Editor Plus is designed to make video editing as simple and seamless as possible, with a beginner-friendly user interface, fast processing times, and lots of options that are nicely arranged in simple, straightforward menus.
You can use this video editor to apply special effects, keyframe animations, custom intros, and more. It can also be used for simpler editing like trimming, cutting, copying, and so on. It’s available in many languages and has low system requirements, so can run on many different devices, including older laptops and computers.
One of the advantages of using Movavi Video Editor Plus for audio removal is that you can then use the tool’s built-in audio library to replace the removed audio with custom sounds and music tracks. Or you can upload and add your own sounds and audio files, if desired, using the simple user interface to adjust the audio easily and seamlessly.
Here’s how to remove audio using Movavi Video Editor Plus:
Step 1. Download and install the program
The first step to use Movavi Video Editor Plus to remove audio from your videos is to download and install the program. You can download the app for free from the official website for your Mac or Windows device. Then, simply follow the on-screen instructions to install the program on your system.
Step 2. Open the program and add the video
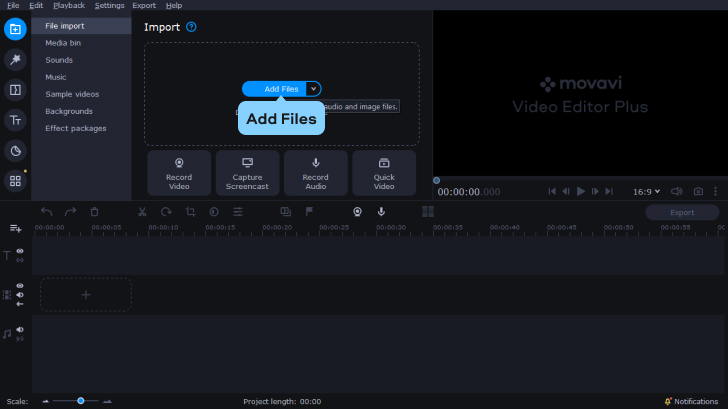
Next, once the program has been installed on your device, you can open it up and then click the Add Files button to choose the video you want to edit. Once the video has been loaded in, you can click to drag and drop it onto the Timeline, ready for editing.
Step 3. Remove the audio
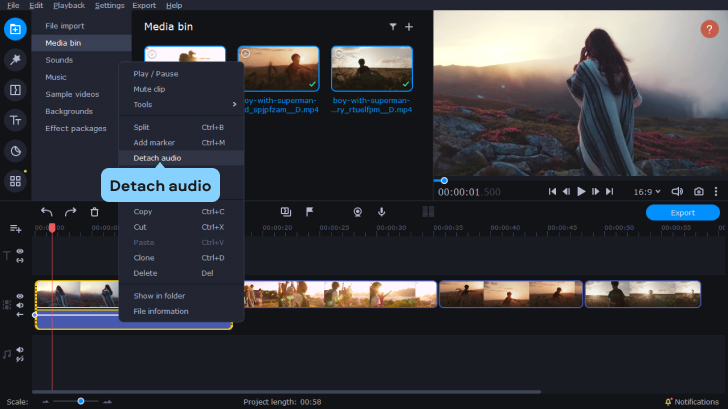
The next step is to delete the sound from your video using the video editor’s built-in tools. To do this, click on the audio track on the Timeline below the images of your video. Then press the Delete button, situated just above the Timeline, to remove the audio.
Step 4. Add your own music or sounds (optional)
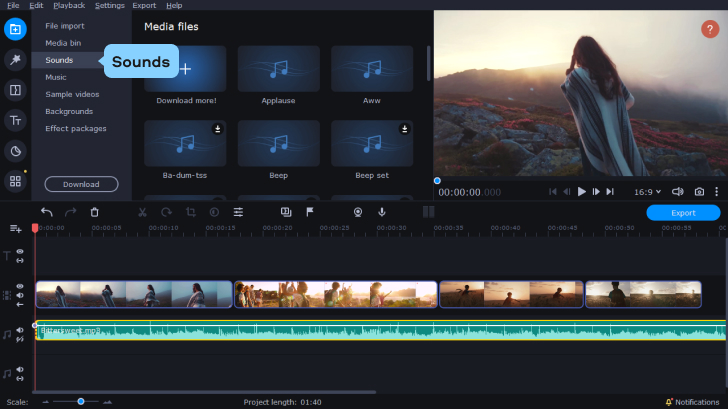
If you want to replace the deleted audio with your own custom soundtrack, you can then click Add Files again, choose the audio files you want to use as the background audio for your video, and then drag and drop the file(s) to the Timeline. You can also select a track from Movavi Video Editor Plus’ built-in music library. To do this, click Sounds and then drag the track of your choosing over to the Timeline. If the video is too long for your chosen audio, you can duplicate the audio file to extend its runtime, or you can add another audio file to fill the silence. If, on the other hand, the audio file is too long, you can drag the edge of the audio section on the Timeline to the left to match up with the end of your video clip.
Step 5. Save your video
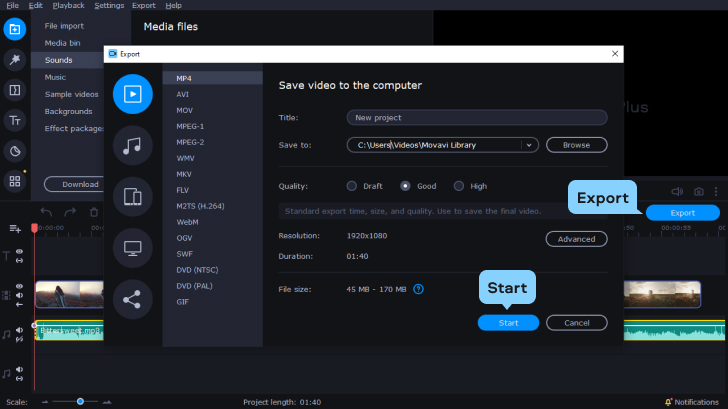
Once you’ve made the necessary audio edits to your video clip, click on the Export button. You can then choose the tab that suits your needs the best and save the new video file onto your device, upload it to the internet, or export it to an attached device, like a smartphone. Once you’ve selected the right option, click Start to save the file.
Summary
There are many reasons why you might want to remove audio from a video clip, and this guide has shown several simple methods to do so. You can either use Premiere® Pro across different devices to get rid of audio with ease, or you can use a different tool, such as Movavi Video Editor Plus, to get the same end result. Either way, removing audio from videos is a relatively simple and straightforward procedure.